Thirty-nine. “Old Faithful Inn’s Architectural Tree Art”
The following is the text of a brief article I wrote as an introduction, a first publication in an expanding series of articles and essays written as a tribute to the remarkable “Lodgepole” pine trees. My ultimate goal is to write a book, illustrated with photographs, titled Contorted Lodgepoles: A Poet’s Tribute. One chapter of that book will be an essay that expands on my observations about architect Robert Reamer’s “architectural tree art.”
Here’s the photograph that accompanied the article.

This photo dramatically illustrates the “architectural tree art” of the Inn’s lobby. Architect Reamer combined both the ideal and the deviant “Lodgepole” pine tree trunks. The photo also illustrates the elevations, processions, and ascensions that I mention in this article. The Crow’s Nest is “nestled” in the pinnacle of the vaulted ceiling. What a masterpiece it is …! (Jack Waller photo)
Explore Big Sky
August 8—22, 2013 issue, “BACK 40”
“Old Faithful Inn’s architectural tree art”
By Jack Waller, Explore Big Sky Contributor
I’m one among a multitude of admirers of Yellowstone National Park’s Old Faithful Inn.
Designed by architect Robert Reamer in 1903, the inn is a monumental example of rustic architecture. For well over a century, it’s been a destination for millions of visitors, and the voluminous subject matter of devoted scholars, historians, writers and photographers.
One essential element of its rustic appeal is what I call “architectural tree art,” the extensive use of lodgepole pine tree trunks both on the building’s exterior and interior.
Reamer’s design, especially in the lobby, combines the shapes of both the straight and the contorted types of the species, Pinus contorta var. latifolia. The magnitude of Reamer’s structural and decorative uses of these trees evokes amazement, awe and a sense of architectural mystery.
In the late 1980s, three seminal events led to my becoming a tree art furniture maker. I moved to southwest Montana to live in a lodgepole pine forest; I visited Old Faithful Inn for the first time; and I read Craig Gilborn’s Adirondack Furniture and the Rustic Tradition.
“Tree art” and “tree art furniture” are terms I first learned from Gilborn. For the most part, they refer to the use of recognizable tree shapes in the design and construction of rustic architecture and in furniture making, respectively.
In July 2012, after more than 20 years of making tree art furniture from contorted lodgepole pine trees, I took a private bellhop’s tour of the upper levels of the inn’s lobby.
Public access was closed in the late 1940s for safety reasons, due to the large numbers of inn visitors. Now twice a day, a group of four people can, by reservation only, accompany a bellhop to the inn’s rooftop either for the morning or evening raising or lowering of flags.
Ascending to the lobby’s upper levels, we arrived at the pinnacle of the lobby’s vaulted ceiling, and arrived at the crow’s nest. From its great height in the peak of the vaulted ceiling, it overlooks all the interior architectural tree art – the lobby floor, the surrounding column-brace-beam frameworks, and the lower balconies with their interconnecting staircases, catwalks and platforms.
A small, enclosed, cage-like structure, the crow’s nest epitomizes the inn’s architectural tree art. As a tree artist, I recognized the recurring motifs that I’ve identified in my own work: swan necks, tuning forks, alpenhorns, shepherd’s crooks and arches. I also saw there the mastery of the carpenters/tree artists who executed these elaborate designs.
The crow’s nest door is positioned near an exit staircase, with another door leading outside and up to the summit of the inn – a long, rectangular roof platform with panoramic views of the Old Faithful geyser basin.
During the tour I realized an essential element of Reamer’s plan was to provide all guests with the experience – both physical and psychological – of elevation, procession and ascension, all culminating on the rooftop.
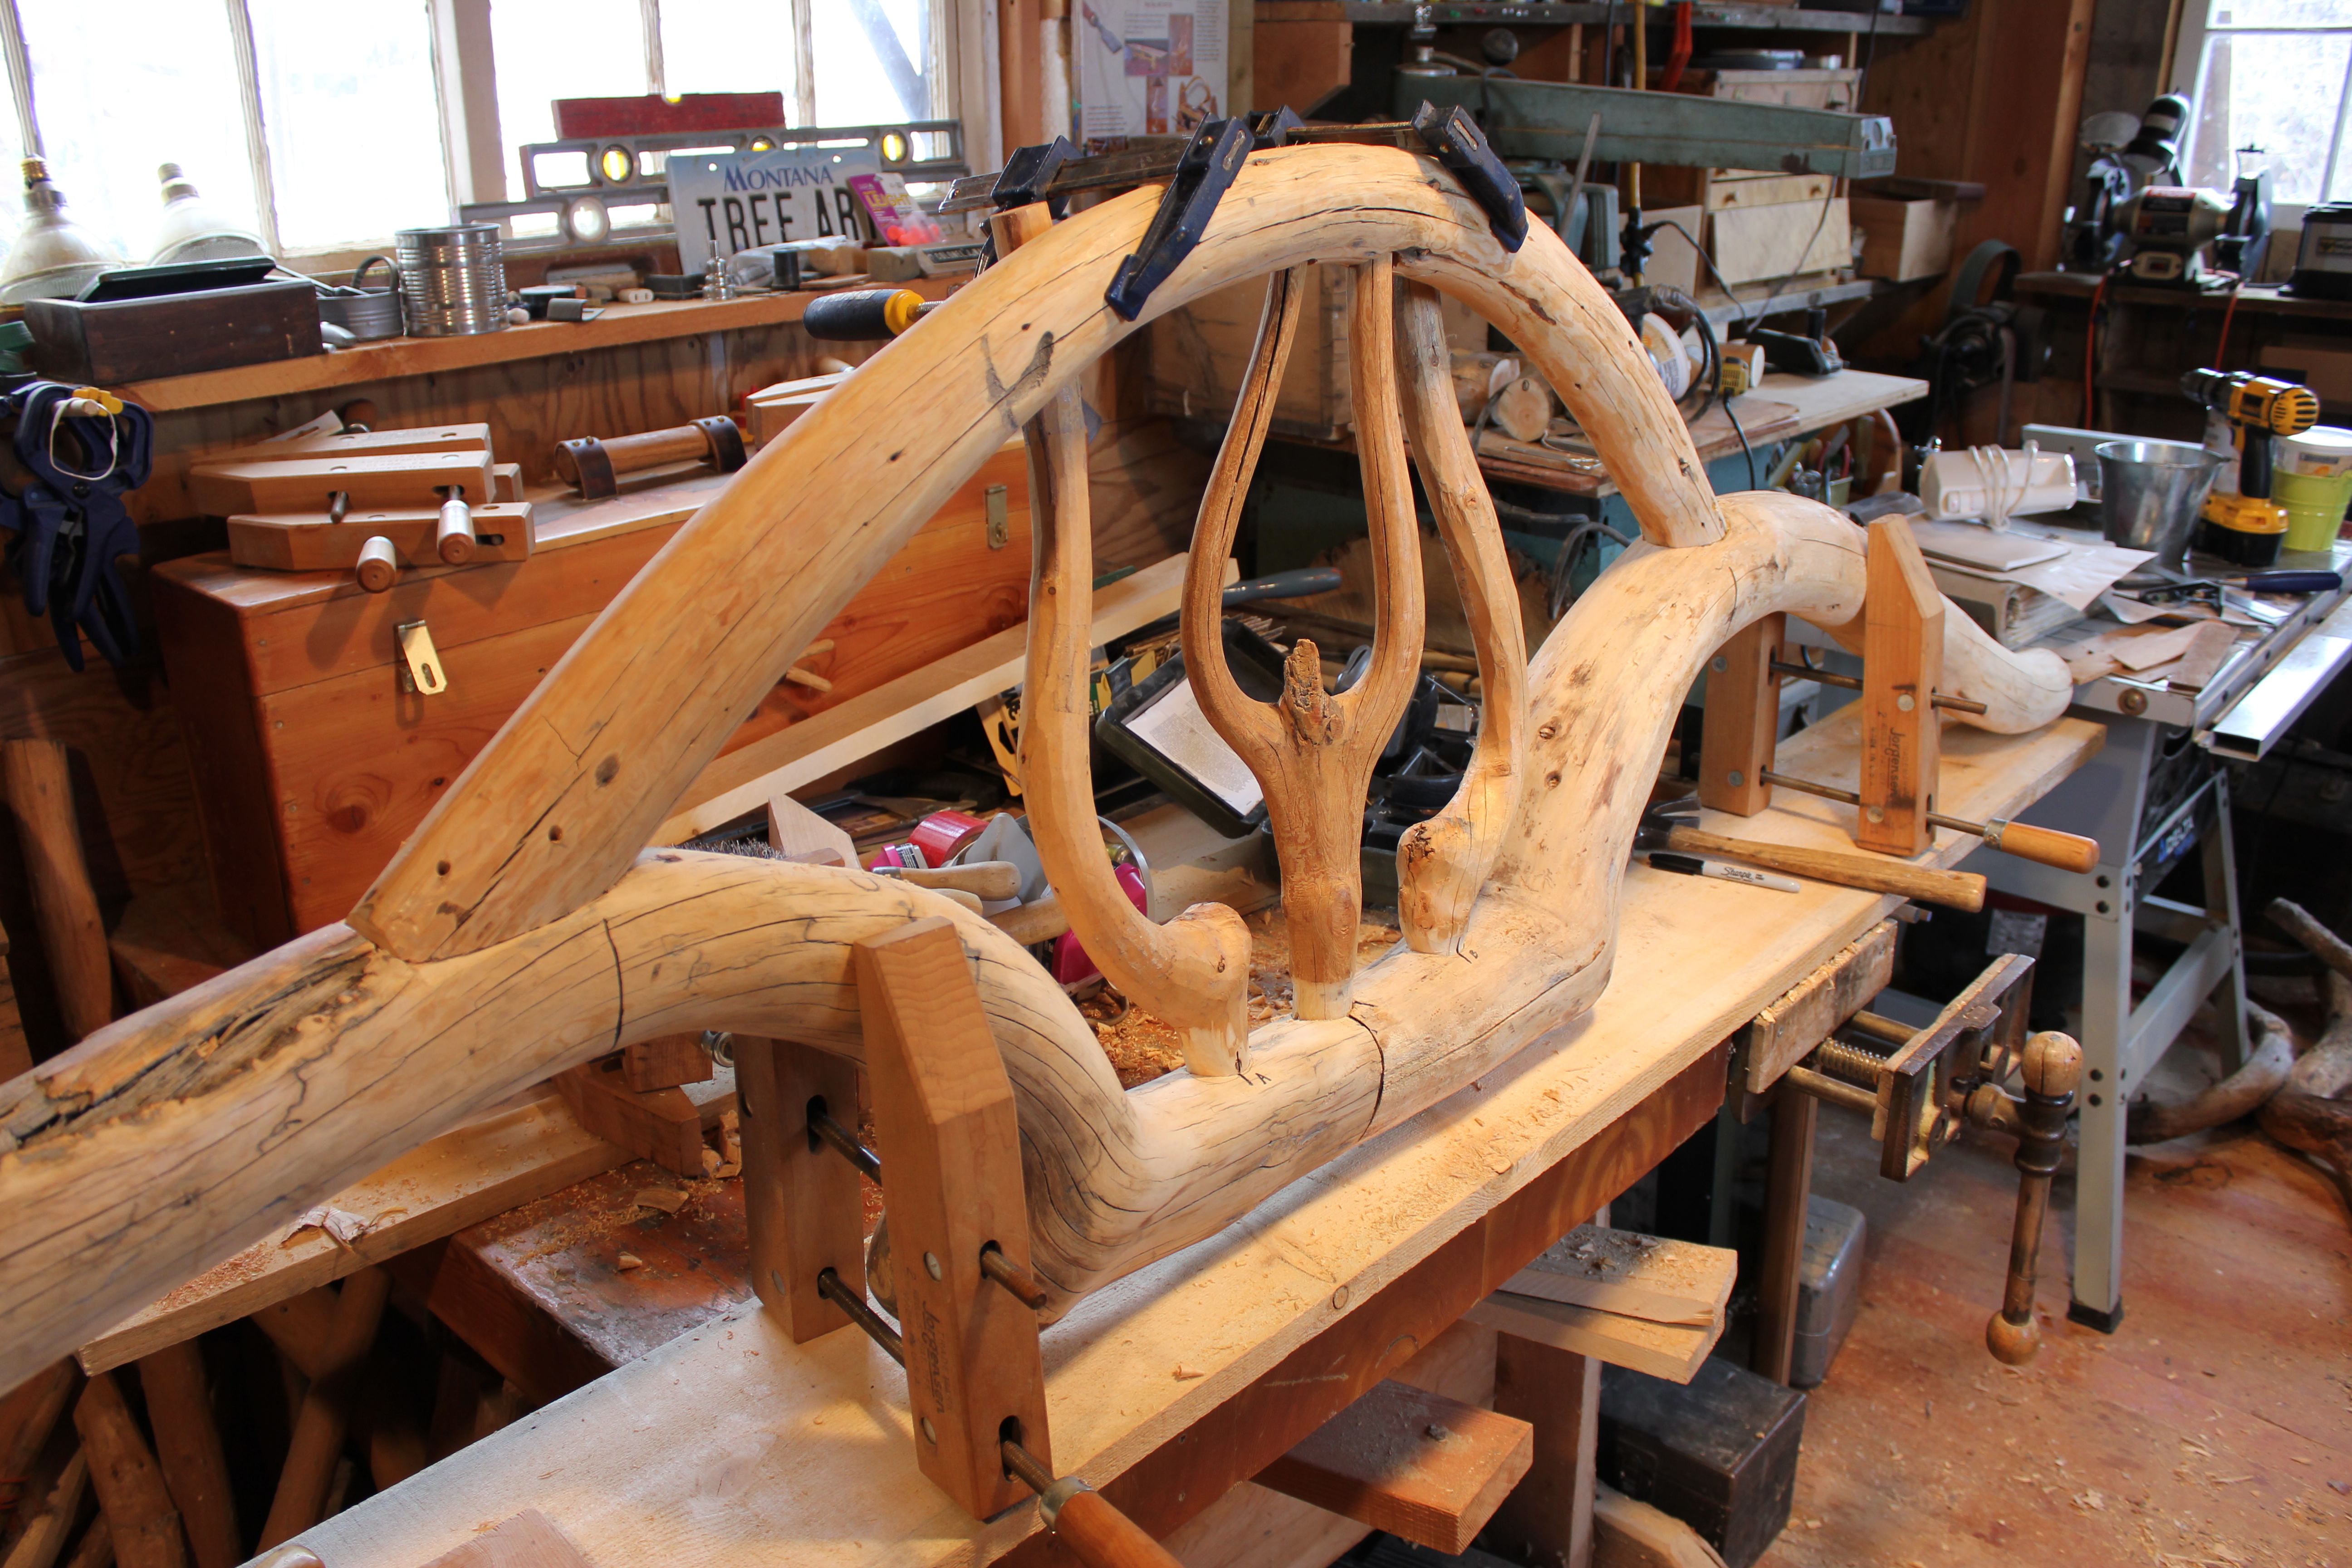
Thirty-one. Joining the front legs with an “ox-bow” stretcher
Throughout the designing and making of this bench, I’ve used trees prepared for use, but not used, in other furniture projects. The “ox-bow” is a tree art motif I identified many years ago, and the ones in these photos were drawknifed and sanded long ago. I brought a selection of them up from the workshop. I’ll use two as stretchers, one between the two front legs and one between the two back legs.

The one I selected for the front stretcher is laid in place for marking its length. The one on the bench seat will probably be used in the back. The front legs are temporarily screwed in place.
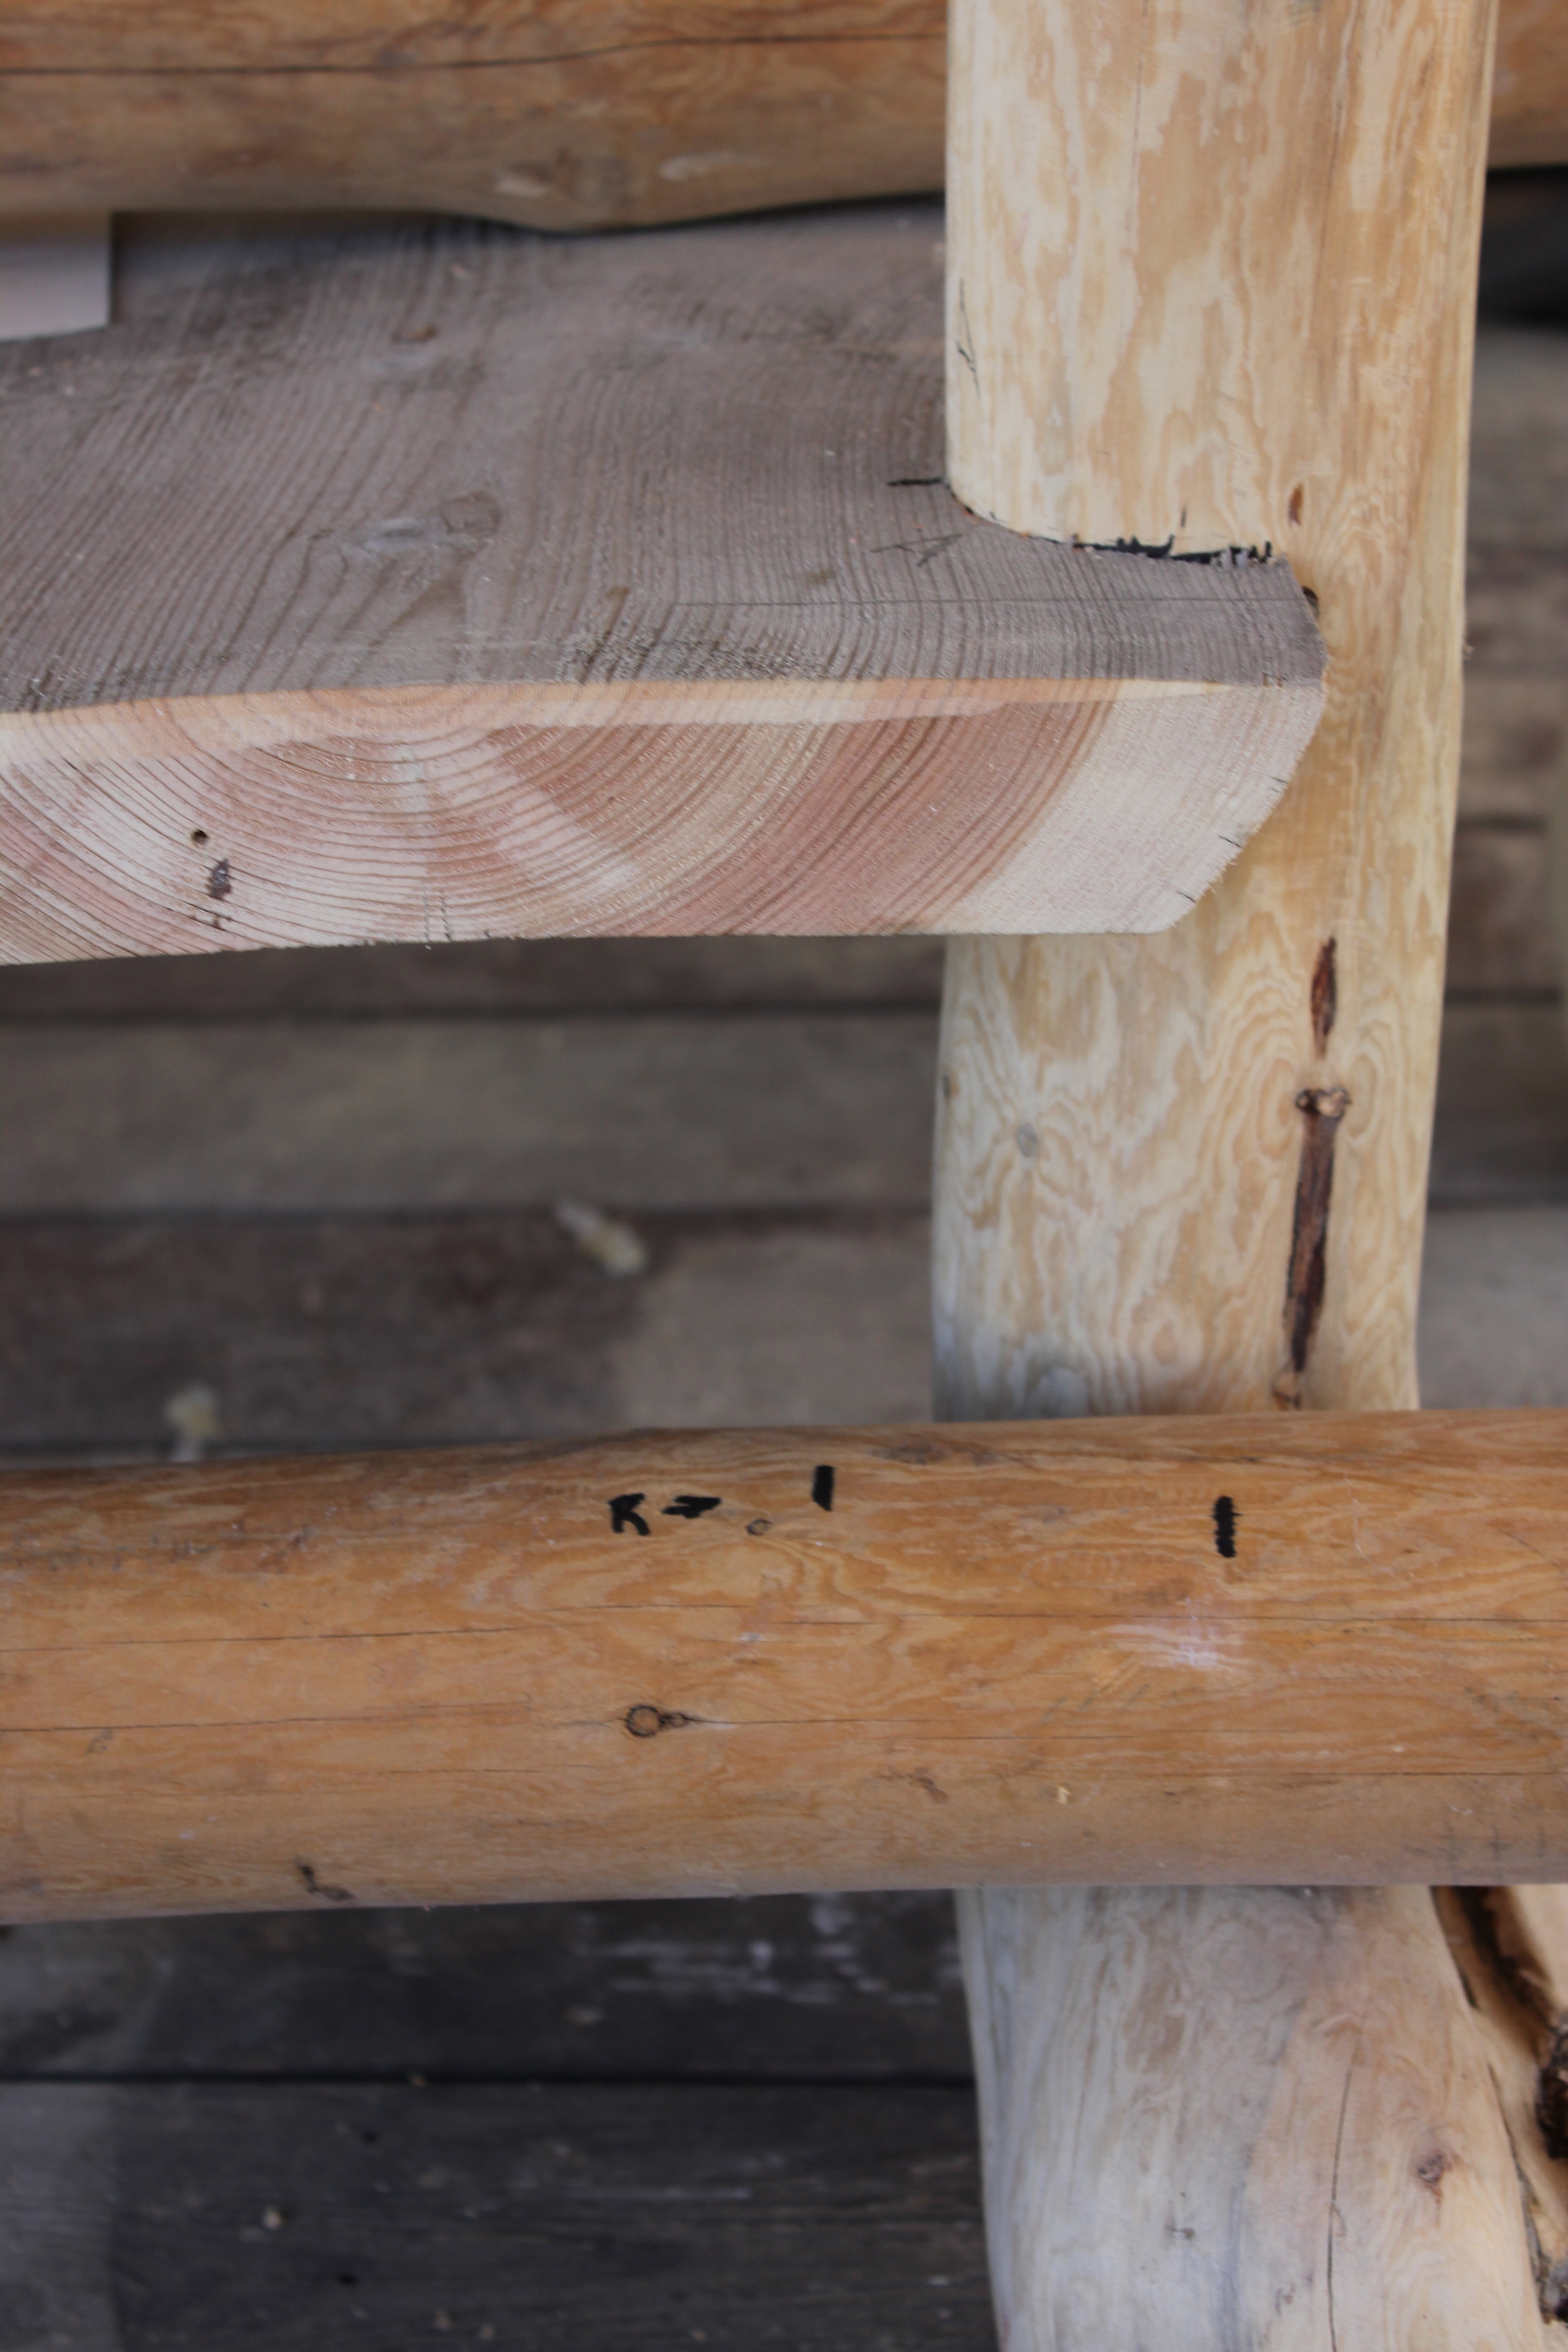
The stretcher is marked twice. One mark is for overall length and the other for the shoulder cut of the tenon. The”R” is to label the right end the stretcher.

I’ve taken the stretcher down to the shop, placed it in the shaving horse, and marked both the diameter and length of the tenon.
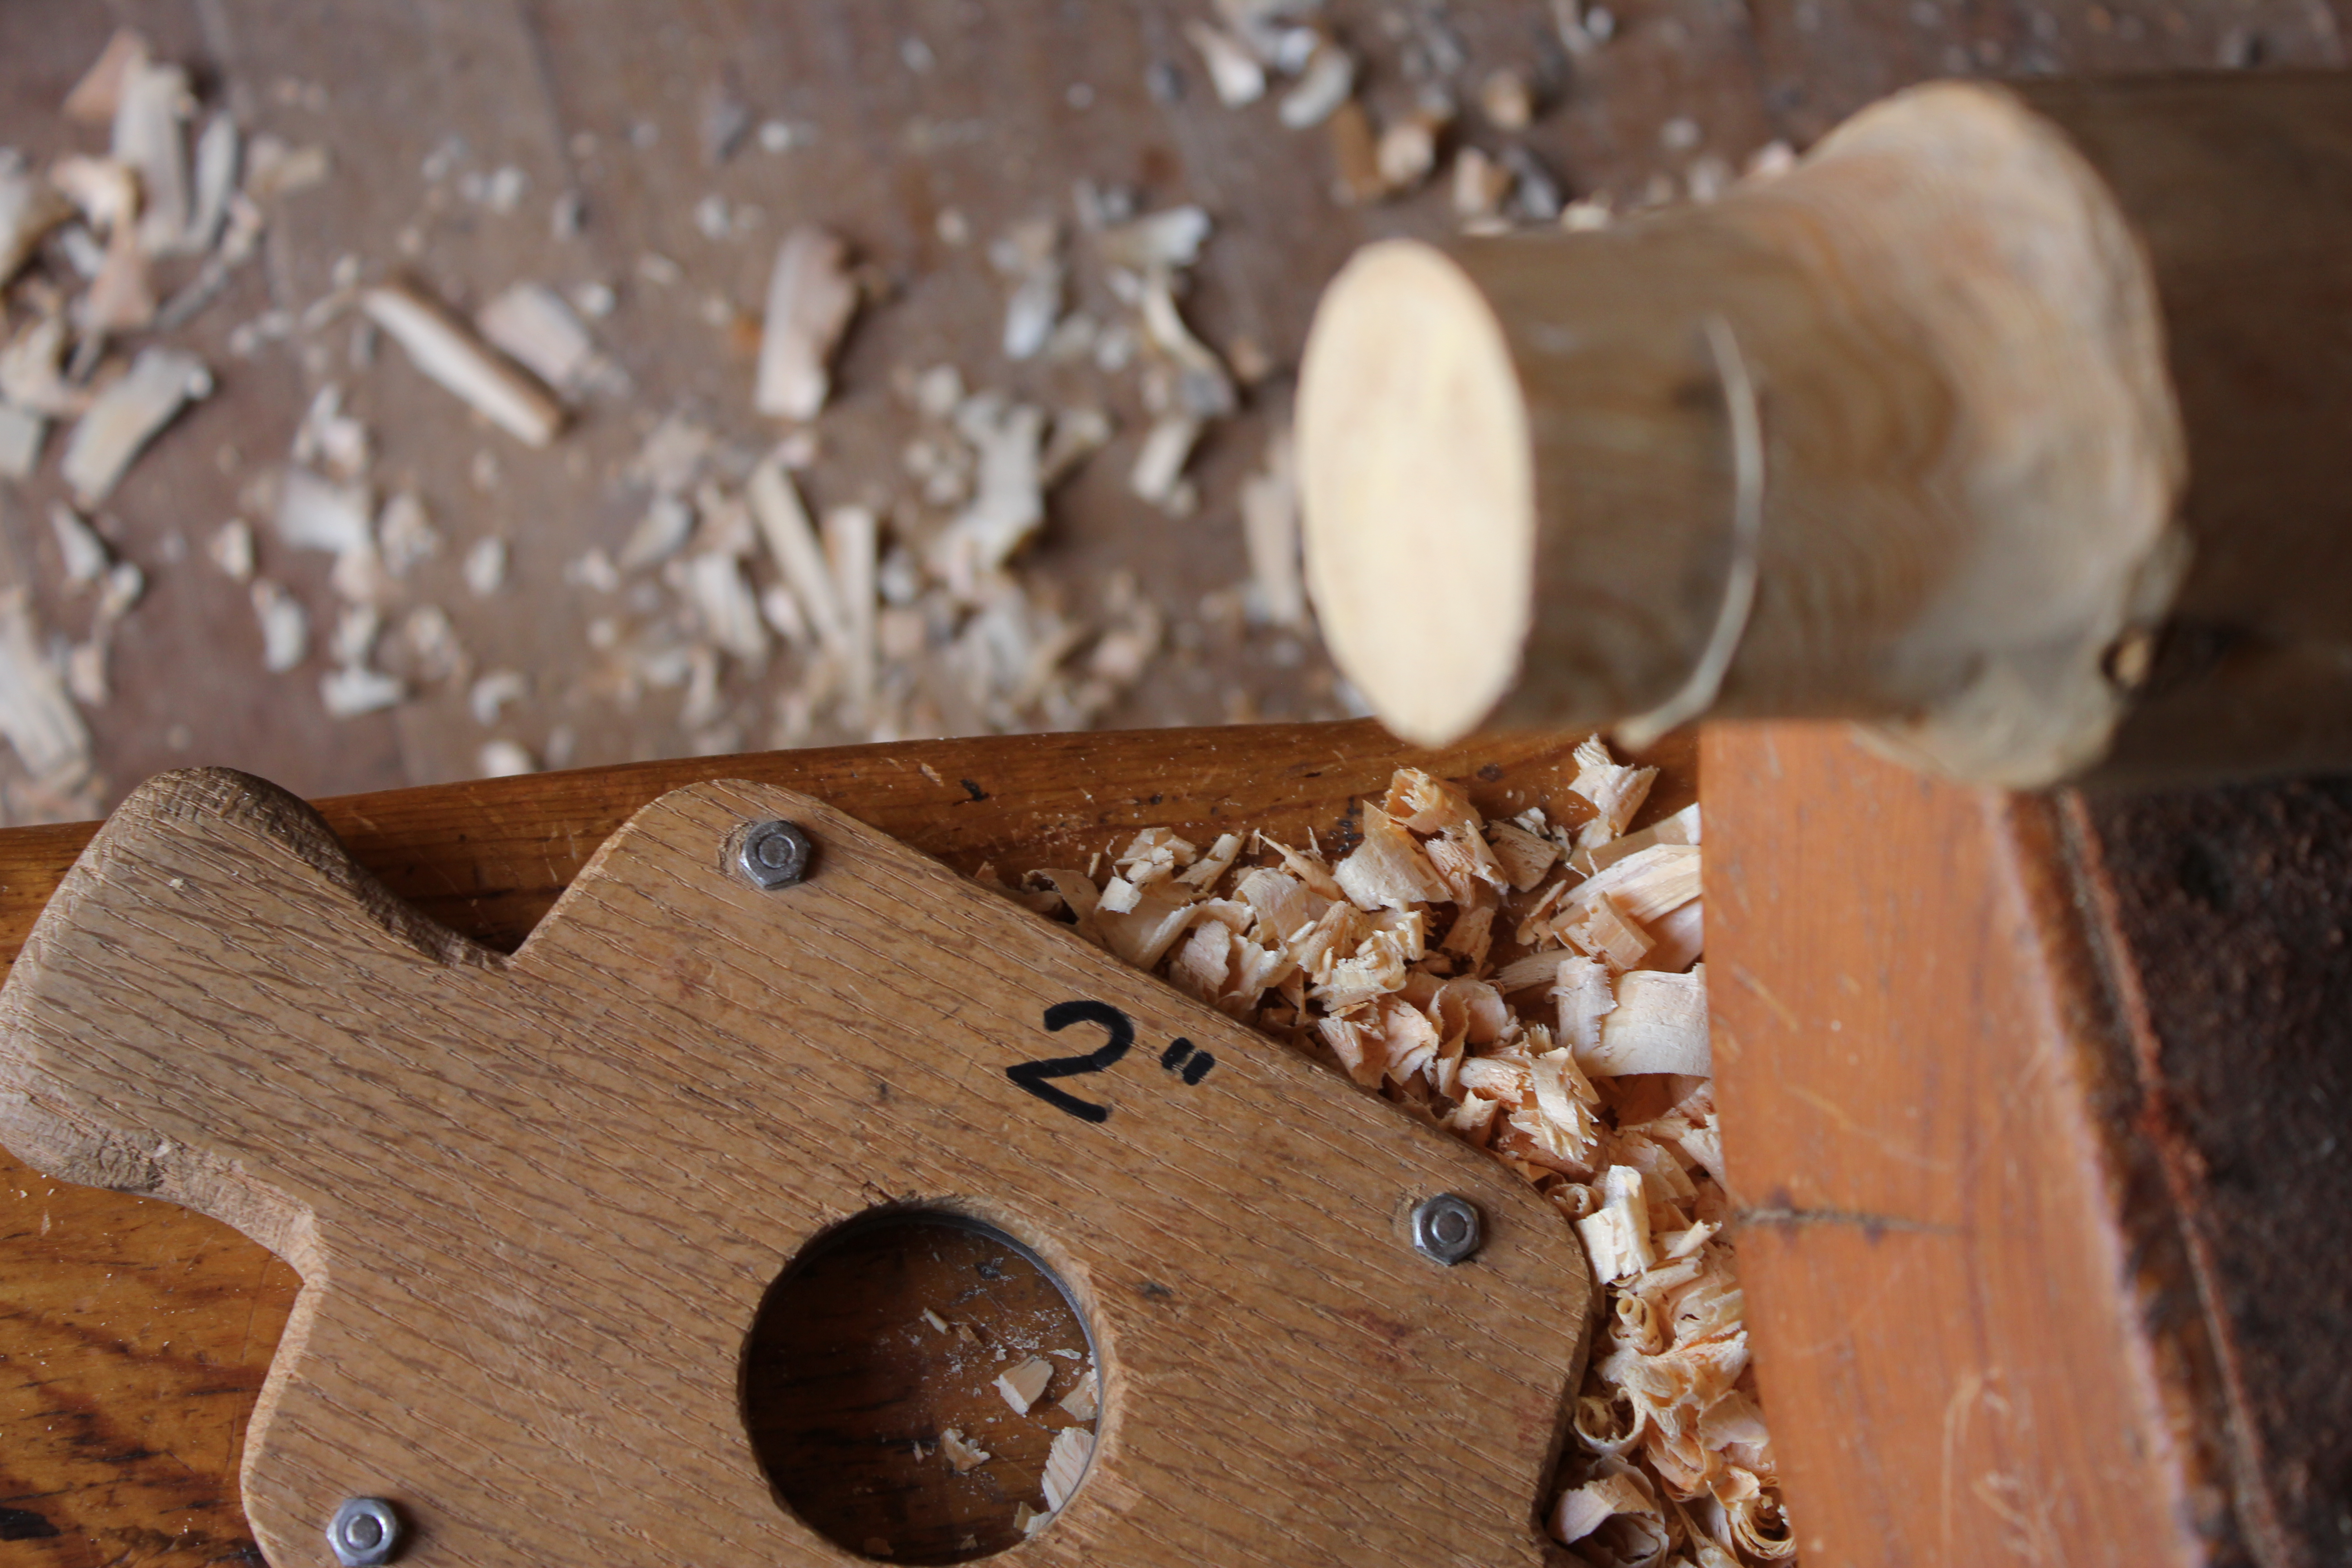
In 1992, I made a set of sizers of my own design, with different diameters, as an important part of hand-cutting tenons. Here I’m using a 2″ diameter sizer. I start the sizing by cutting the end down to the circle guideline with a drawknife. As the sizer starts to fit over the end and is rotated back and forth, its steel plate leaves a ridge on the tenon to show where more drawknifing is needed. The ridge shows in this photo. The goal is to make a truly round and cylindrical tenon all the way up to its shoulder. I have never used any kind of power tool, “production” tenon cutter.

It’s tricky to get the right horizontal alignment on the drilling angle of the mortises. Because the ox-bow stretcher is not straight, the heights of the holes and the drilling angles have to matched to each end the ox-bow and to its overall shape. One mortise is 2′ in diameter; the other is 2 1/2″. I drilled them using a combination of a Forstner bit and a hole cutter.
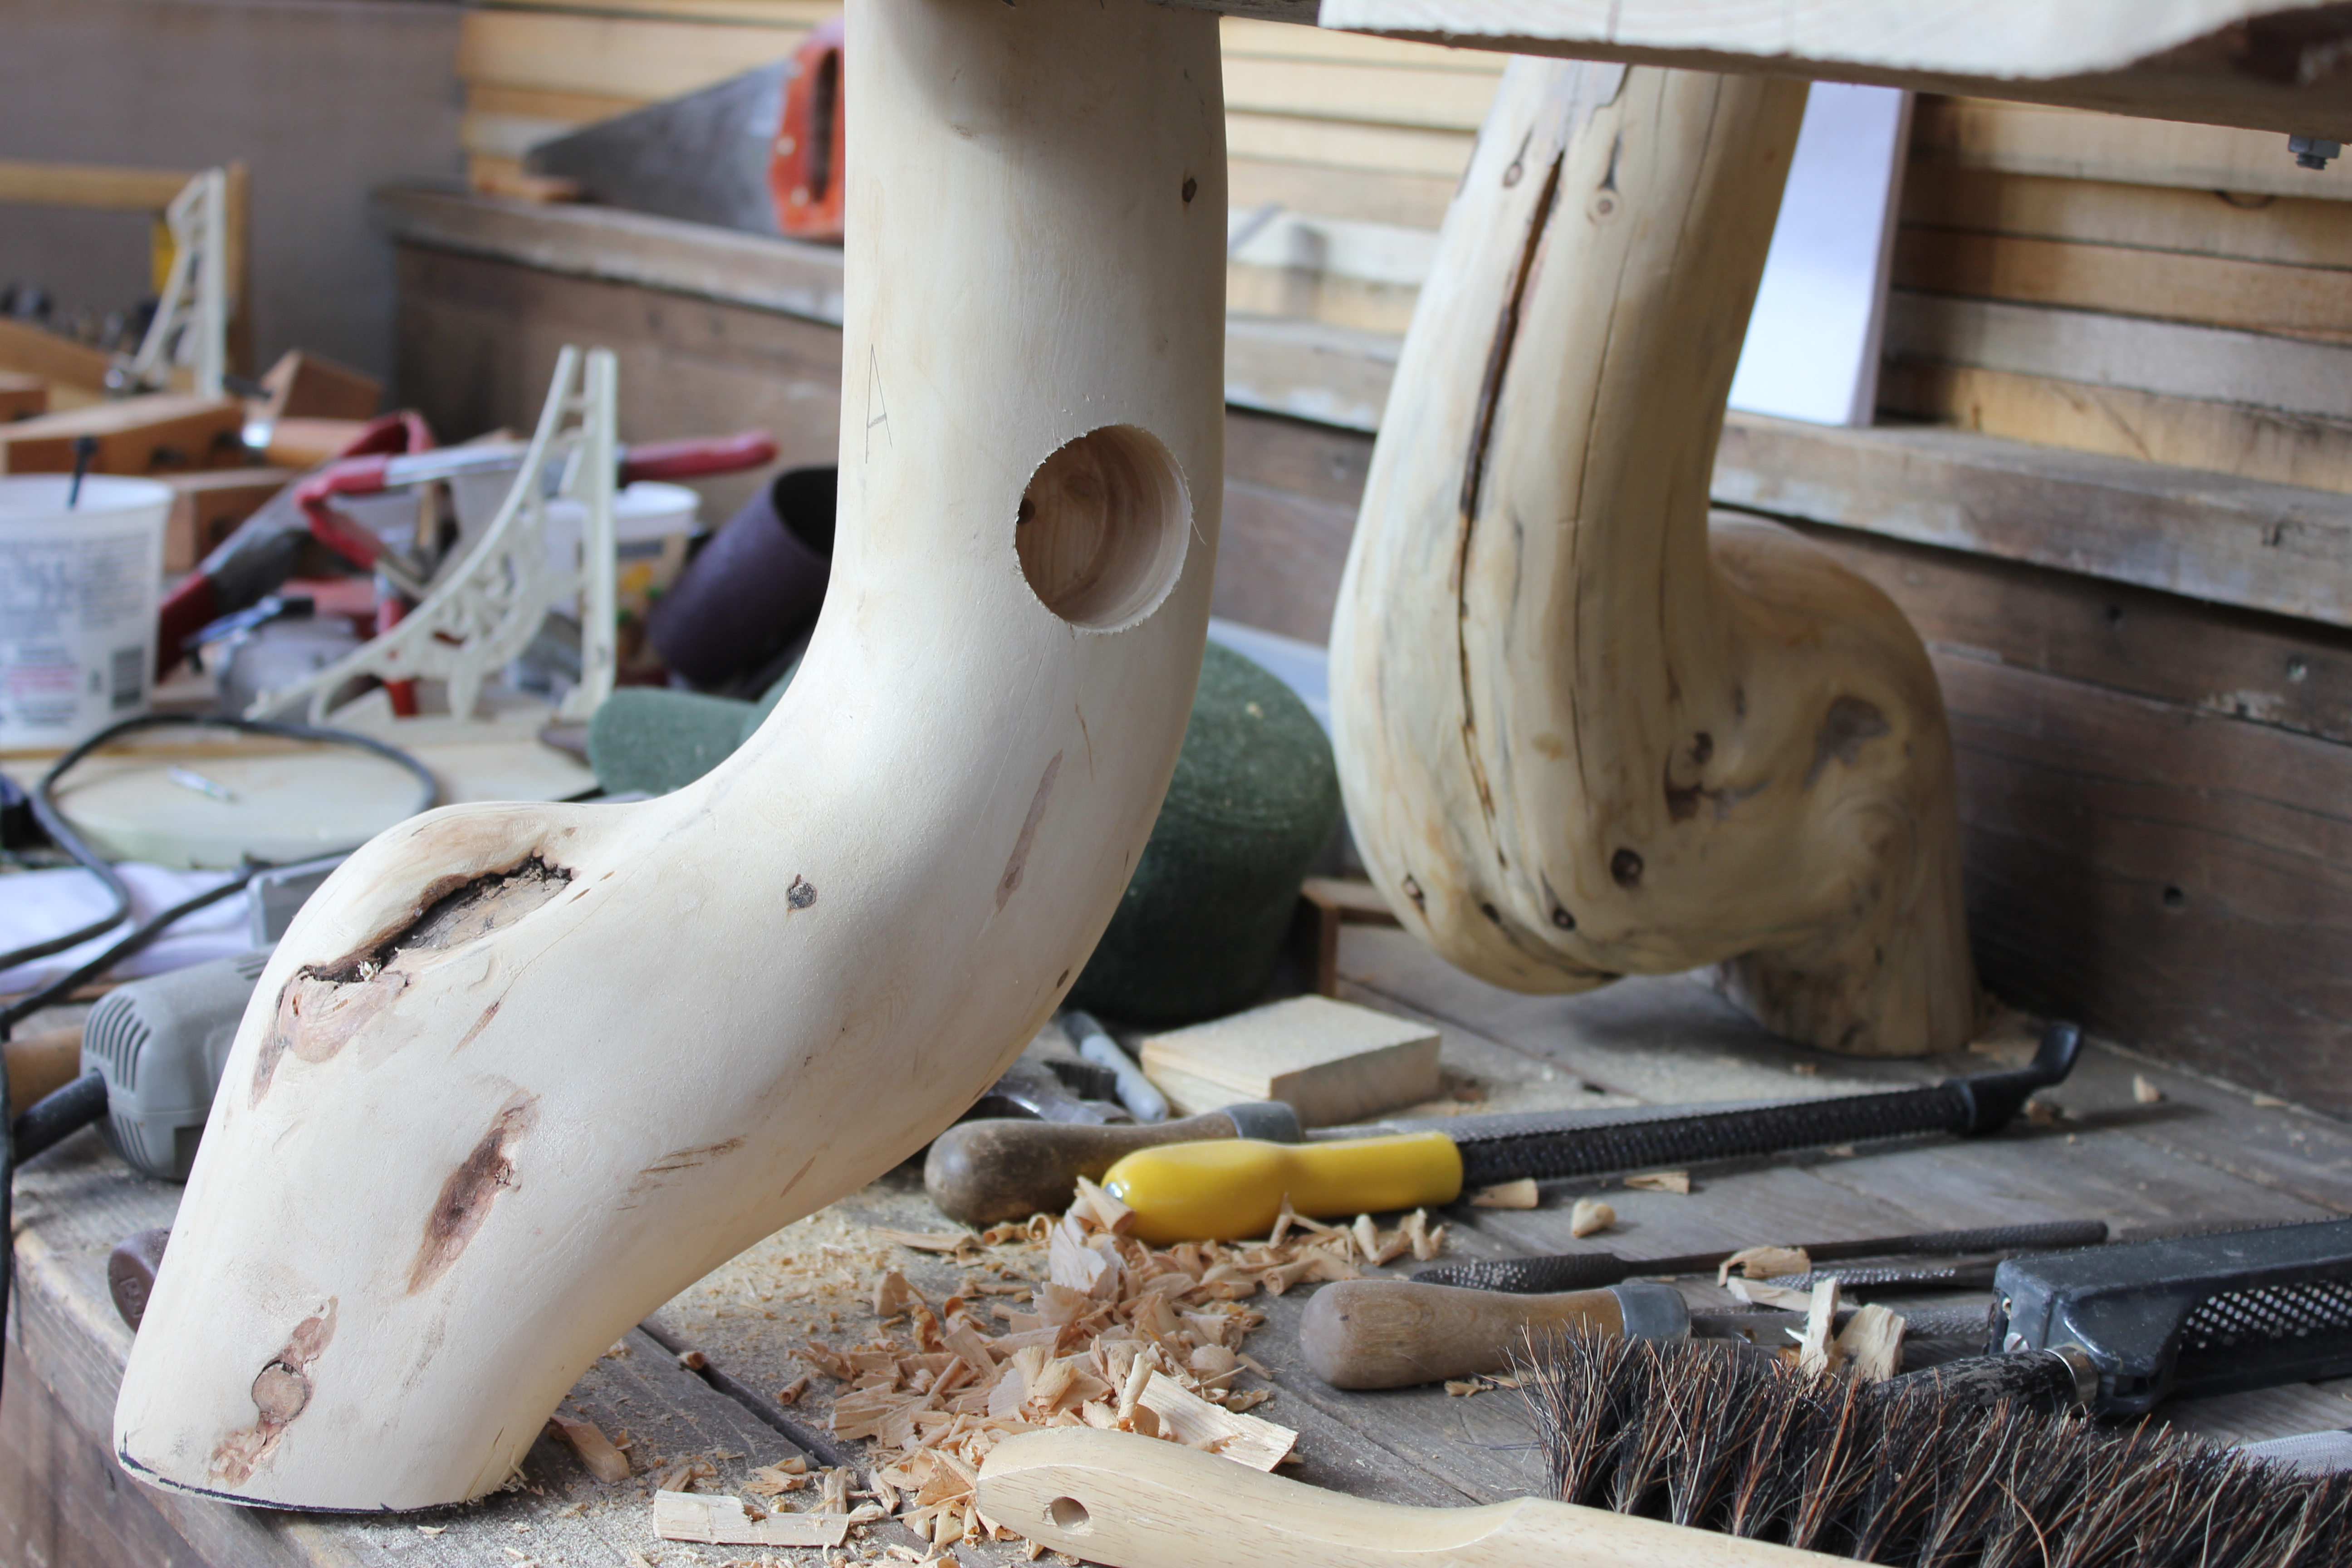
This is the left front leg. Its mortise is 1 3/4 inches higher than the right leg’s mortise, so that the stretcher will be, overall, level and parallel to the bench seat and the floor.

The right leg, with both the mortise and tenon finished, is ready for gluing, clamping, and assembly.

I visually test the shoulder fit and depth of the tenons on each leg.

Because of the number–four–and size of the joints, I appreciated Kristin’s assistance (including taking photos.) I first apply a sizing coat of glue, and then a generous follow-up coat, that actually serves as a lubricant during assembly.

The first step in gluing is to have wet rags ready for clean up. I use my fingers a lot, along with a dowel and glue brush. There’s stress in this phase, so the more preparation (and anticipation of what can go wrong) the better.

It was challenging to use a correct sequence of assembly, and to use the web clamps in a way that pulled the joints in tightly and yet maintained the desired vertical alignment and visual flare of the legs. Kristin prevented a huge problem by pointing out the the ox-bow was not vertical and needed to be twisted upright.
Thirty. Joining the front legs to the bench seat
The design of this bench is experimental and evolving step-by-step. I have a basic idea of adding wide slab armrests to the top of the front posts, which are much longer at this stage than they will be when I start working on the arm rests. For now, the challenge is tightly fitting each leg into a cut-out in the bench seat.

I first marked and cut out a poster board pattern. The leg is marked for realignment.

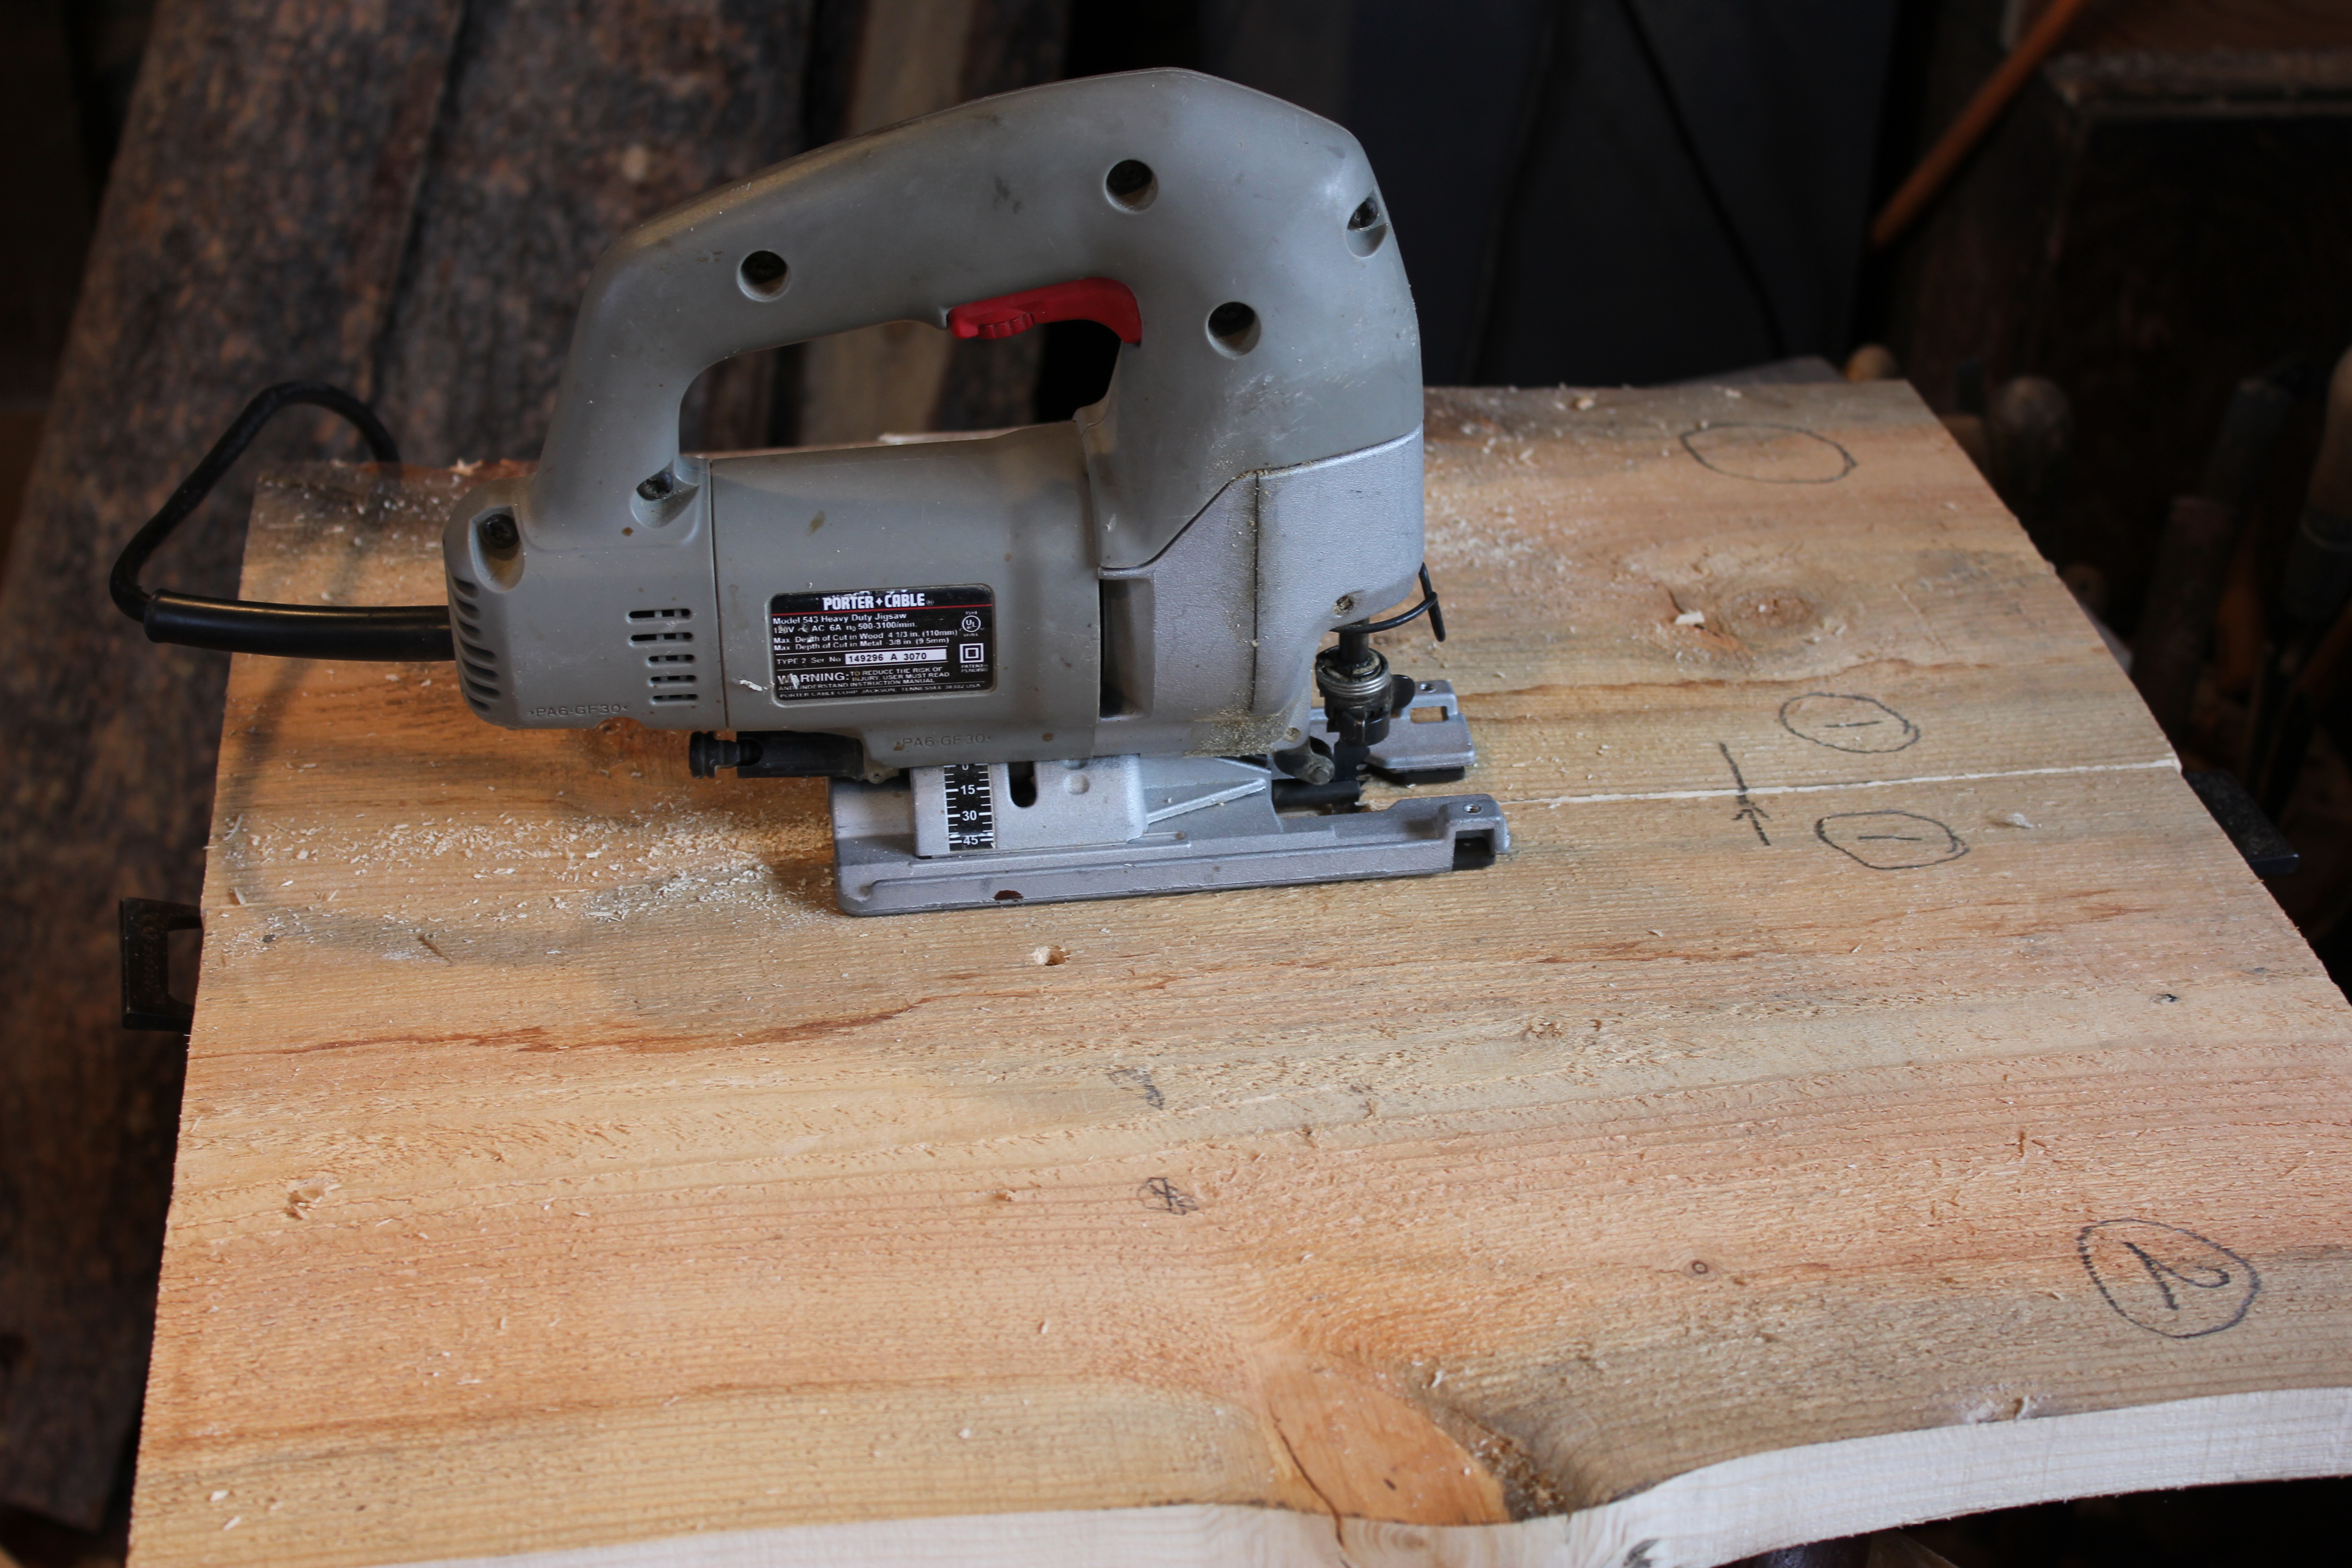
With the leg removed, the pattern was moved deeper into the bench seat. The straight pencil line was drawn at the edge of the pattern, before there leg was removed, as a guide when the pattern was moved on the bench seat. The cut-out is marked and ready for cutting with a jigsaw.

The cut-out is made and ready for a test fit of the leg.
This rarely happens–the leg fit tightly and with the right alignment on the first try.

Twenty-nine. Bench backrest attachments & front legs
This post is about (1) attaching an arched support to stiffen the backrest, (2) connecting the backrest to the bench seat in a way that allows the backrest and seat to be disassembled, and (3) the start of attaching the front legs. (My captions for the photos are not as detailed and informative as they could be.)
I have two more posts in draft status that I’ll publish asap (the date today is May 26, 2013).
The arch is a naturally grown shape, a small lodgepole tree trunk. I flattened it with a hand adze after cutting a series of saw kerfs. The rounded side had to be inset in three places, each of which were clamped as shown here.

This photo shows the mate-cutting in progress, with the top of the arch clamped in place. The saw is cutting both pieces at once. The kerf is prevented from closing, and pinching the saw blade, by the shim shingle.

With the backrest laid flat and the seat clamped to it, I had access to the underside of the seat. I wanted to attach the seat to the backrest in a way that allowed for disassembly because of the increasing weight of the bench. I also wanted the attachment to allow for expansion and contraction of the slabs in the seat.

Here’s the underside with slotted holes, one in each of the slab pieces.
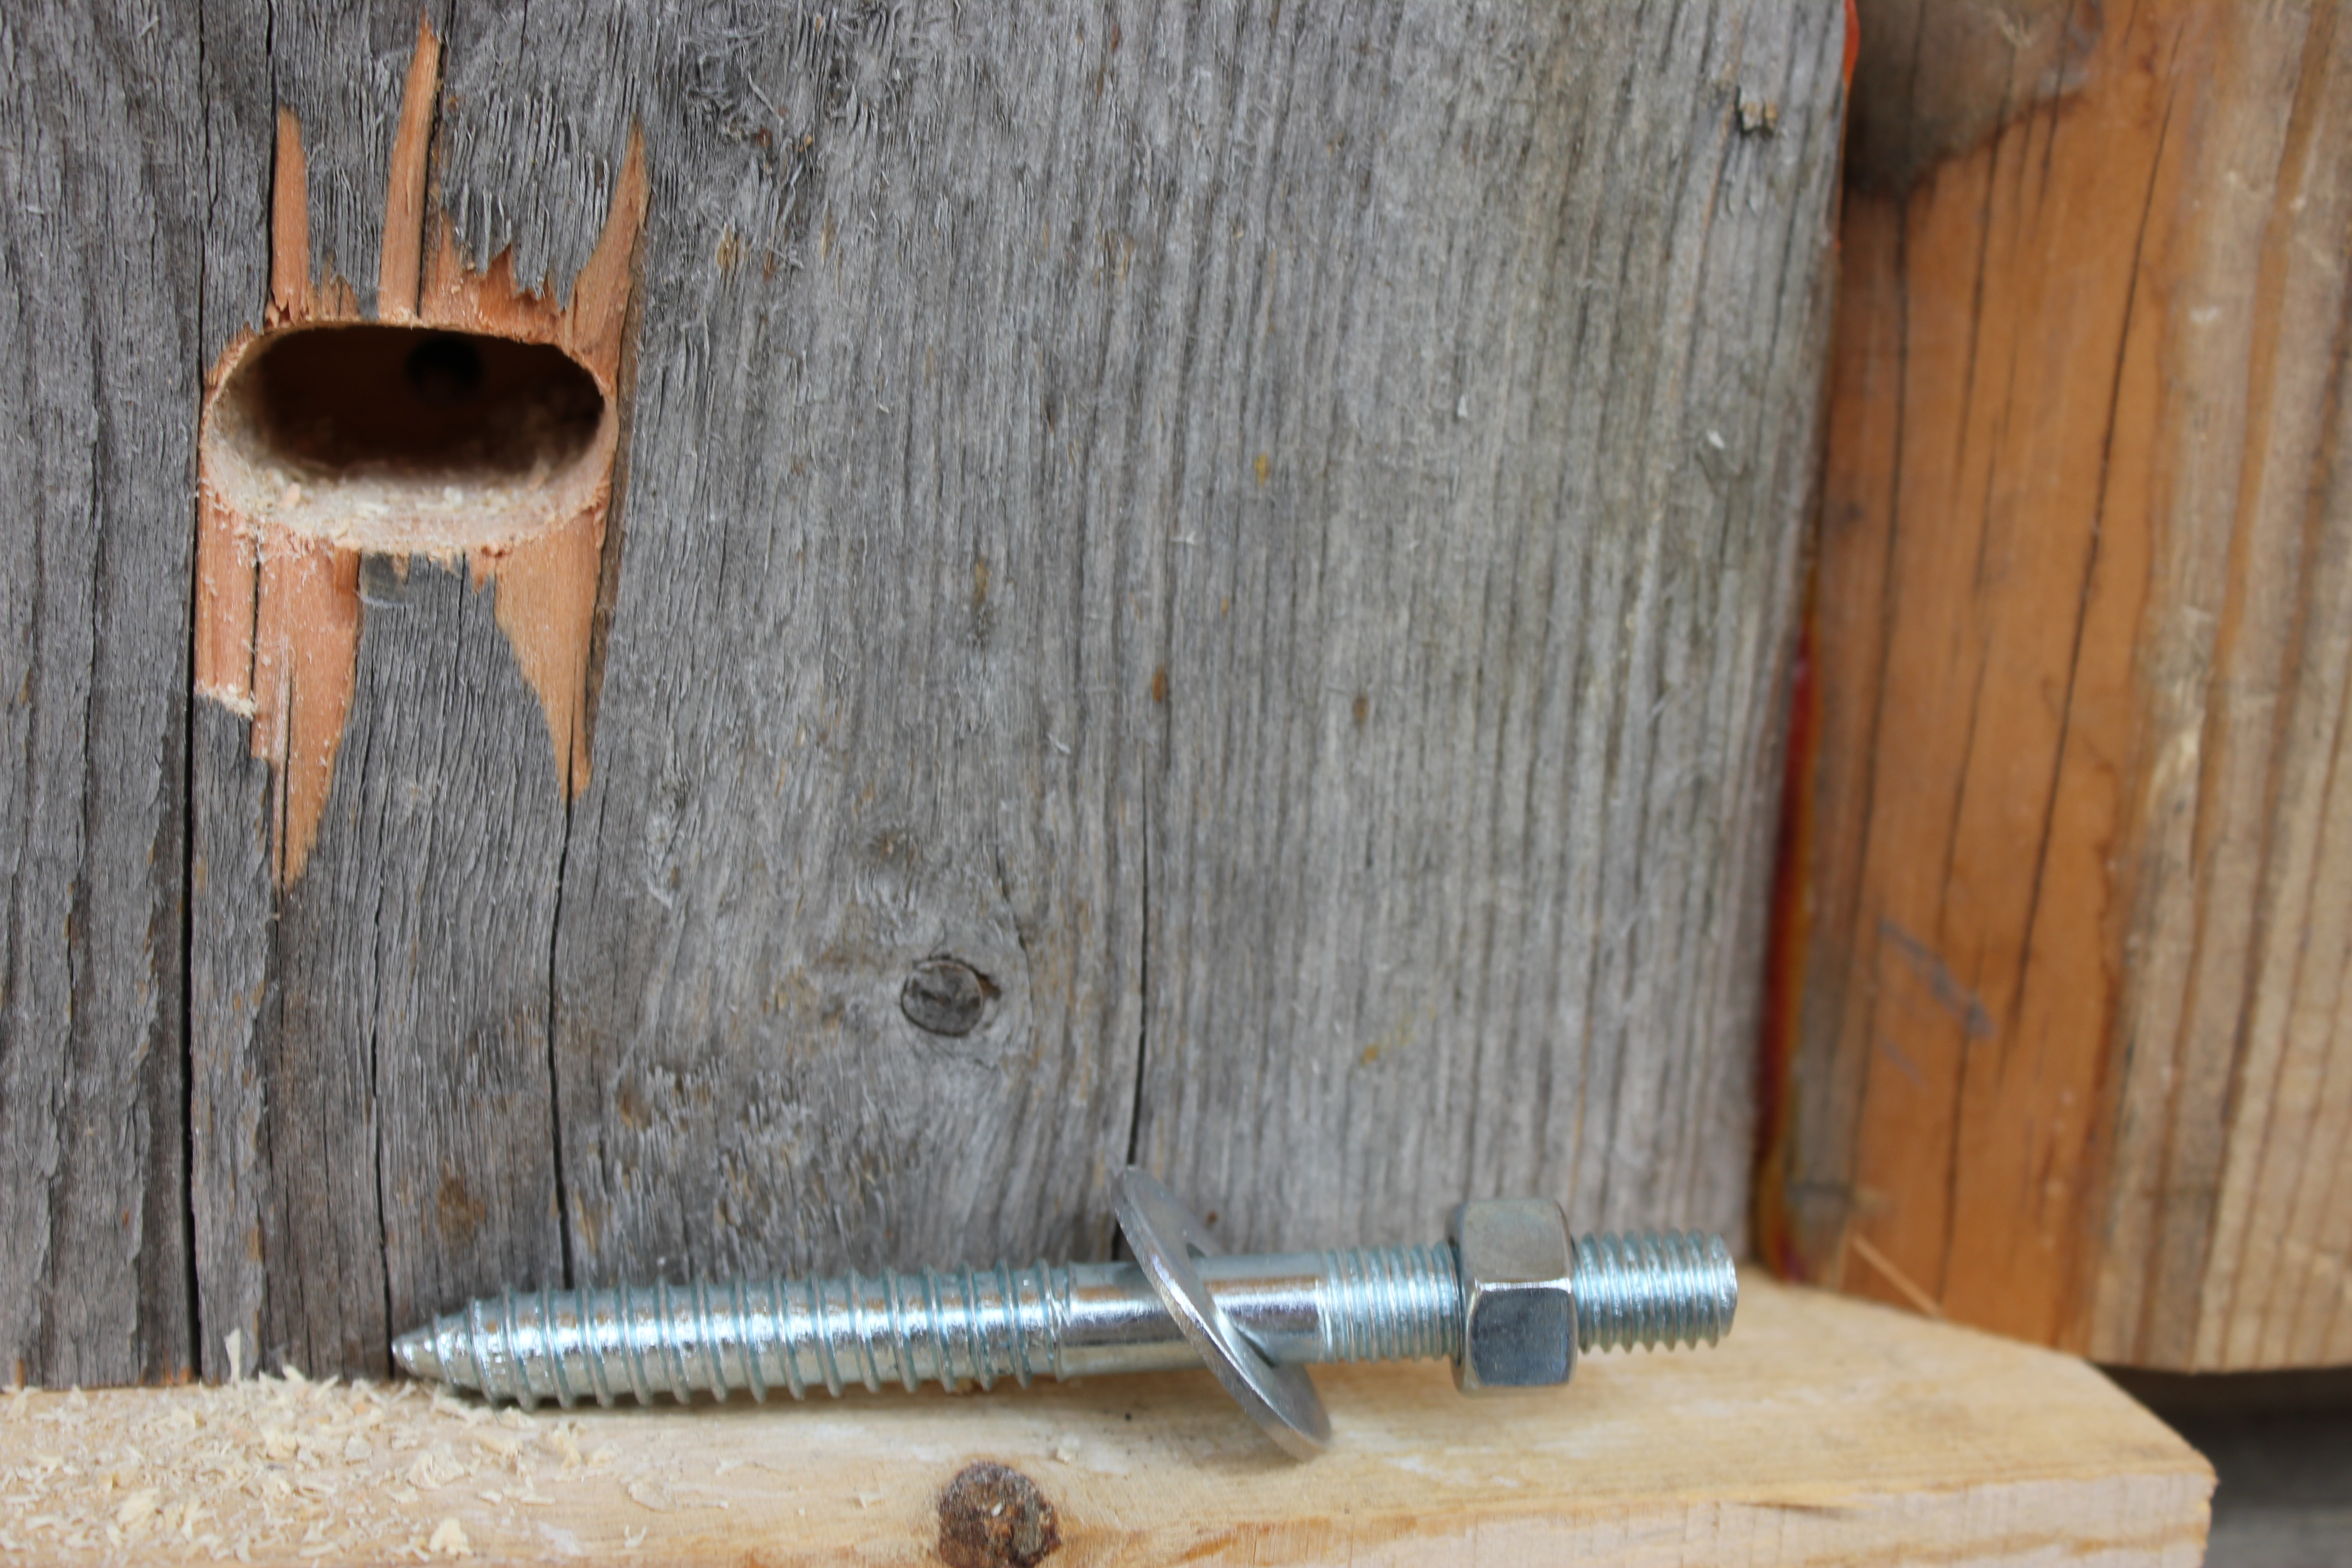
A close up of a slotted hole, this one and one at the other end of the row, are for hanger bolts to make assembly and reassembly easier. The remaining holes are for lag screws. (The drilling tear-out will be removed later with sanding.)

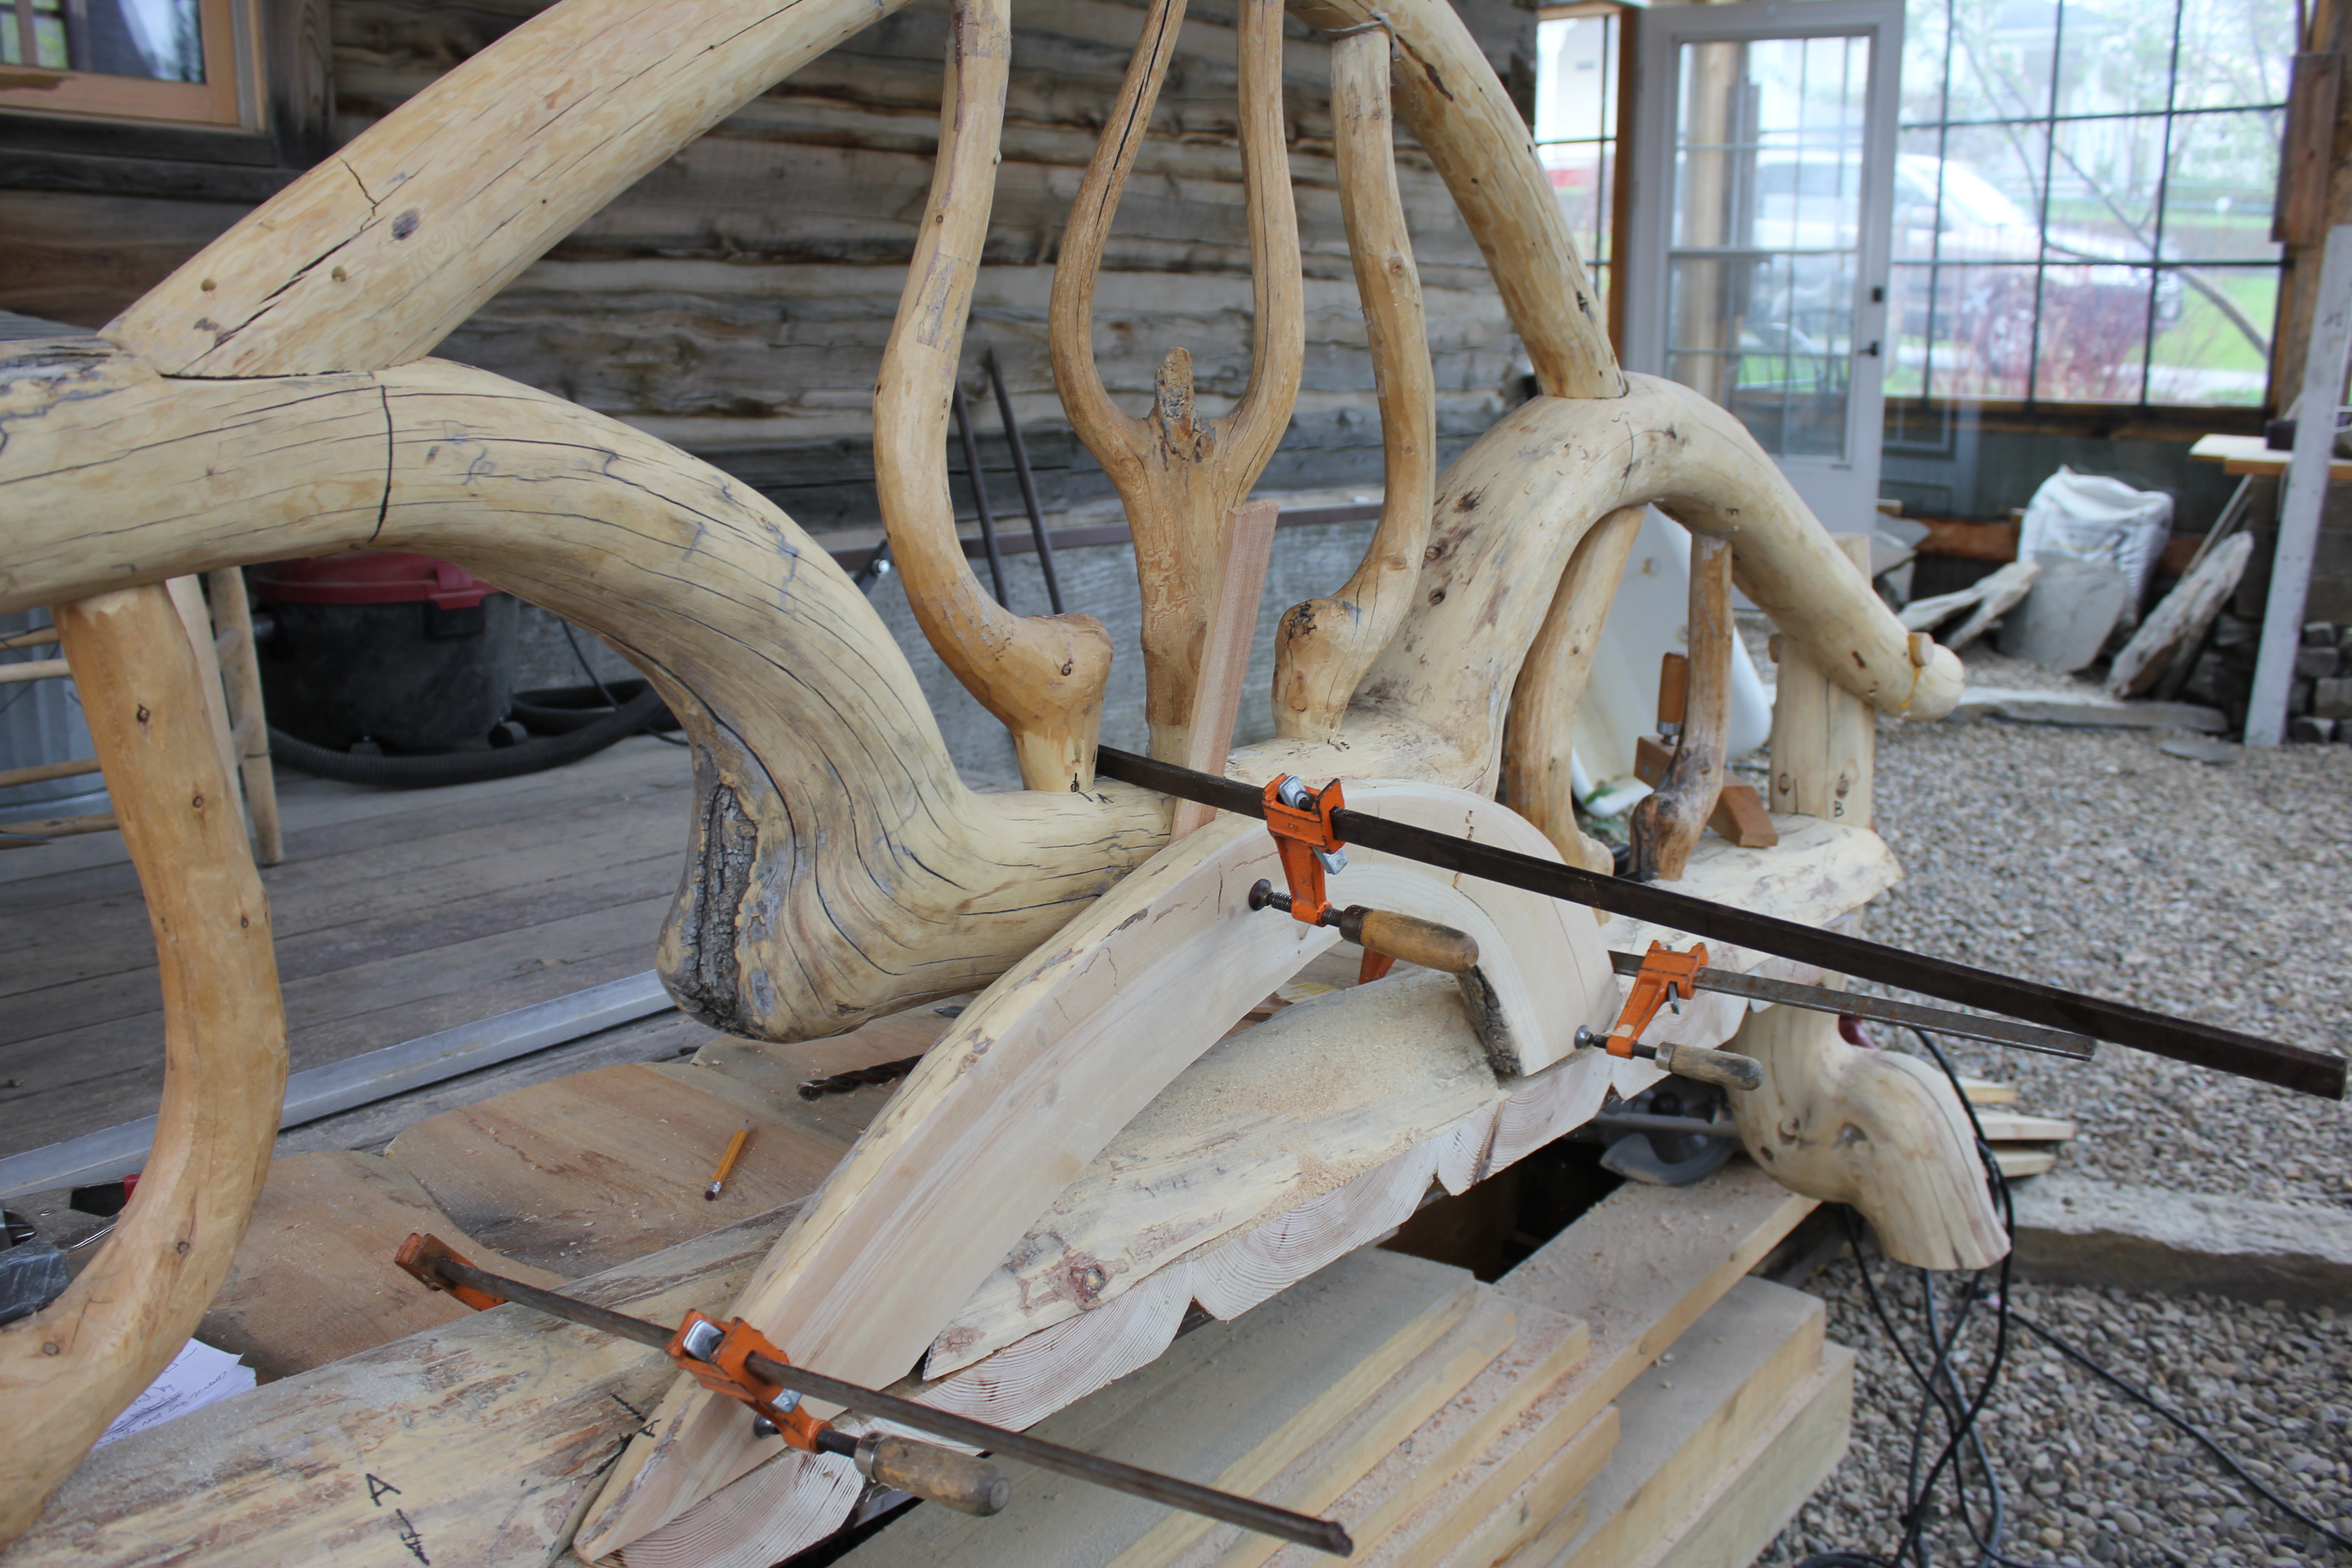
The hanger bolts and lag screws, with two flat washers each, are tightened securely but loose enough to allow the wood to expand and contract.

To establish a front seat height that approximately matches the back, I added a temporary board to each end of the bench. A spacer board was placed on the bench seat, and the front leg was leaned against the seat for its vertical alignment. This photo was taken after I had marked and cut the bottom of the leg for a flush fit to the deck surface.

This is the second front leg with the marking block and pen. The sequence is important. The cut is approximate, but once made the leg is dropped and that changes the fitting of the joint in the seat above.

Here’s the finished cut, with the leg vertically aligned, with a slight flare from from to back and side to side.

Both front legs are now ready to be attached, which will require cutouts in the bench seat at each end. That will be the subject of my next post.
Twenty-eight. Joining legs to the bench back rest.
April 17, 2013
For personal and family reasons and priorities, I haven’t worked much on the bench for the past month. I had originally planned (!) to have it finished by the end of April, but since that was a self-imposed time frame, I’ve relaxed my schedule. And, besides, the making of tree art is only one of my creative practices ….
I’m also continuing with my relaxed standards for the quality of these posts, especially in literary terms.
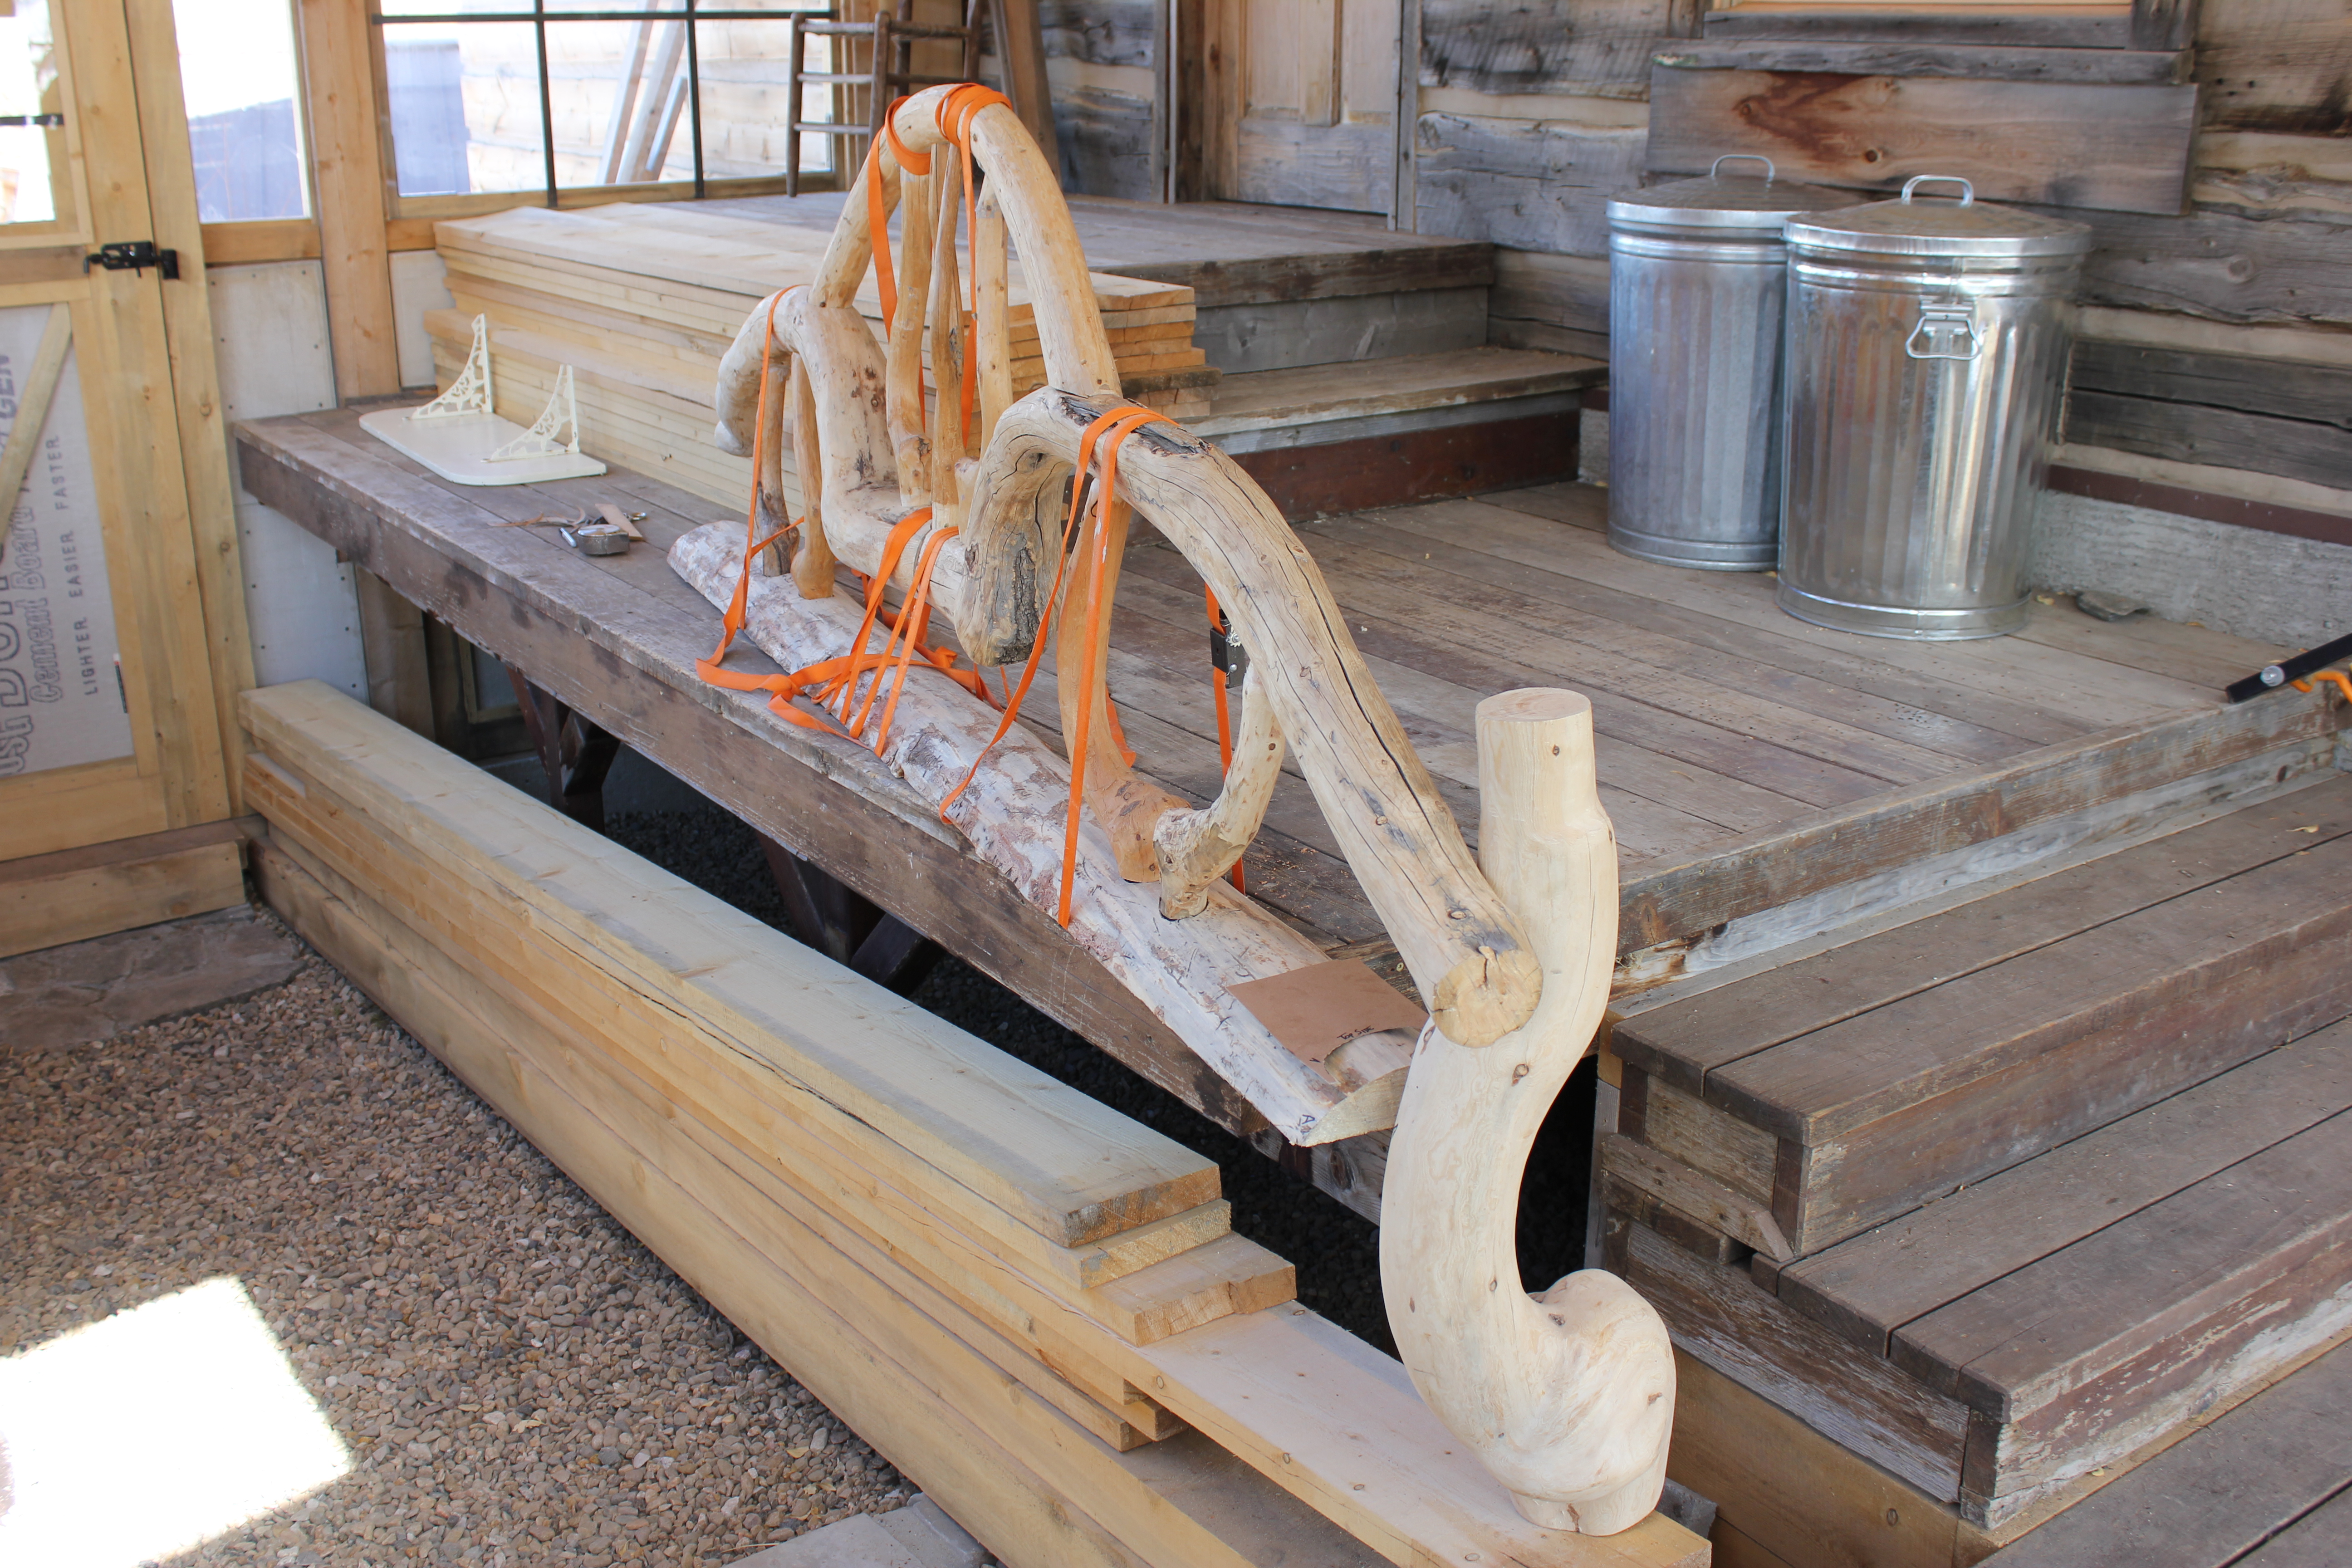
Because of the size of the bench, and the crowded condition of my workshop, I decided to bring the bench up to our attached greenhouse. As long as it’s sunny, the unfinished greenhouse is a comfortable, roomy, and well-lighted workspace. And the deck serves as a good workbench.
Here are photos of my latest efforts to combine the back rest with the seat, and to add two legs:

I’ve selected four swan neck pieces for the bench legs. In this photo, I’ve placed one of them to explore options for joinery that connects the leg to both the top and the bottom of the back rest.
Using a piece of light cardboard, I’m starting to make a pattern for the coped cut out on the bottom of the back rest, the first of the two to receive the leg.
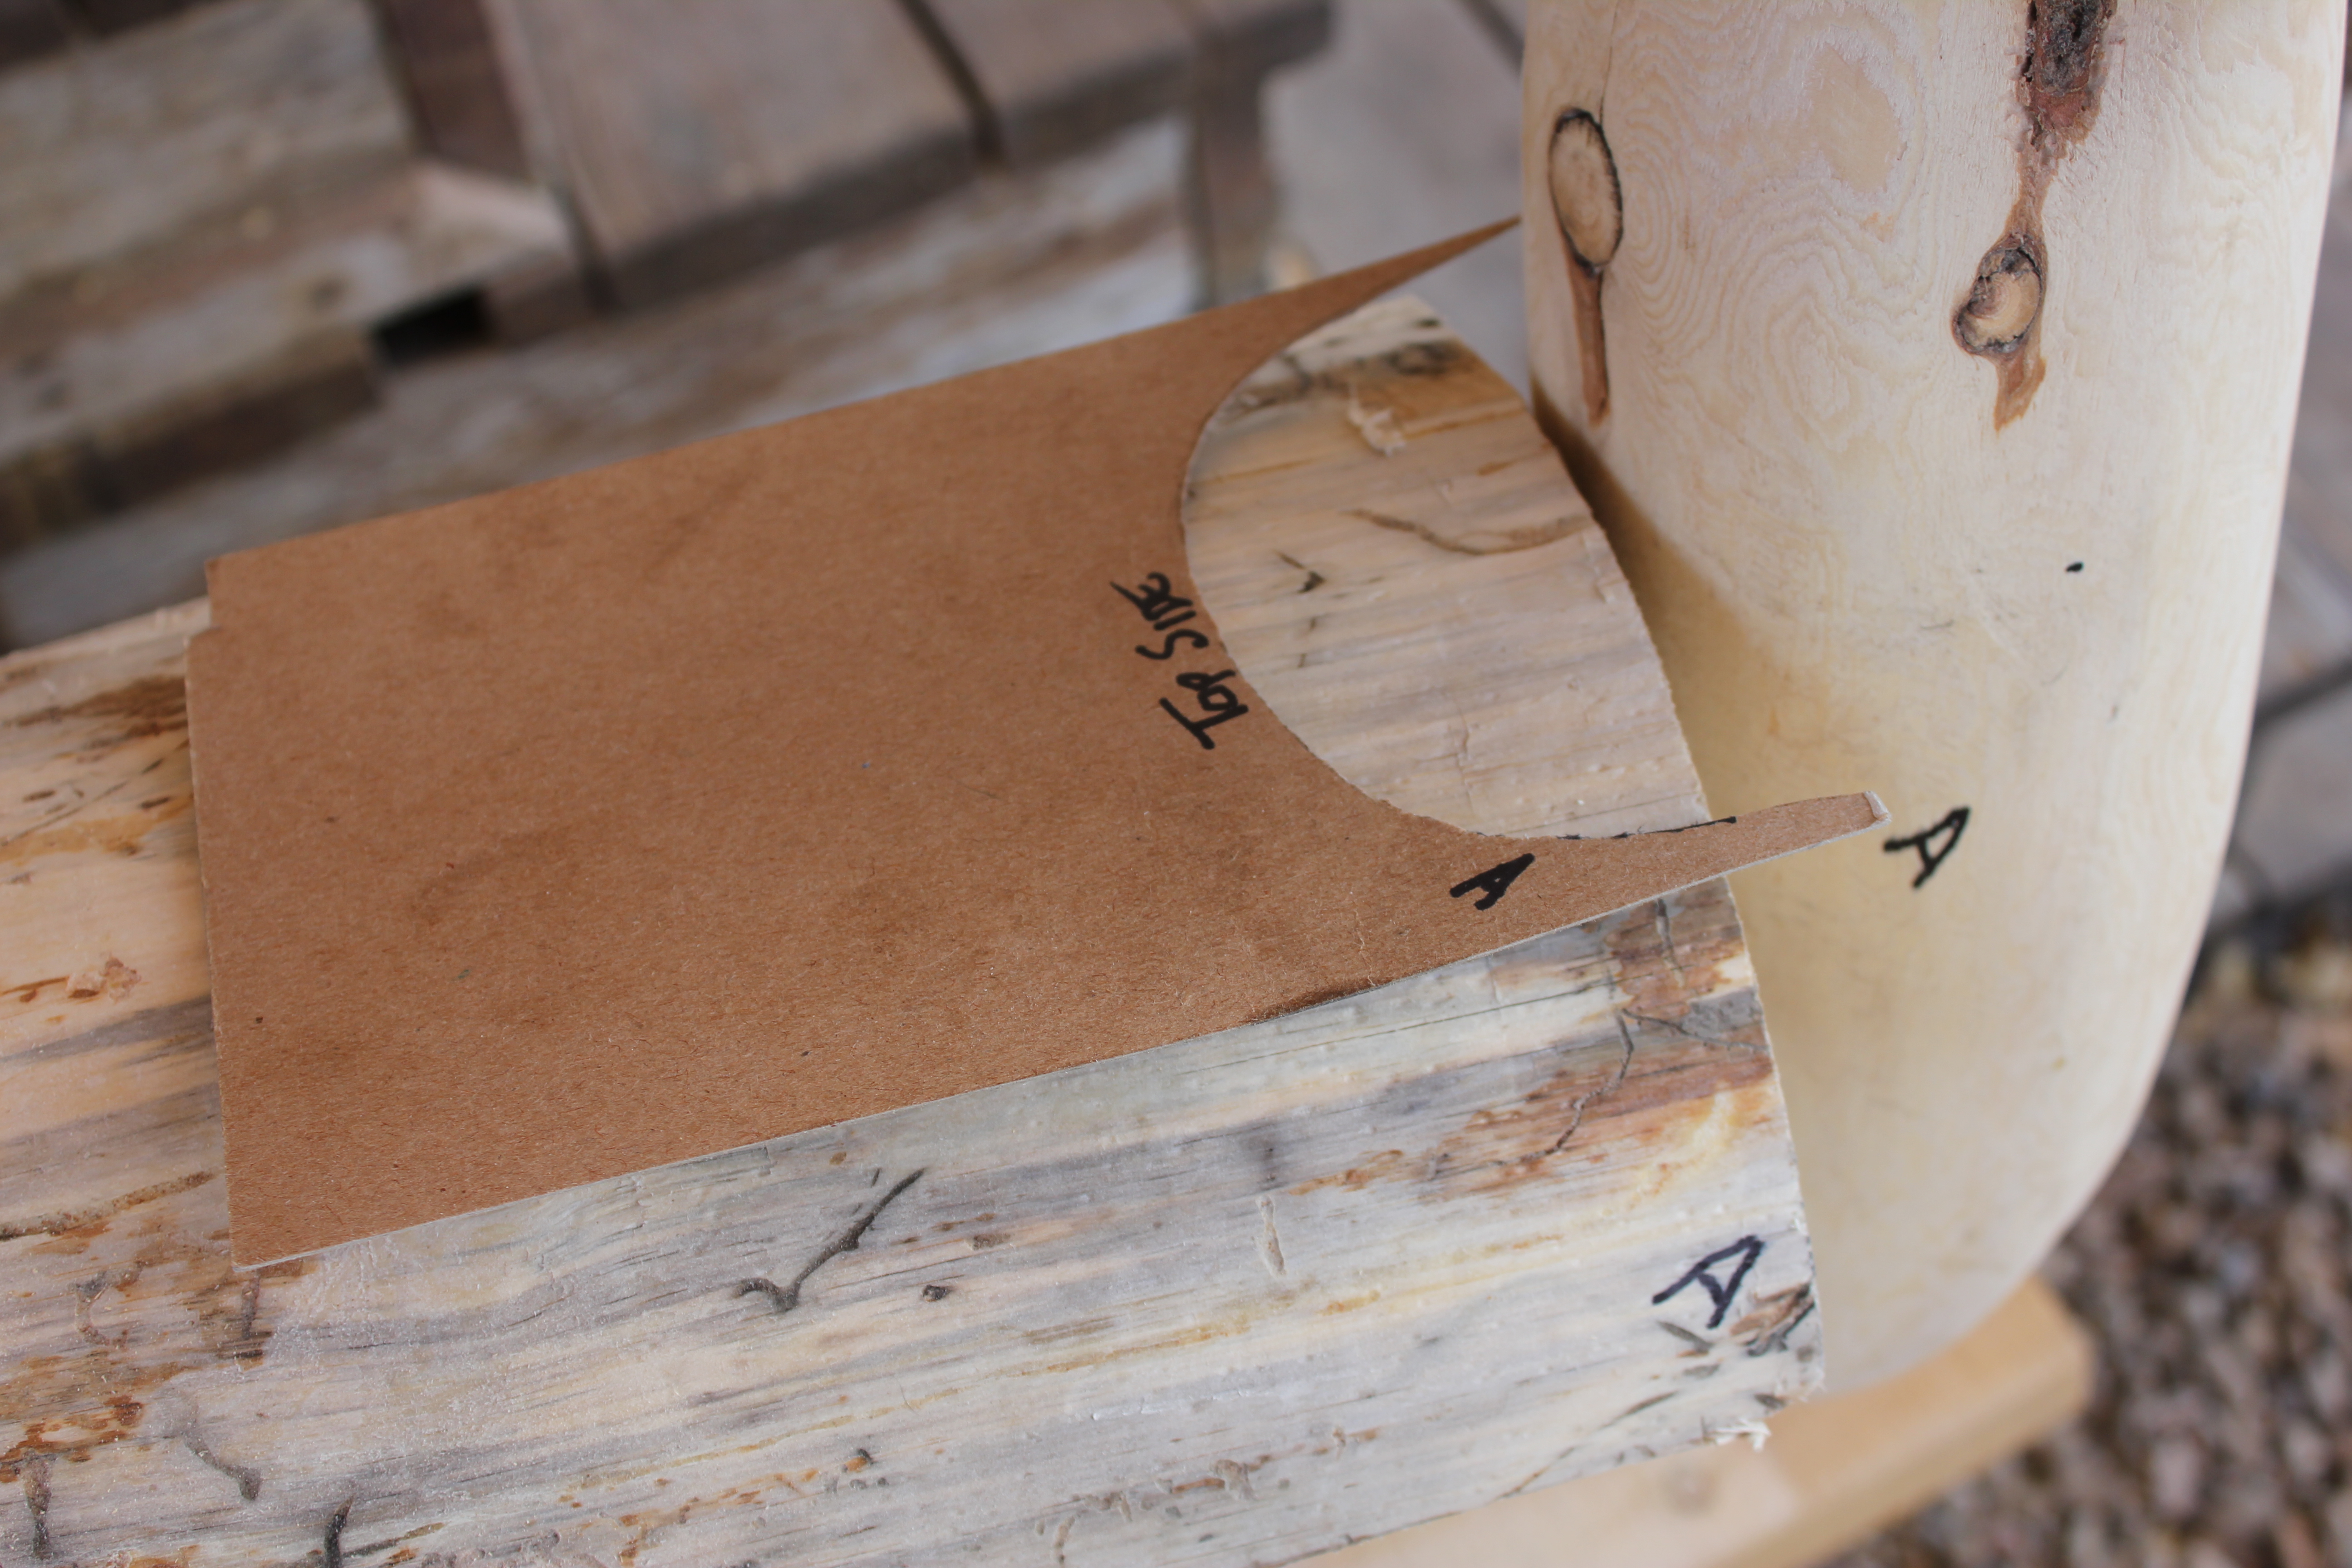
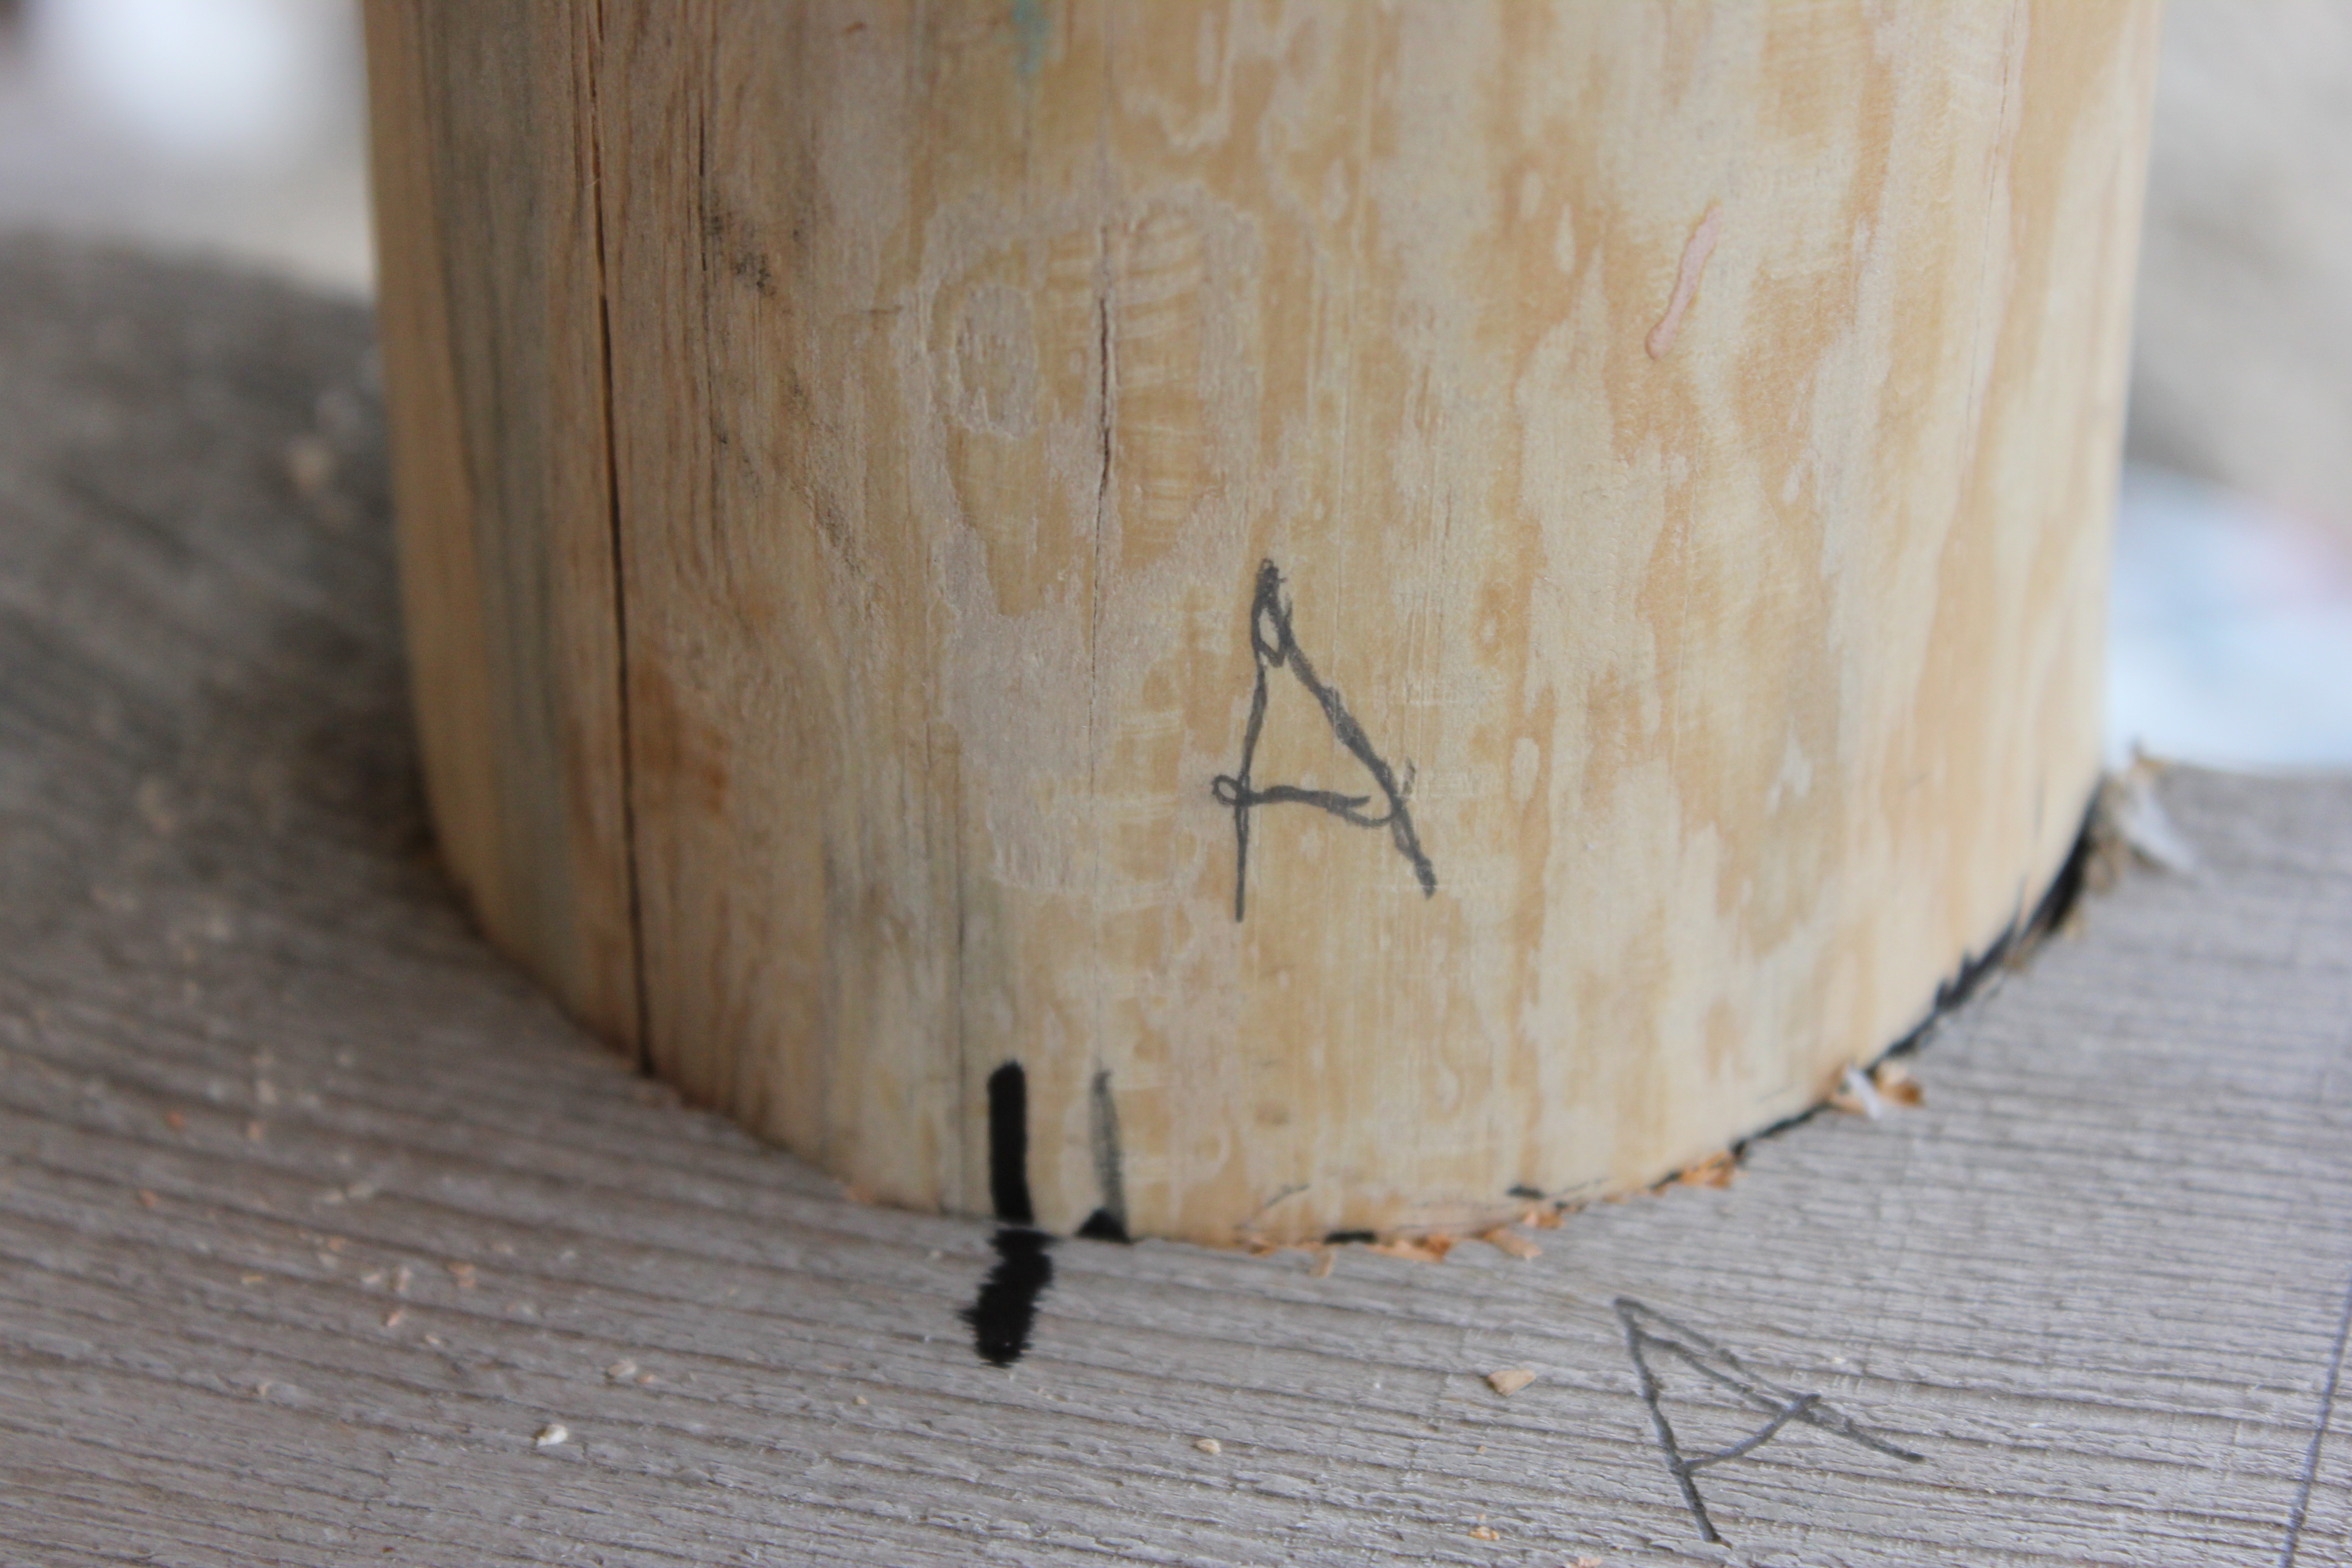
After the pattern fits around the leg, it will be placed on the underside to mark for the actual cutting. I have added the matching letters “A” to keep the correct alignment when the pattern is transferred to the underside.
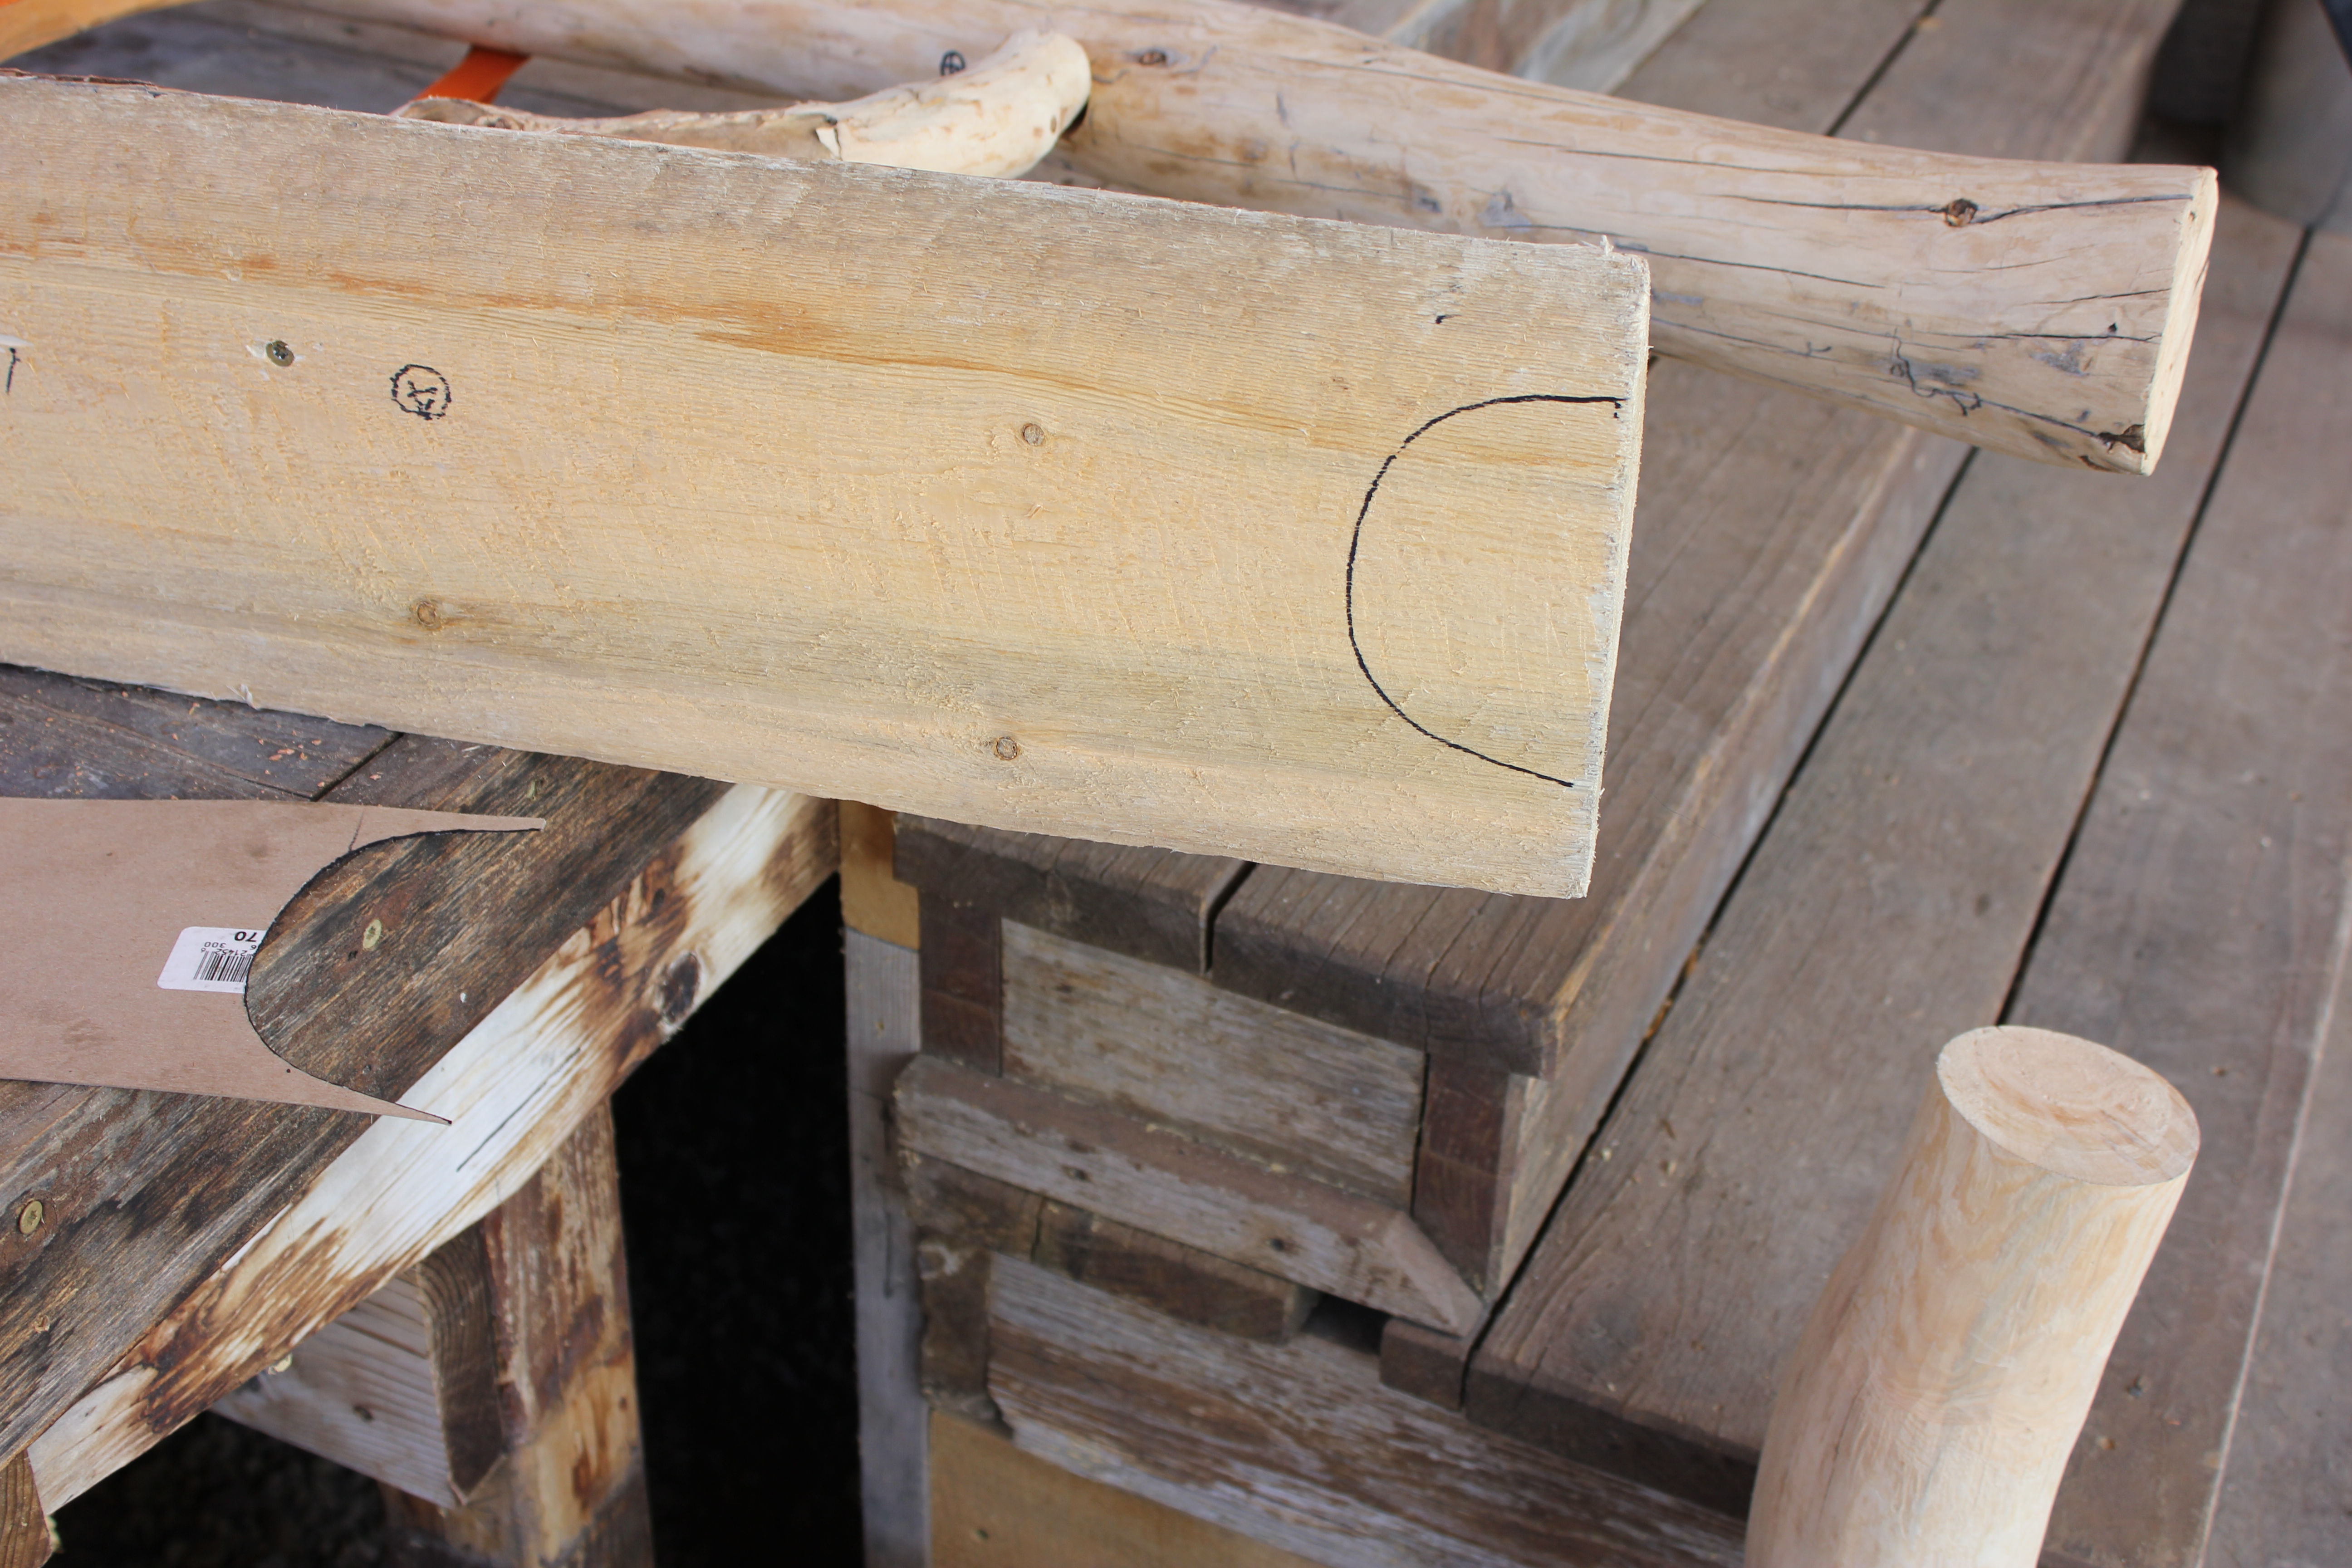
So here’s the guideline for the cut out on the back rest base, to receive the leg.
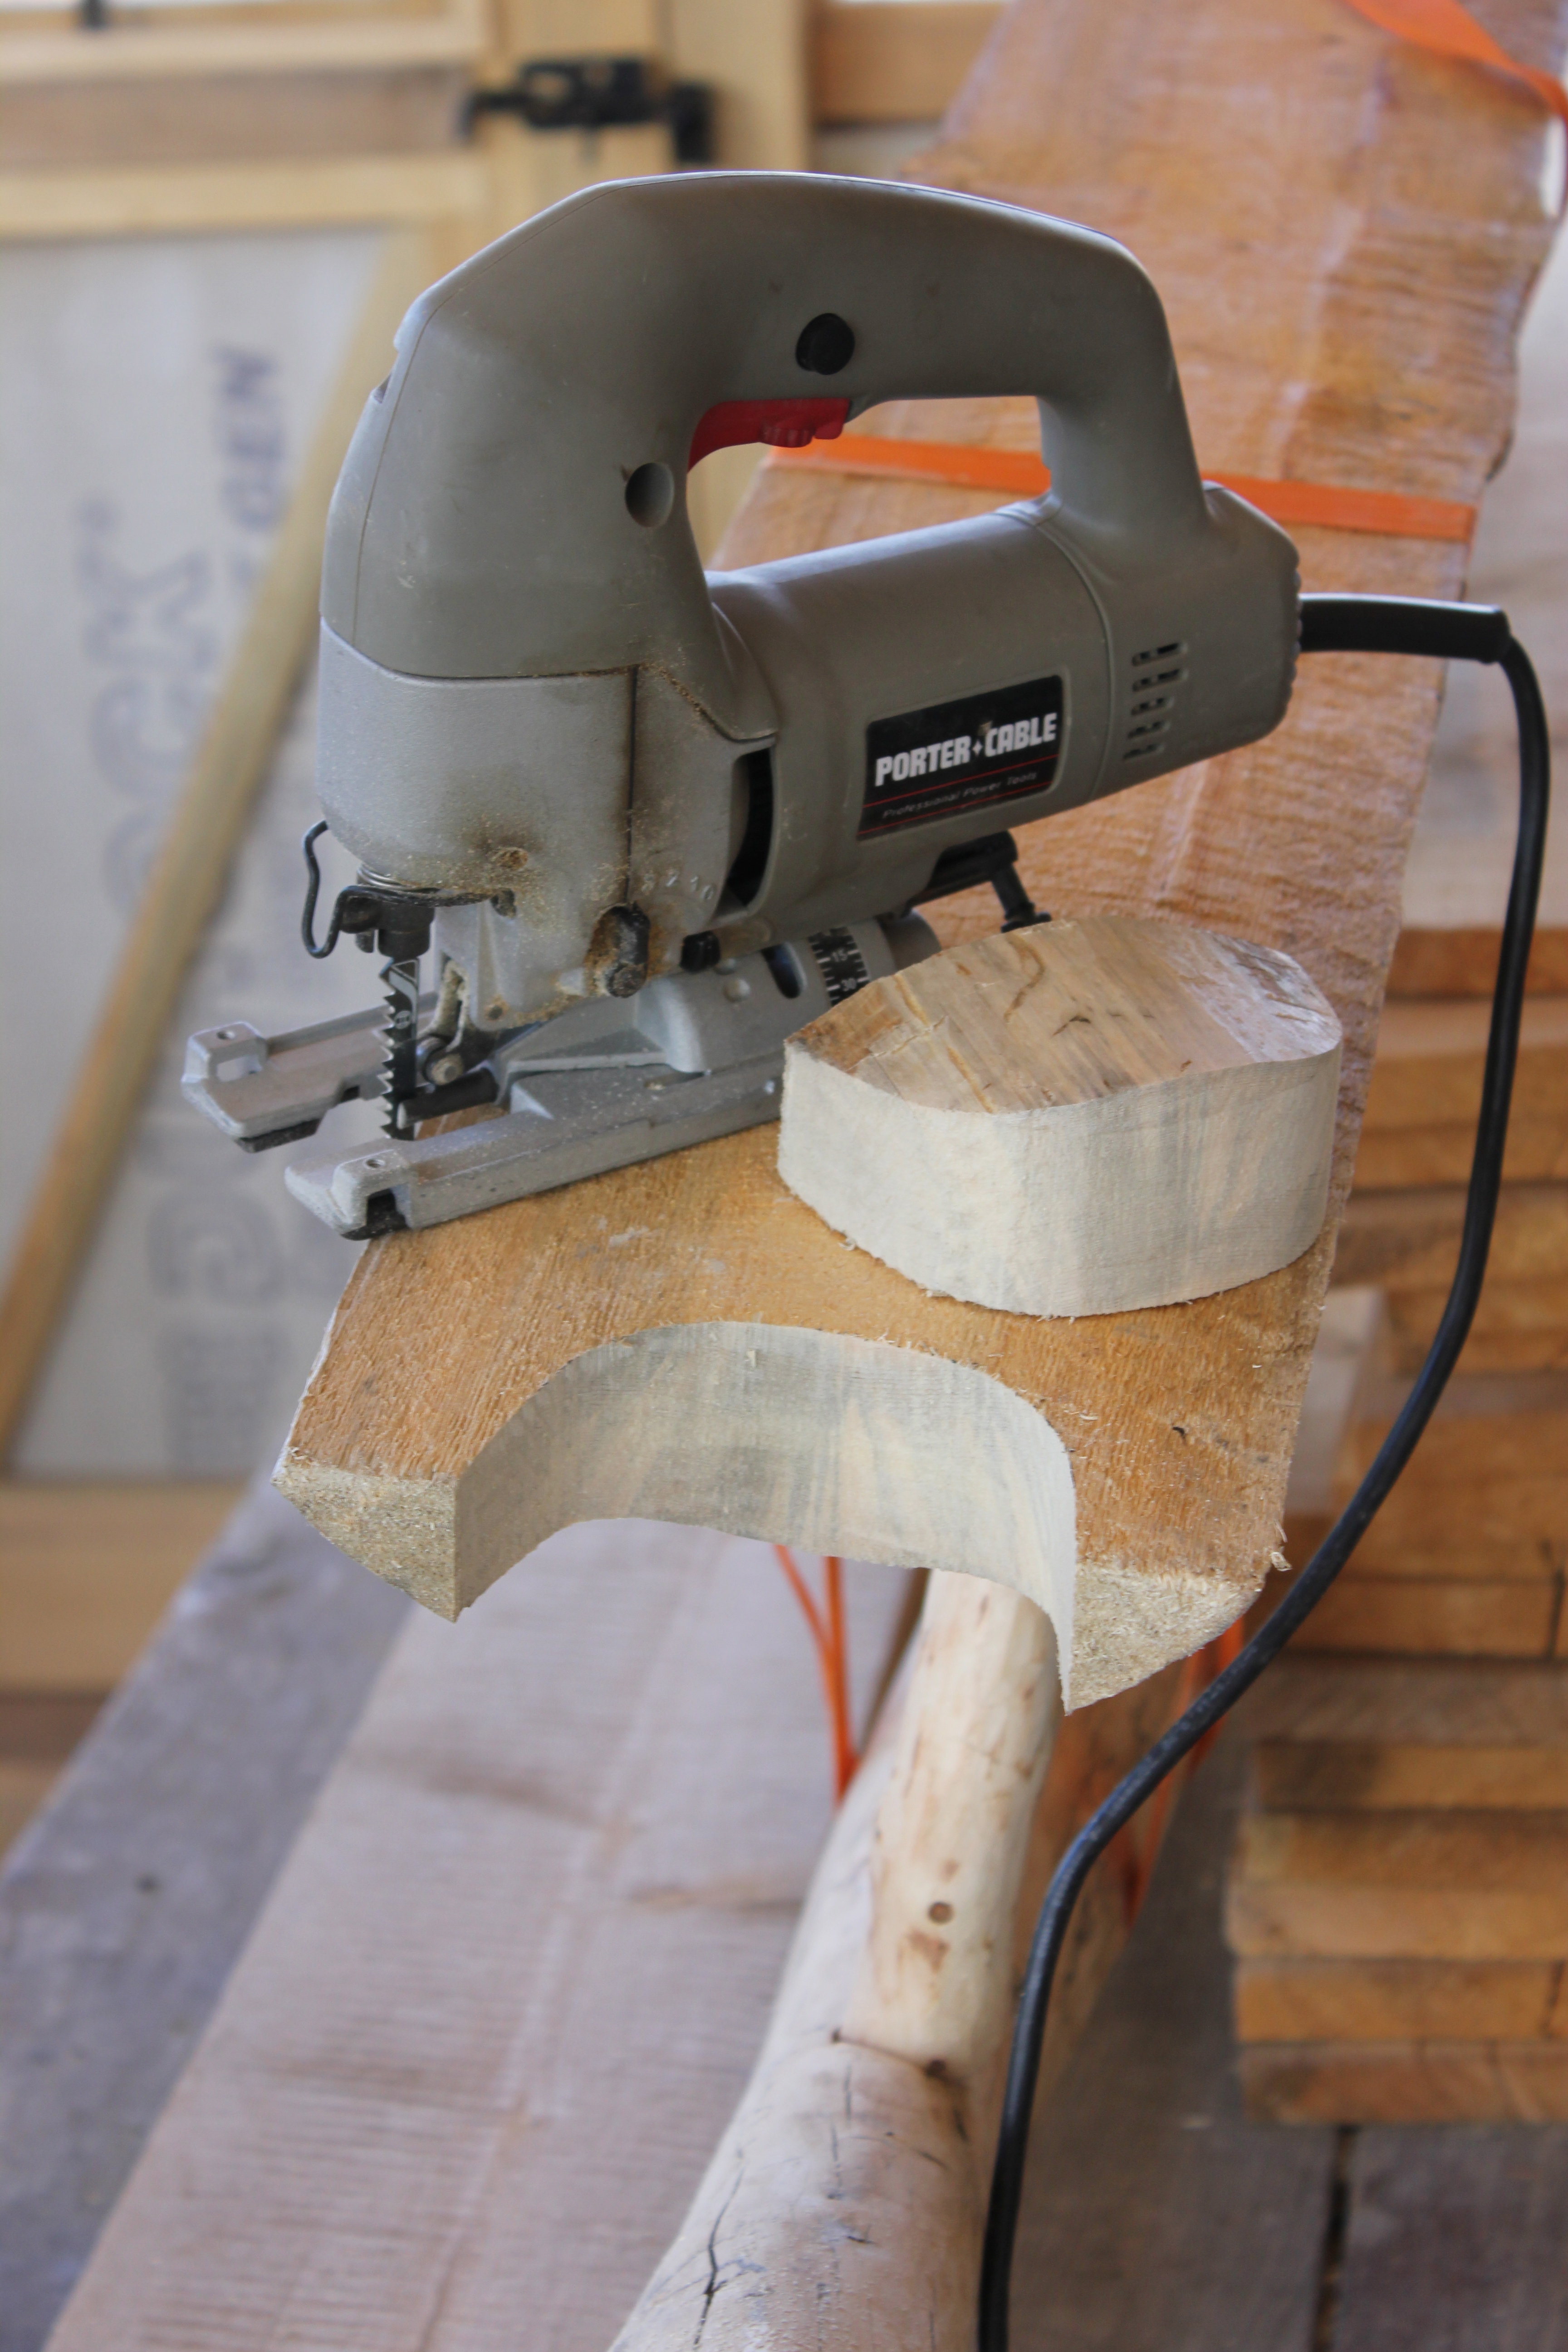
The cut out is completed, and the back rest will be turned over for a test fit.
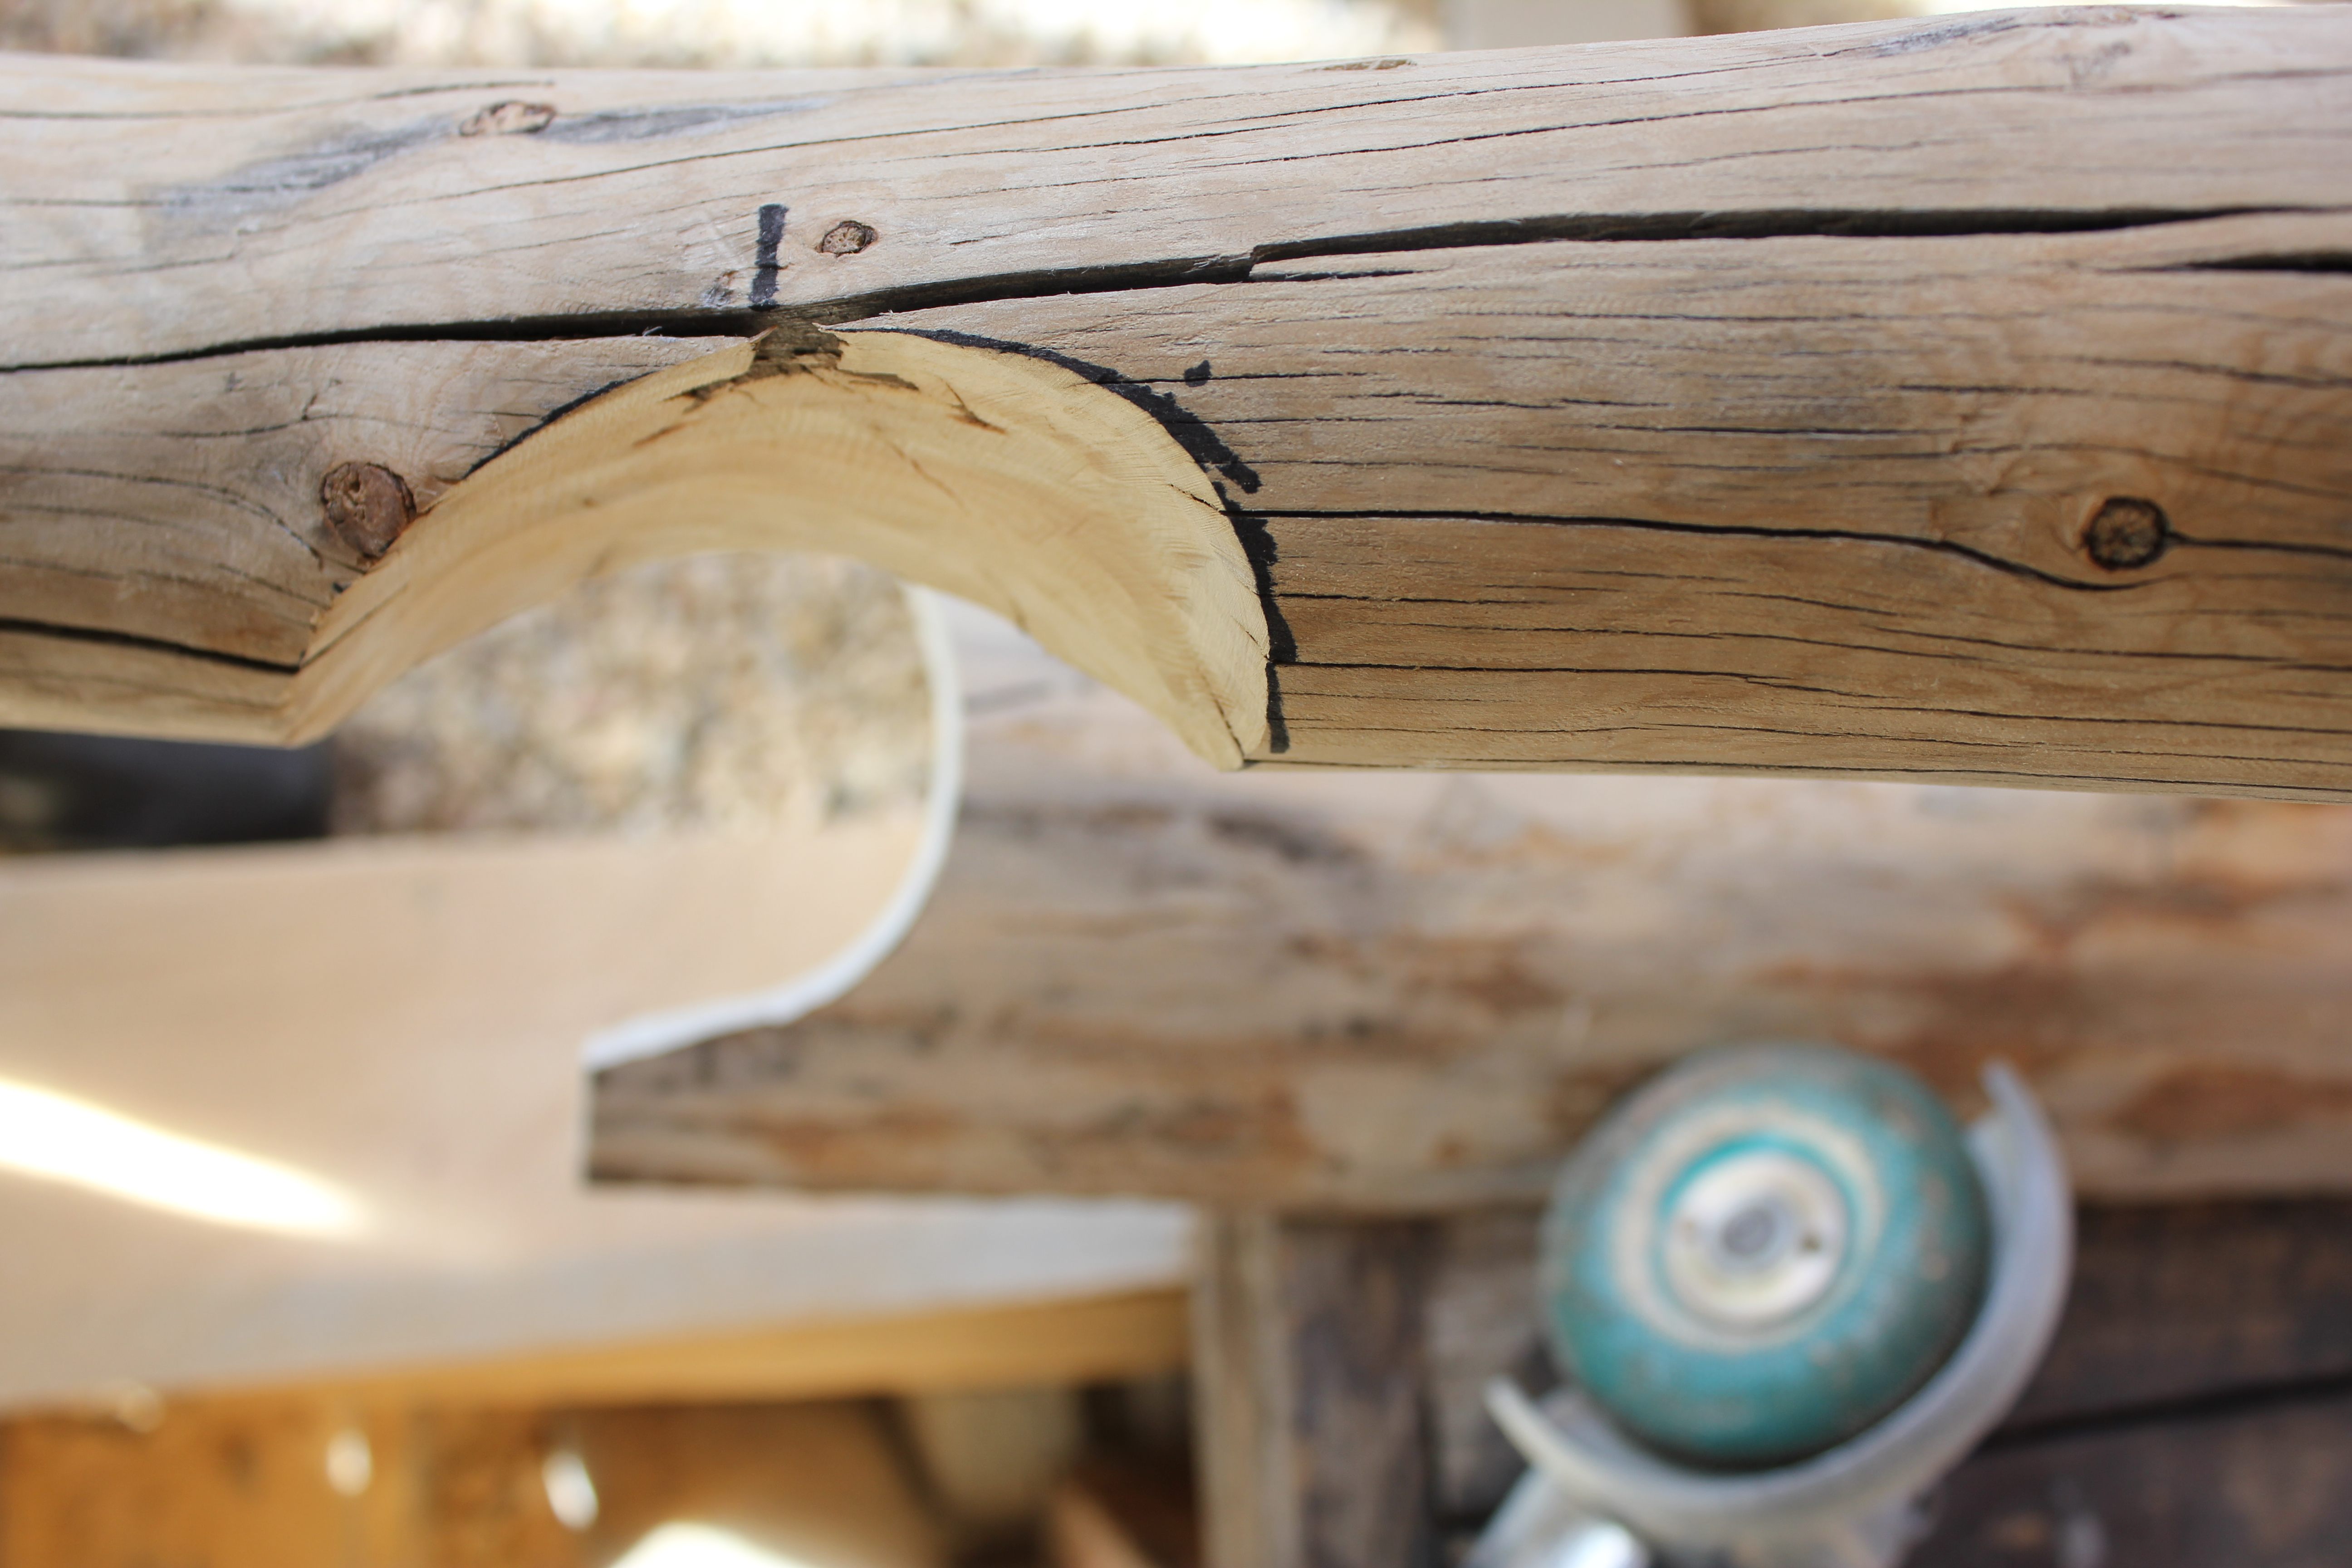
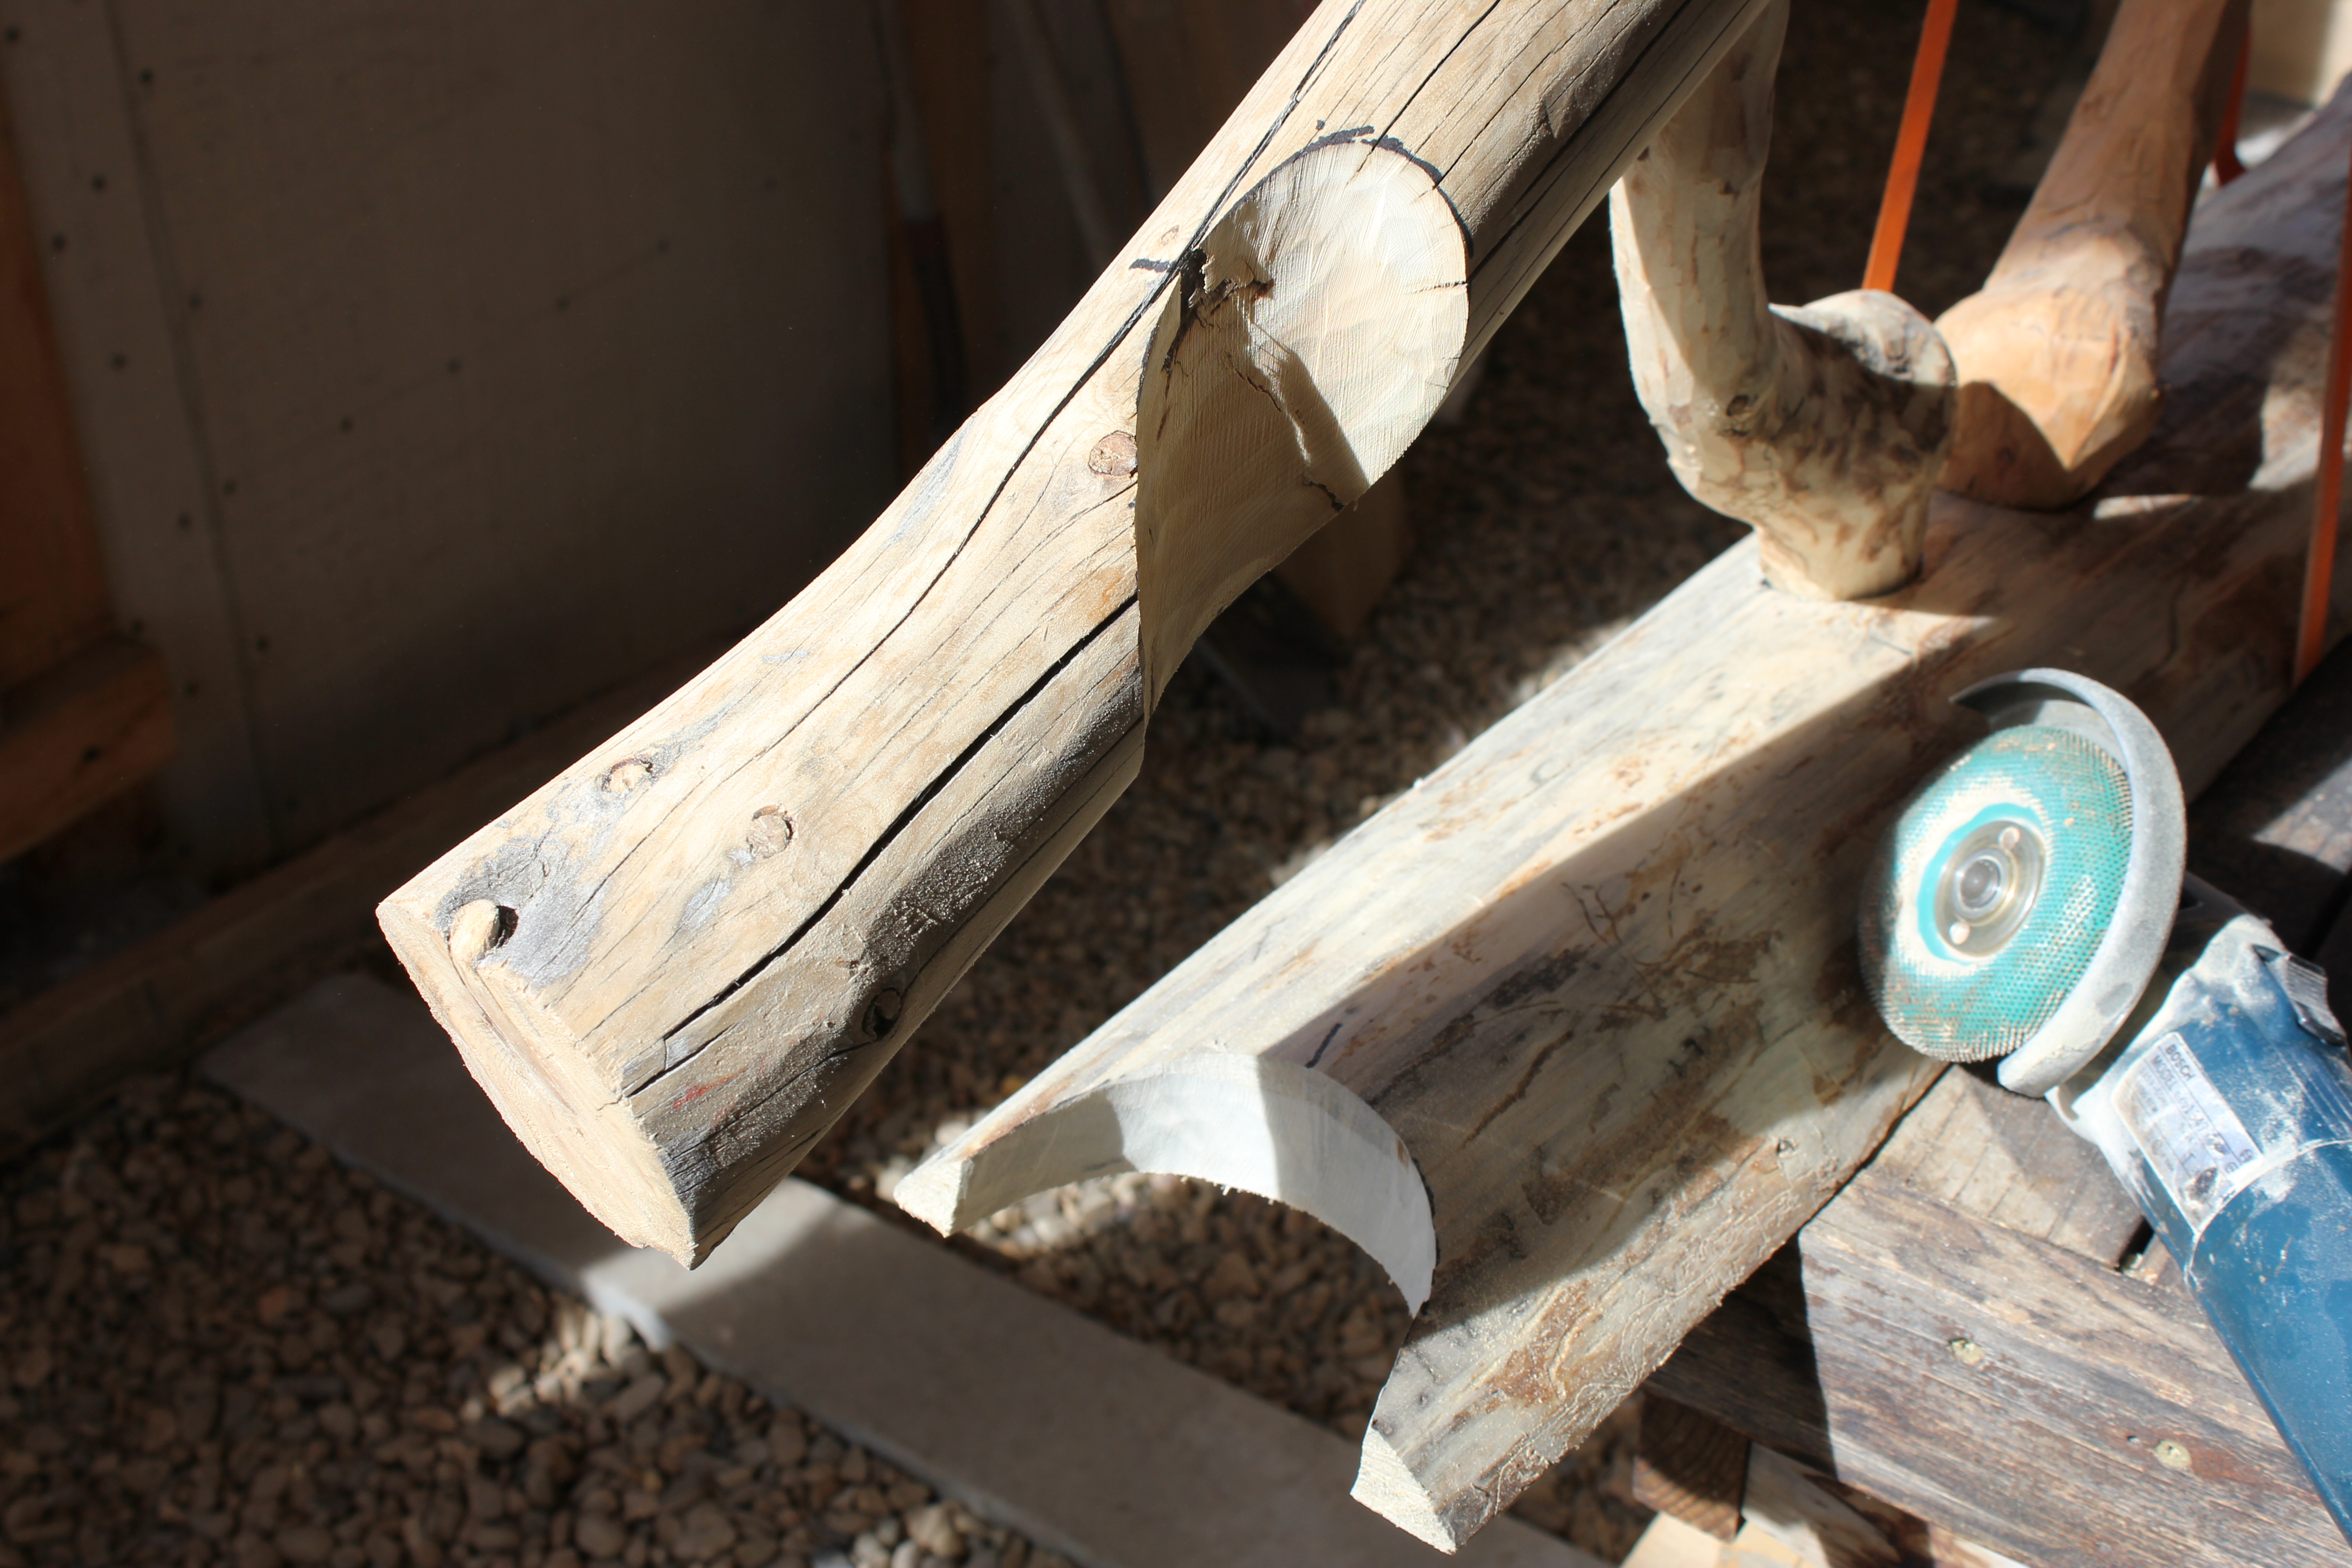
This photo is the first in a series showing the cut outs in both the top and bottom of the back rest to receive the leg. It’s a top view, looking down after the cut out has been made in the top rail of the backrest. Notice the black line that has a matching line on the leg for correct realignment of the joints. Also in the photo is the grinder and special cutting wheel that works very well, with and against the grain, in “sculpting” these cut outs for the coped joinery.
Another view of the cut outs. I decided to leave the leg “as is” and fit it fully into the two cut outs. It’s complicated to make just one of these kinds of joints because of the curves and slants of the cut out, and of getting the correct horizontal alignments of the legs so the bench sits firmly on the ground.

This is another view of the leg fitted into the two cut outs, with the top joint showing the alignment marks I mentioned above.
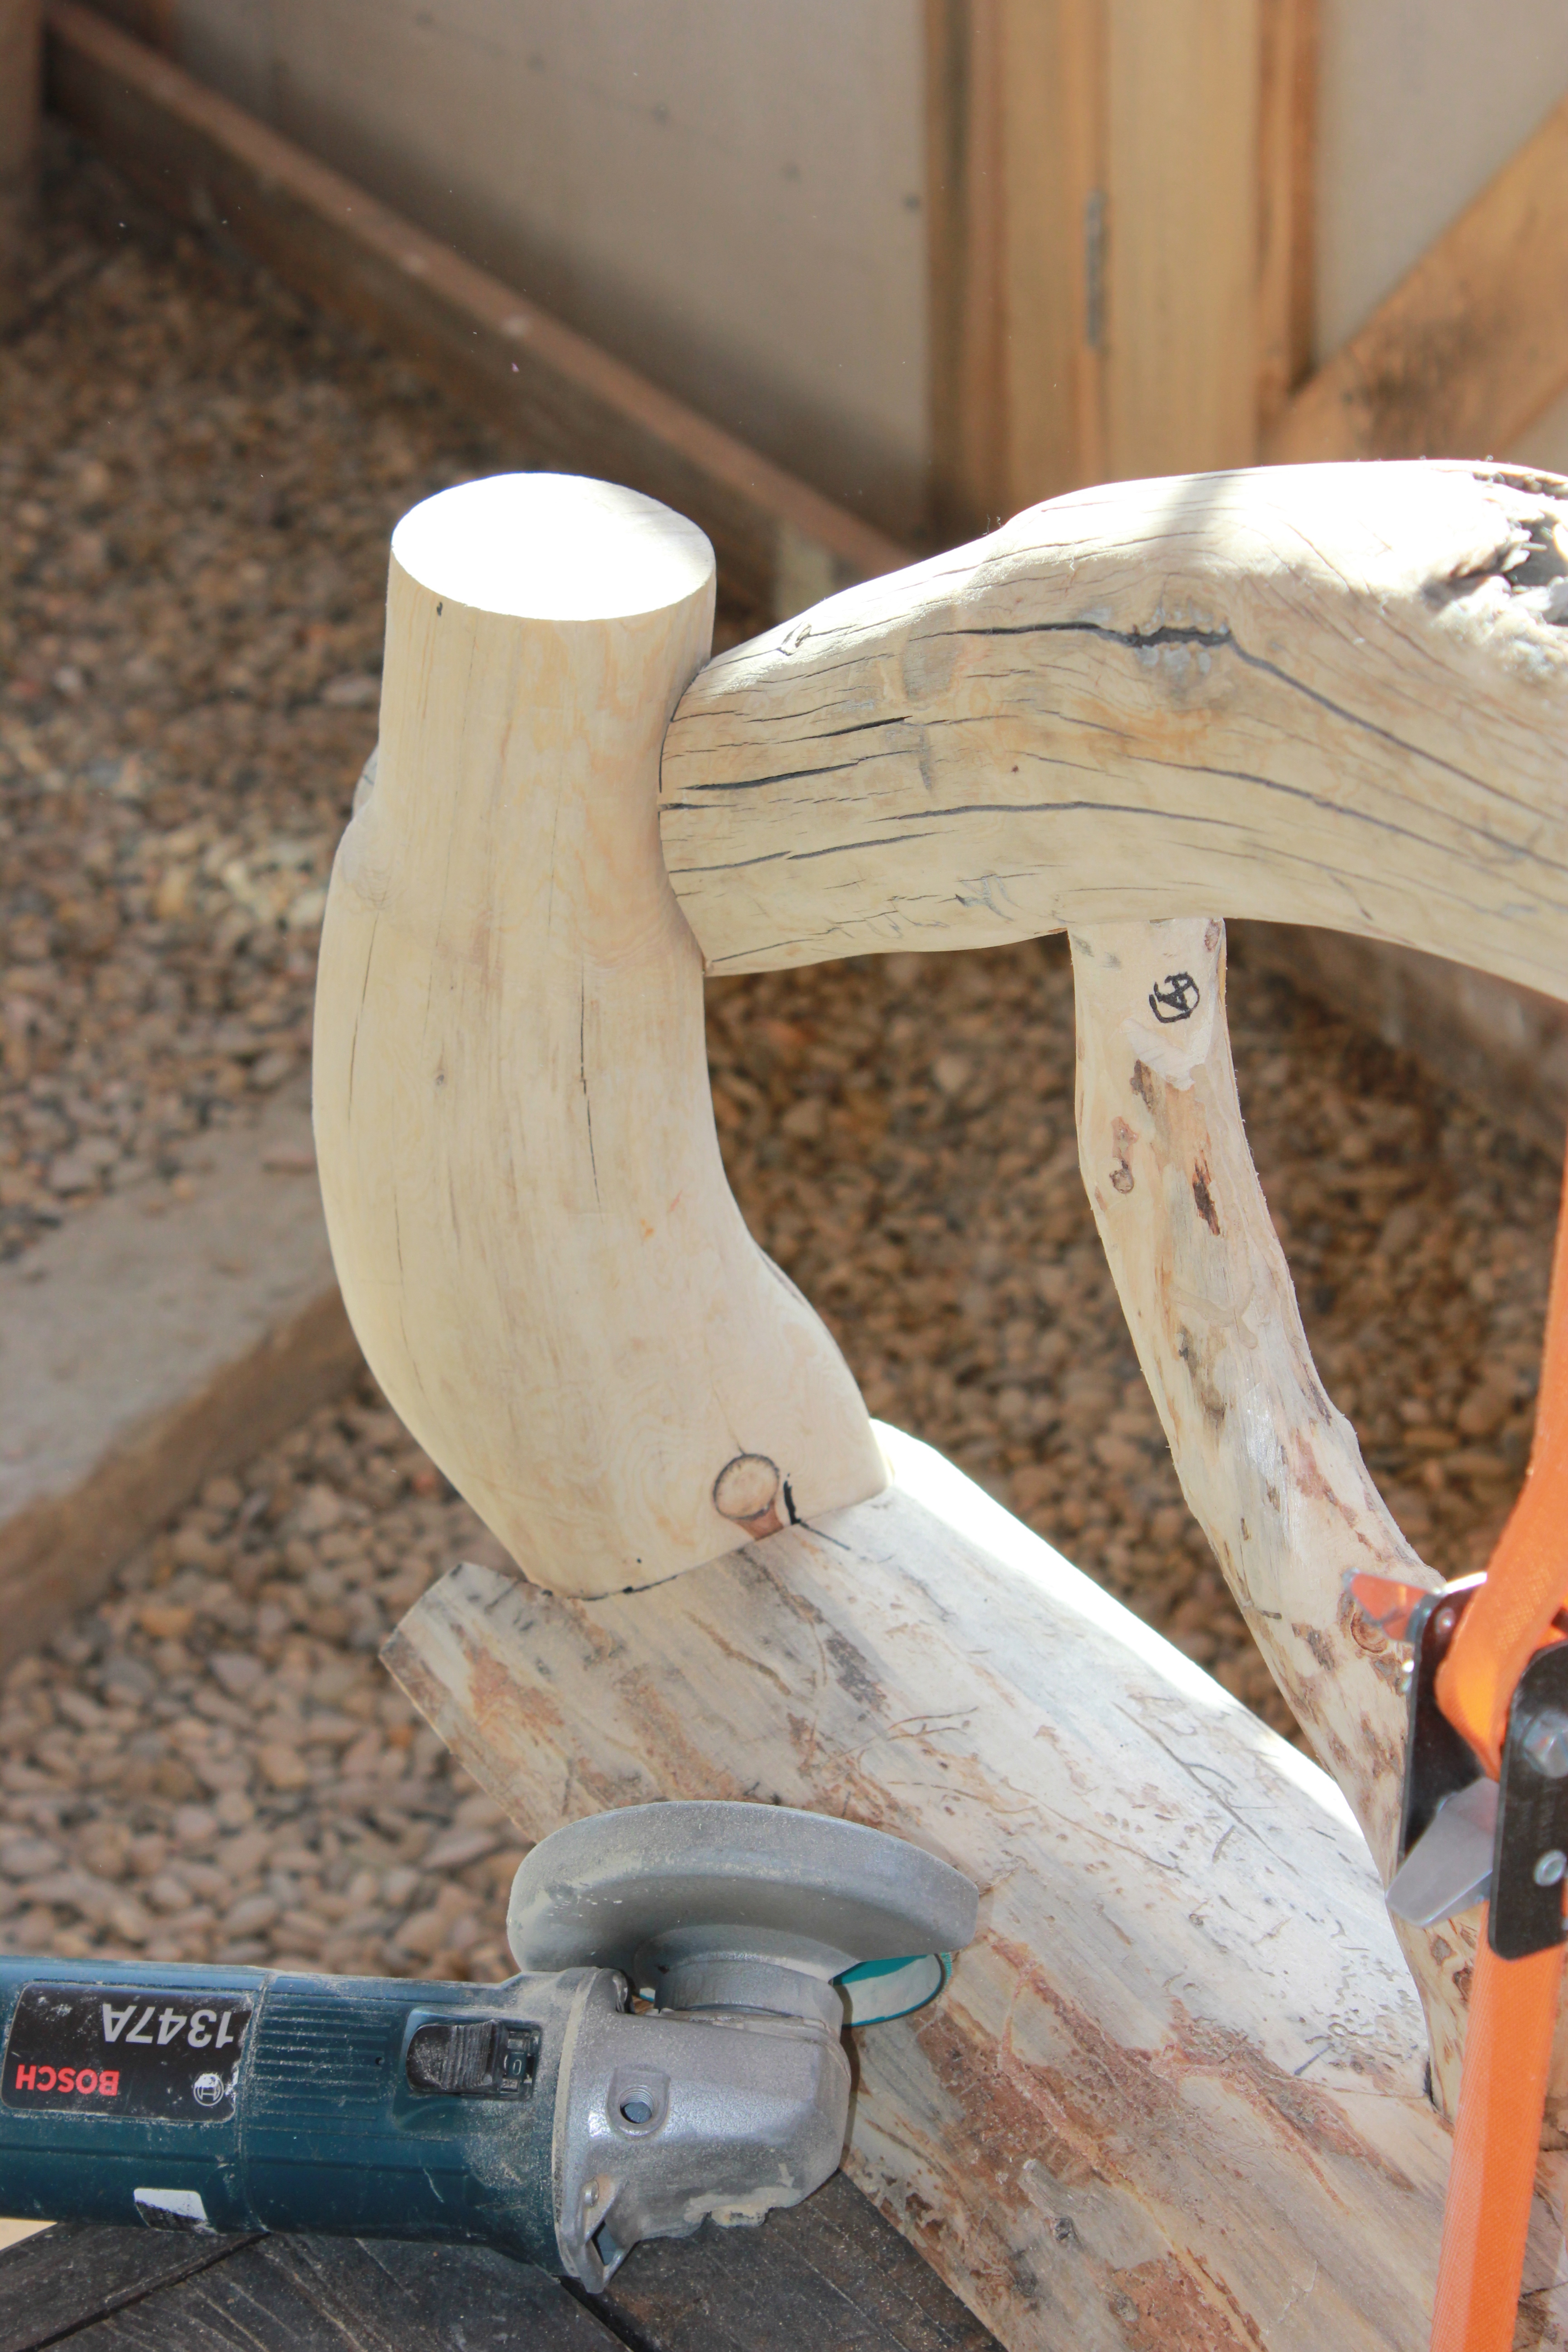
Viewed from the other side, the leg is securely fitted into the cut outs. At this point, I’m not sure how I will fasten the joints–whether I’ll dowel and glue them or use concealed wood screws to allow for disassembly because the bench is getting heavy and will be awkward to move.
Twenty-seven. Making the bench seat
The making of the bench seat with 8 pieces of 2″ thick planks.
Perhaps, since tree art is a collaboration with Nature, I tend to abhor straight lines (and square corners, etc.). In the making of edge to edge butt joints, I like the mate cut, waney edge joints as a design detail.
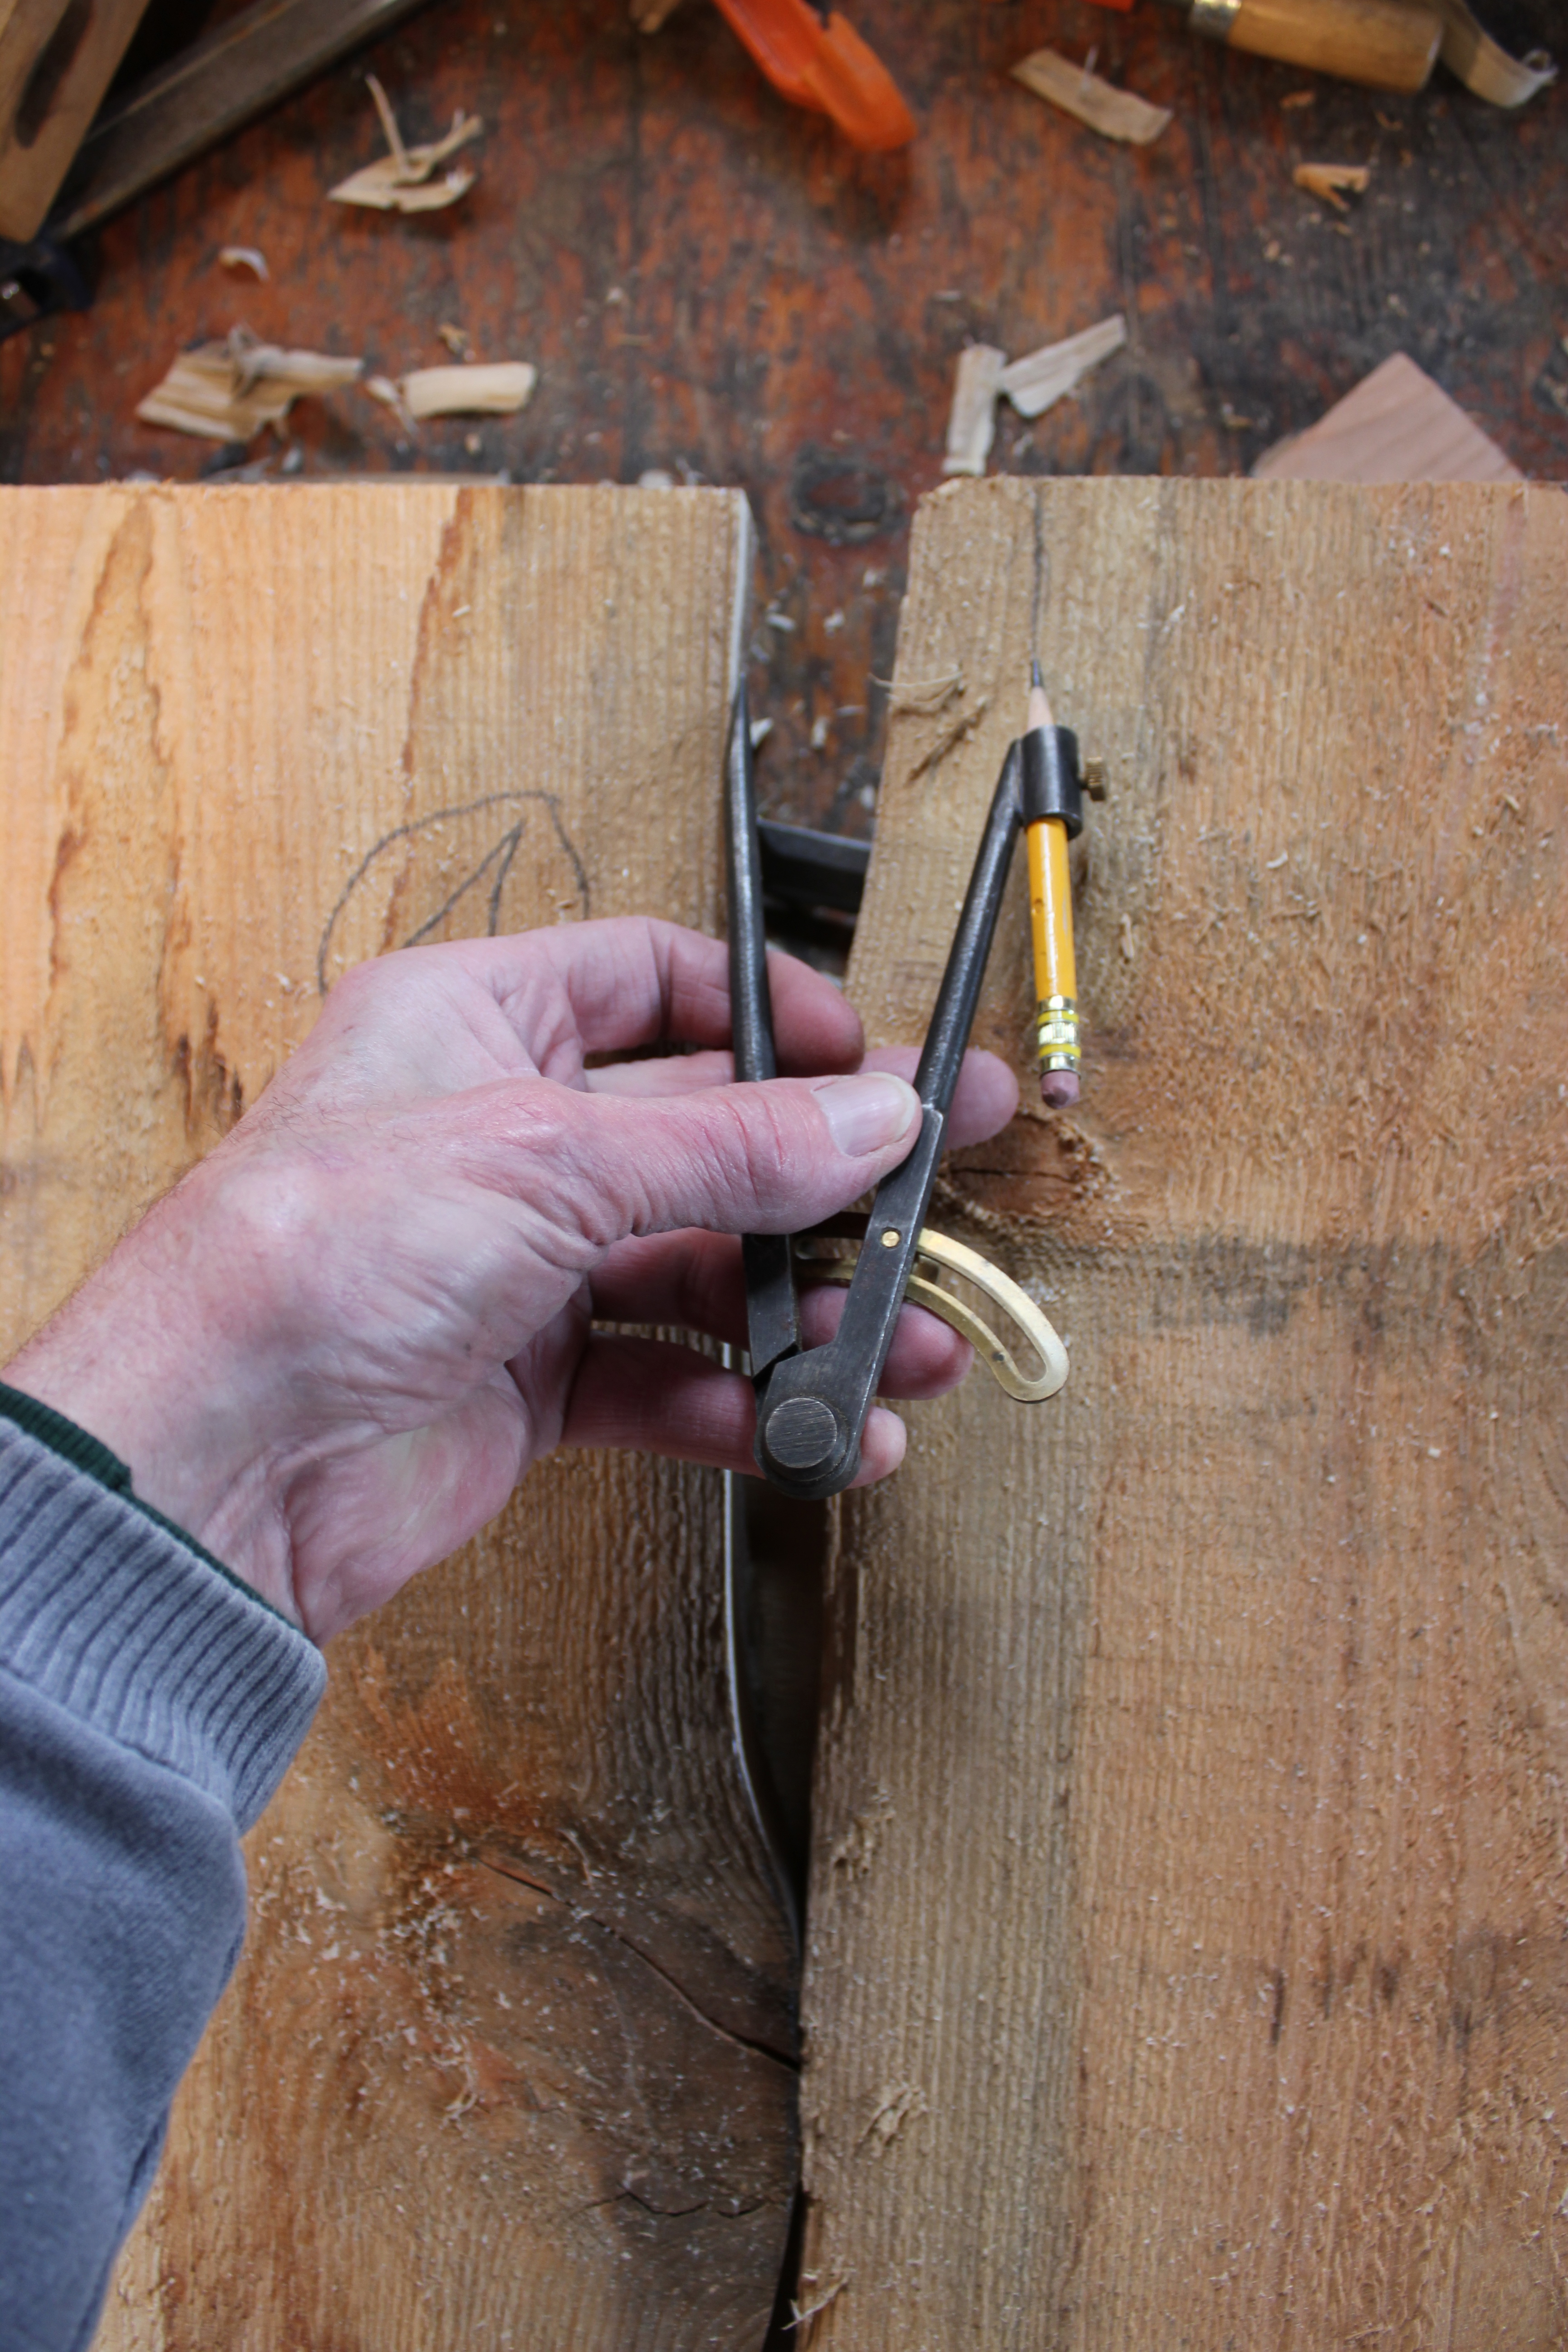
After one side of a piece has been cut on the bandsaw, the compass serves to scribe the adjoining piece, for a paired and mate cut joint. It’s important to keep the point and the pencil directly opposite to each other, closely perpendicular to the direction of the joint.

Piece number 4 will now go to the bandsaw for a cut of the second half of the paired pieces, for an approximate fit. It is important to number the paired pieces for replacement.

The edges of these pieces have all been cut on the bandsaw. Now, one joint at a time, after each end of the paired pieces has a log dog driven in, the jigsaw will mate cut the final butt joint.
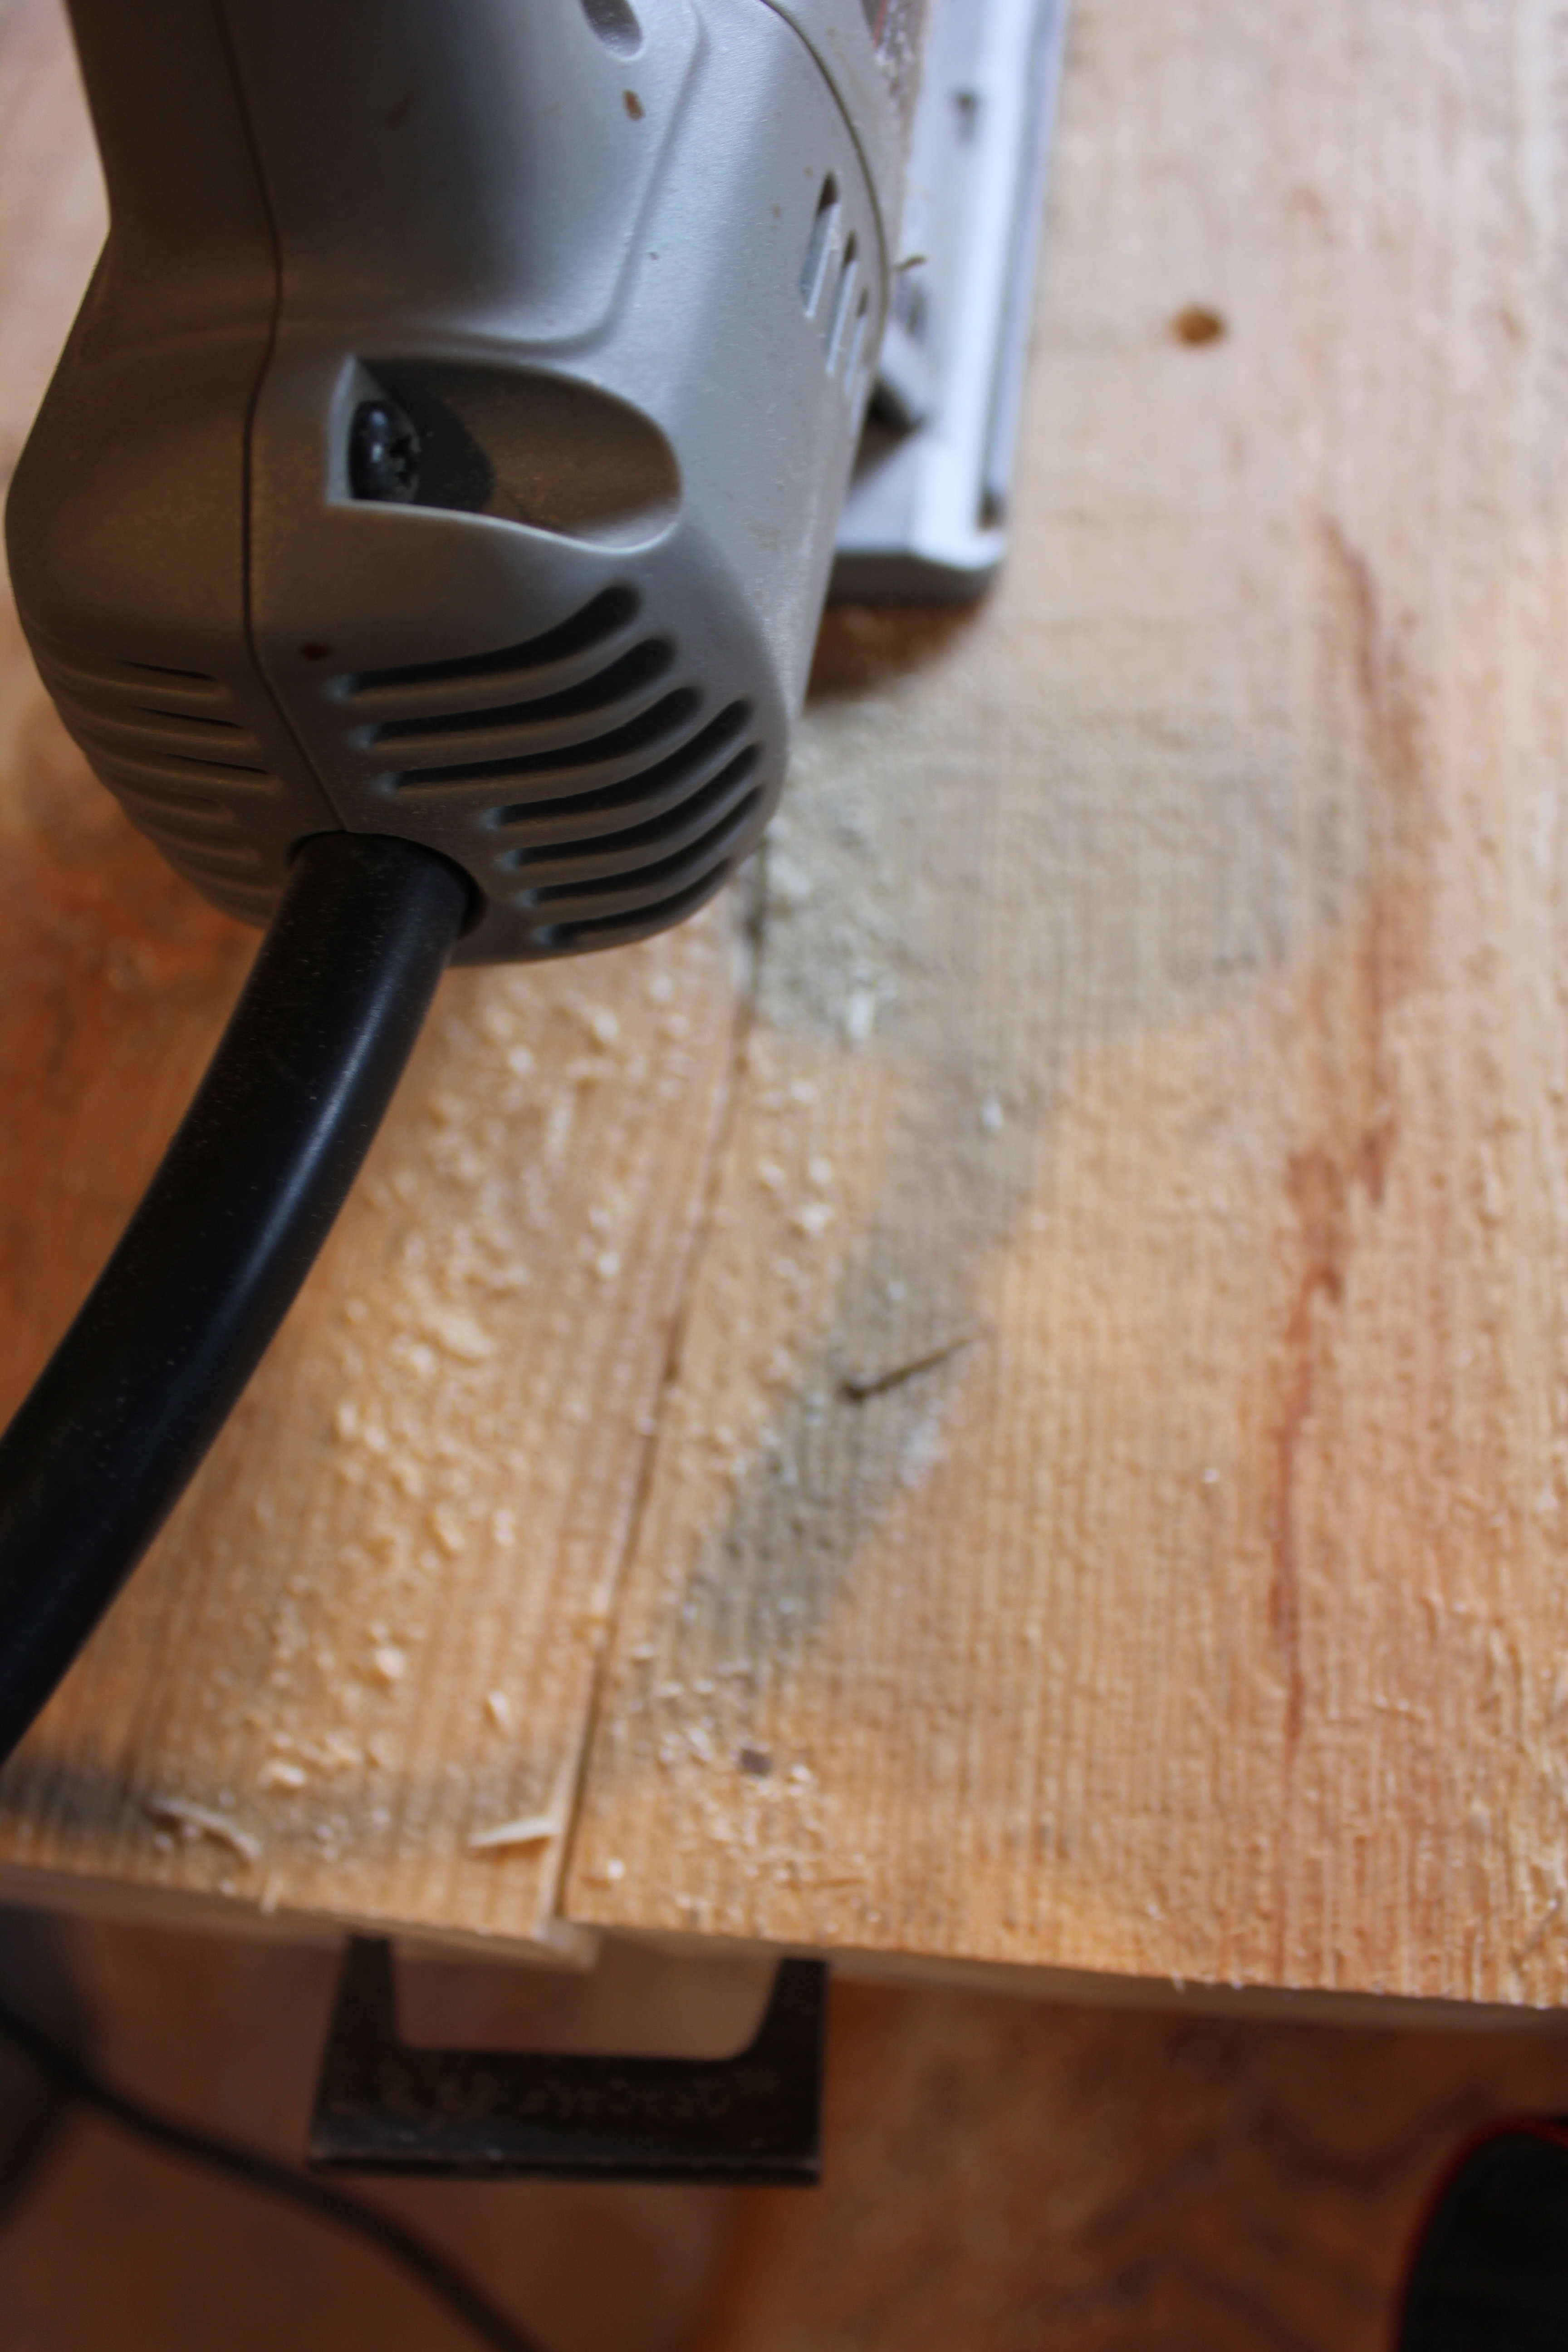
Here’s a close up of the mate cut in progress. Tightly fitting the joint sometimes takes several passes, releasing the log dogs each time, depending on how tightly the bandsaw’s approximate cuts fit. The two points of each log dog are pointed and wedge shaped so they draw the joint together as they are driven into the end grain.
The jigsaw is cutting a uniform kerf the length of the pieces, so when the log dogs are removed the waney edges fit tightly, i.e., are mated to each other.

These 8 pieces are ready for gluing and clamping to make the seating surface for the bench, about 80′ long and 20″ deep–deep enough for the backrest to be placed on top.
Twenty-six. (B) Making the bench backrest (cont’d)
Post Twenty-six was getting too lengthy, probably too many photos and not enough text. I’ve been saving two posts as drafts rather than publishing them. I’m thinking now that it doesn’t matter all that much if I go ahead and publish them. Just as tree art is not fine woodworking, my writing in these posts is not fine literature.
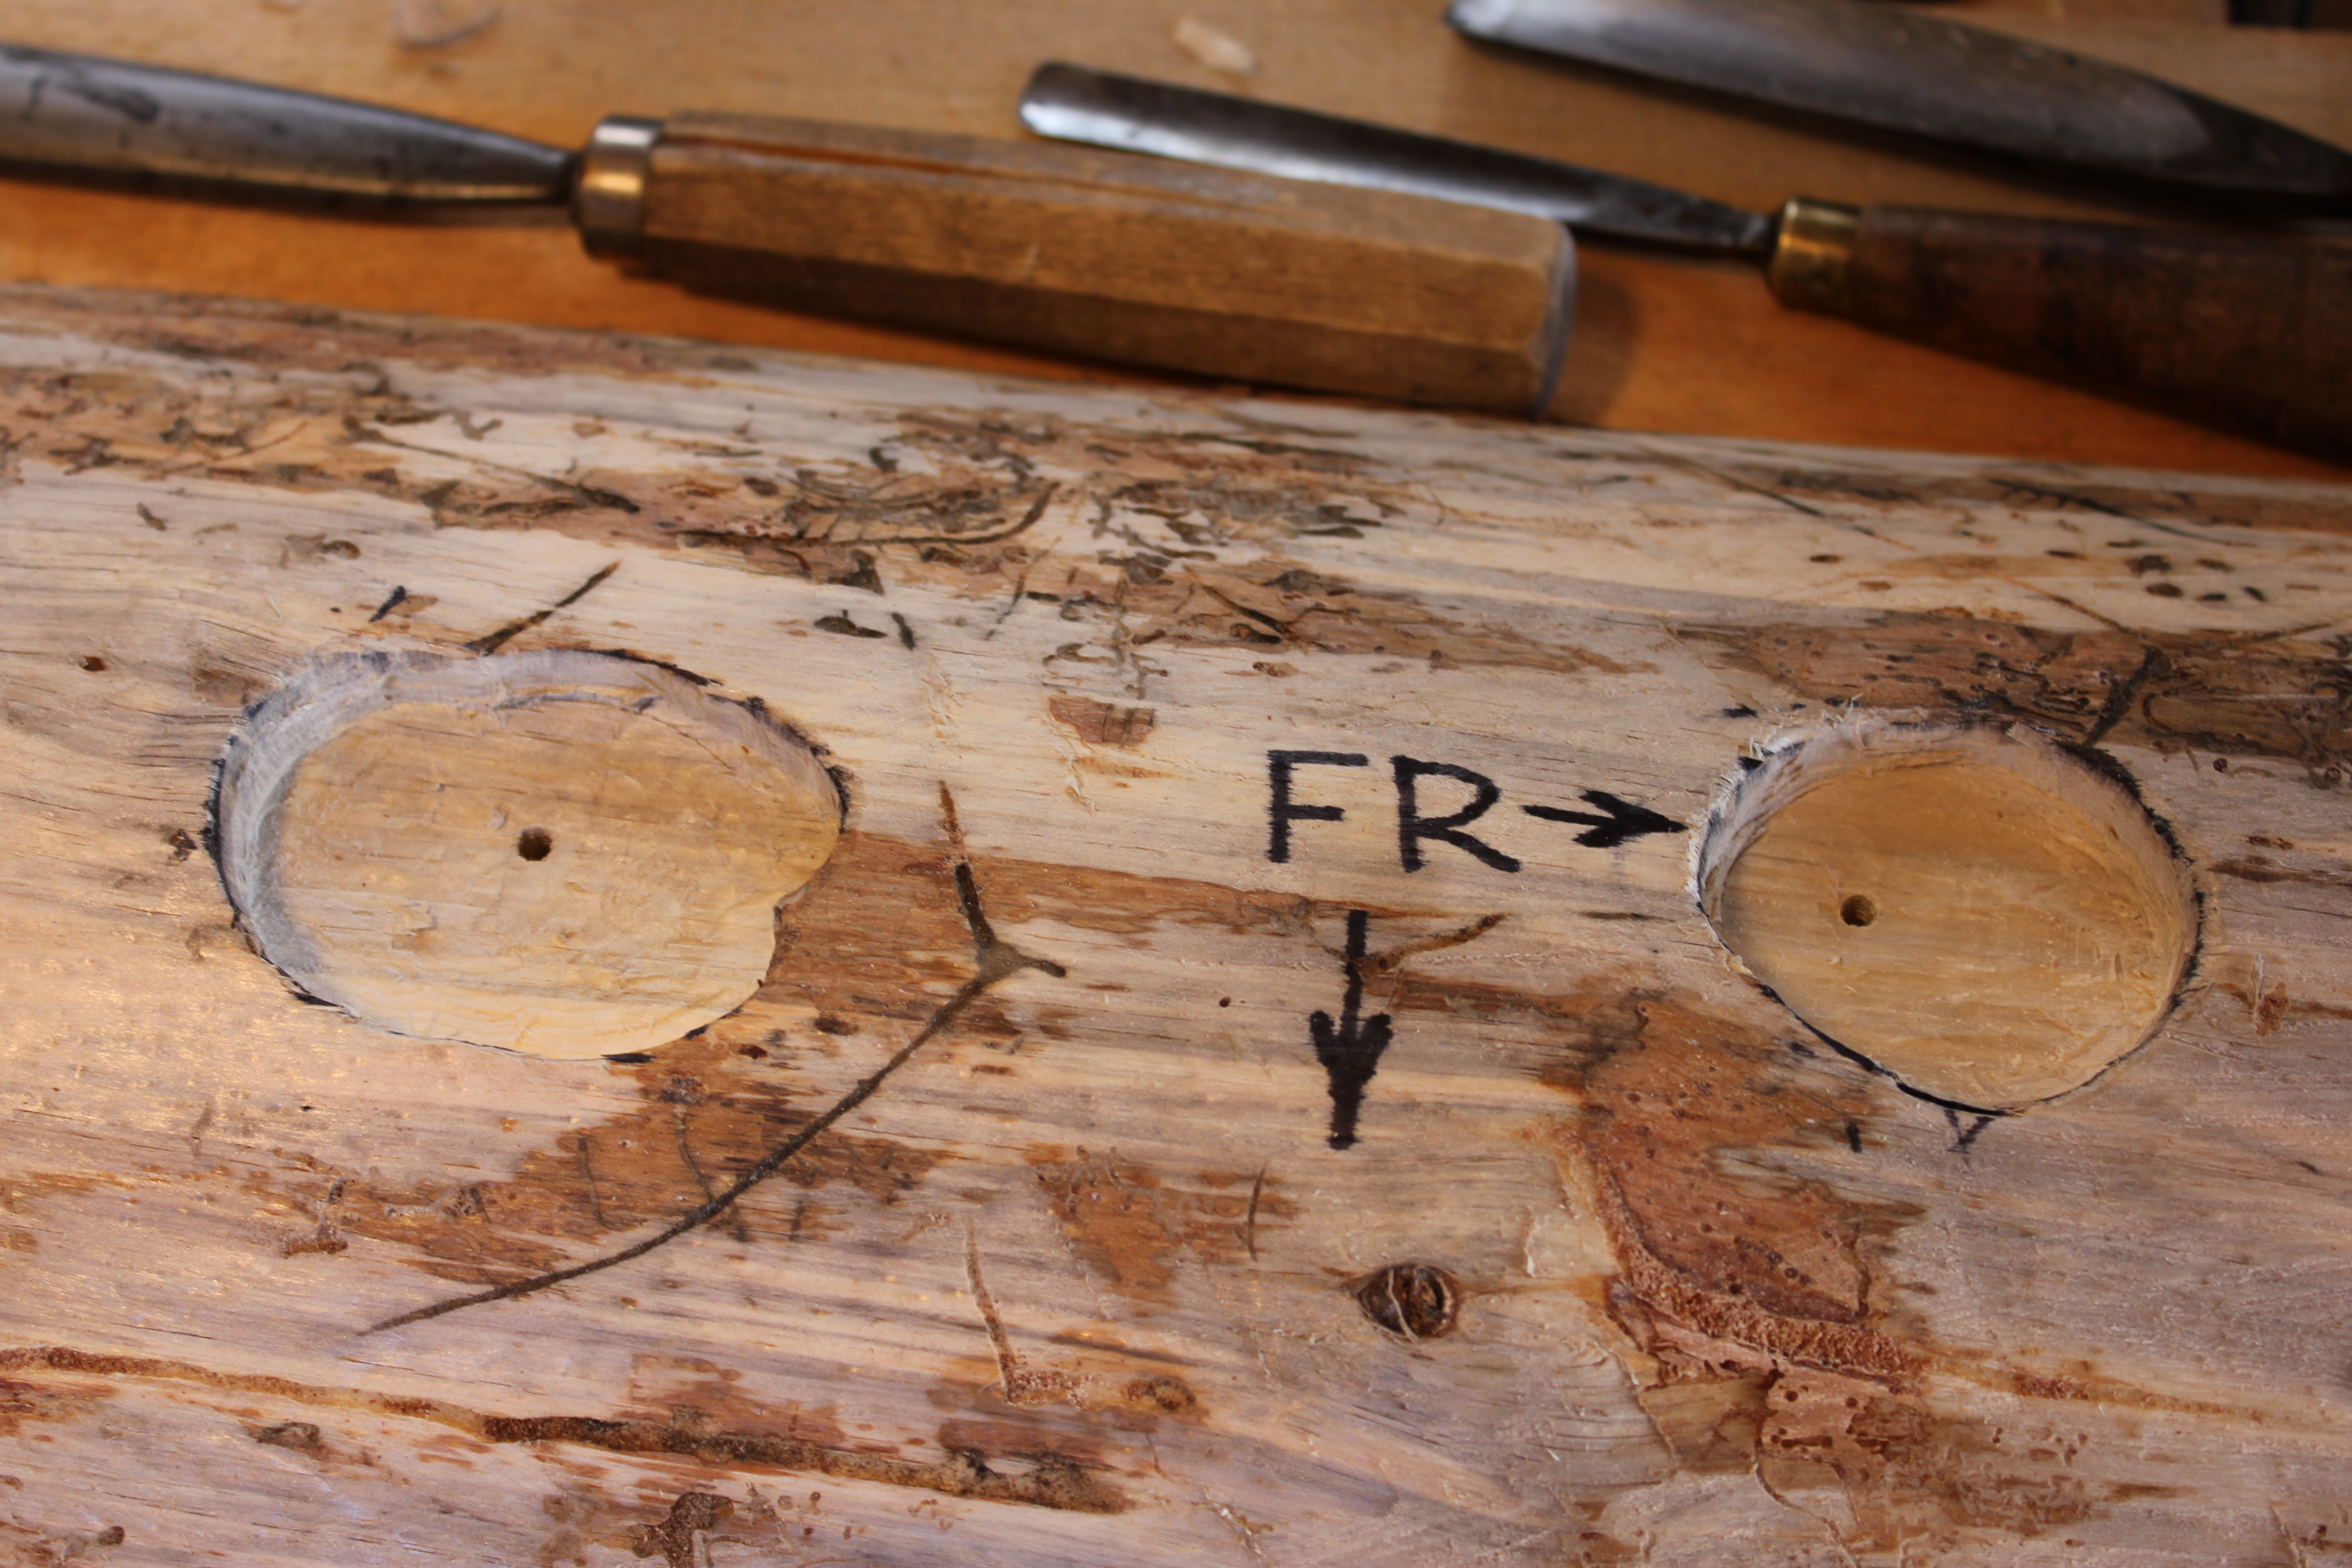
After the bark was drawknife off the slab, I scribed around the end of each swan neck for a matching mortise to secure each of them as a tenon. The FR with arrows remind me which edge of the slab is to the front and which end is to the right.

The four swan necks will connect this 80″ long slab with both the backrest and the bench seat. Eventually, the two back legs of the bench will also be joined to this slab.

Each swan neck tenon is now secured in its mortise by a long wood screw inserted and tightened through a pilot hole predrilled through the slab from its flat underside.

With the backrest mounted to the slab, I’m now ready to think about the bench seat, which I hadn’t designed yet or selected its materials. This project has become more of a design-in-progress than I feel comfortable with ….
Twenty-six. (A) Making the bench backrest … Feb 28, 2013
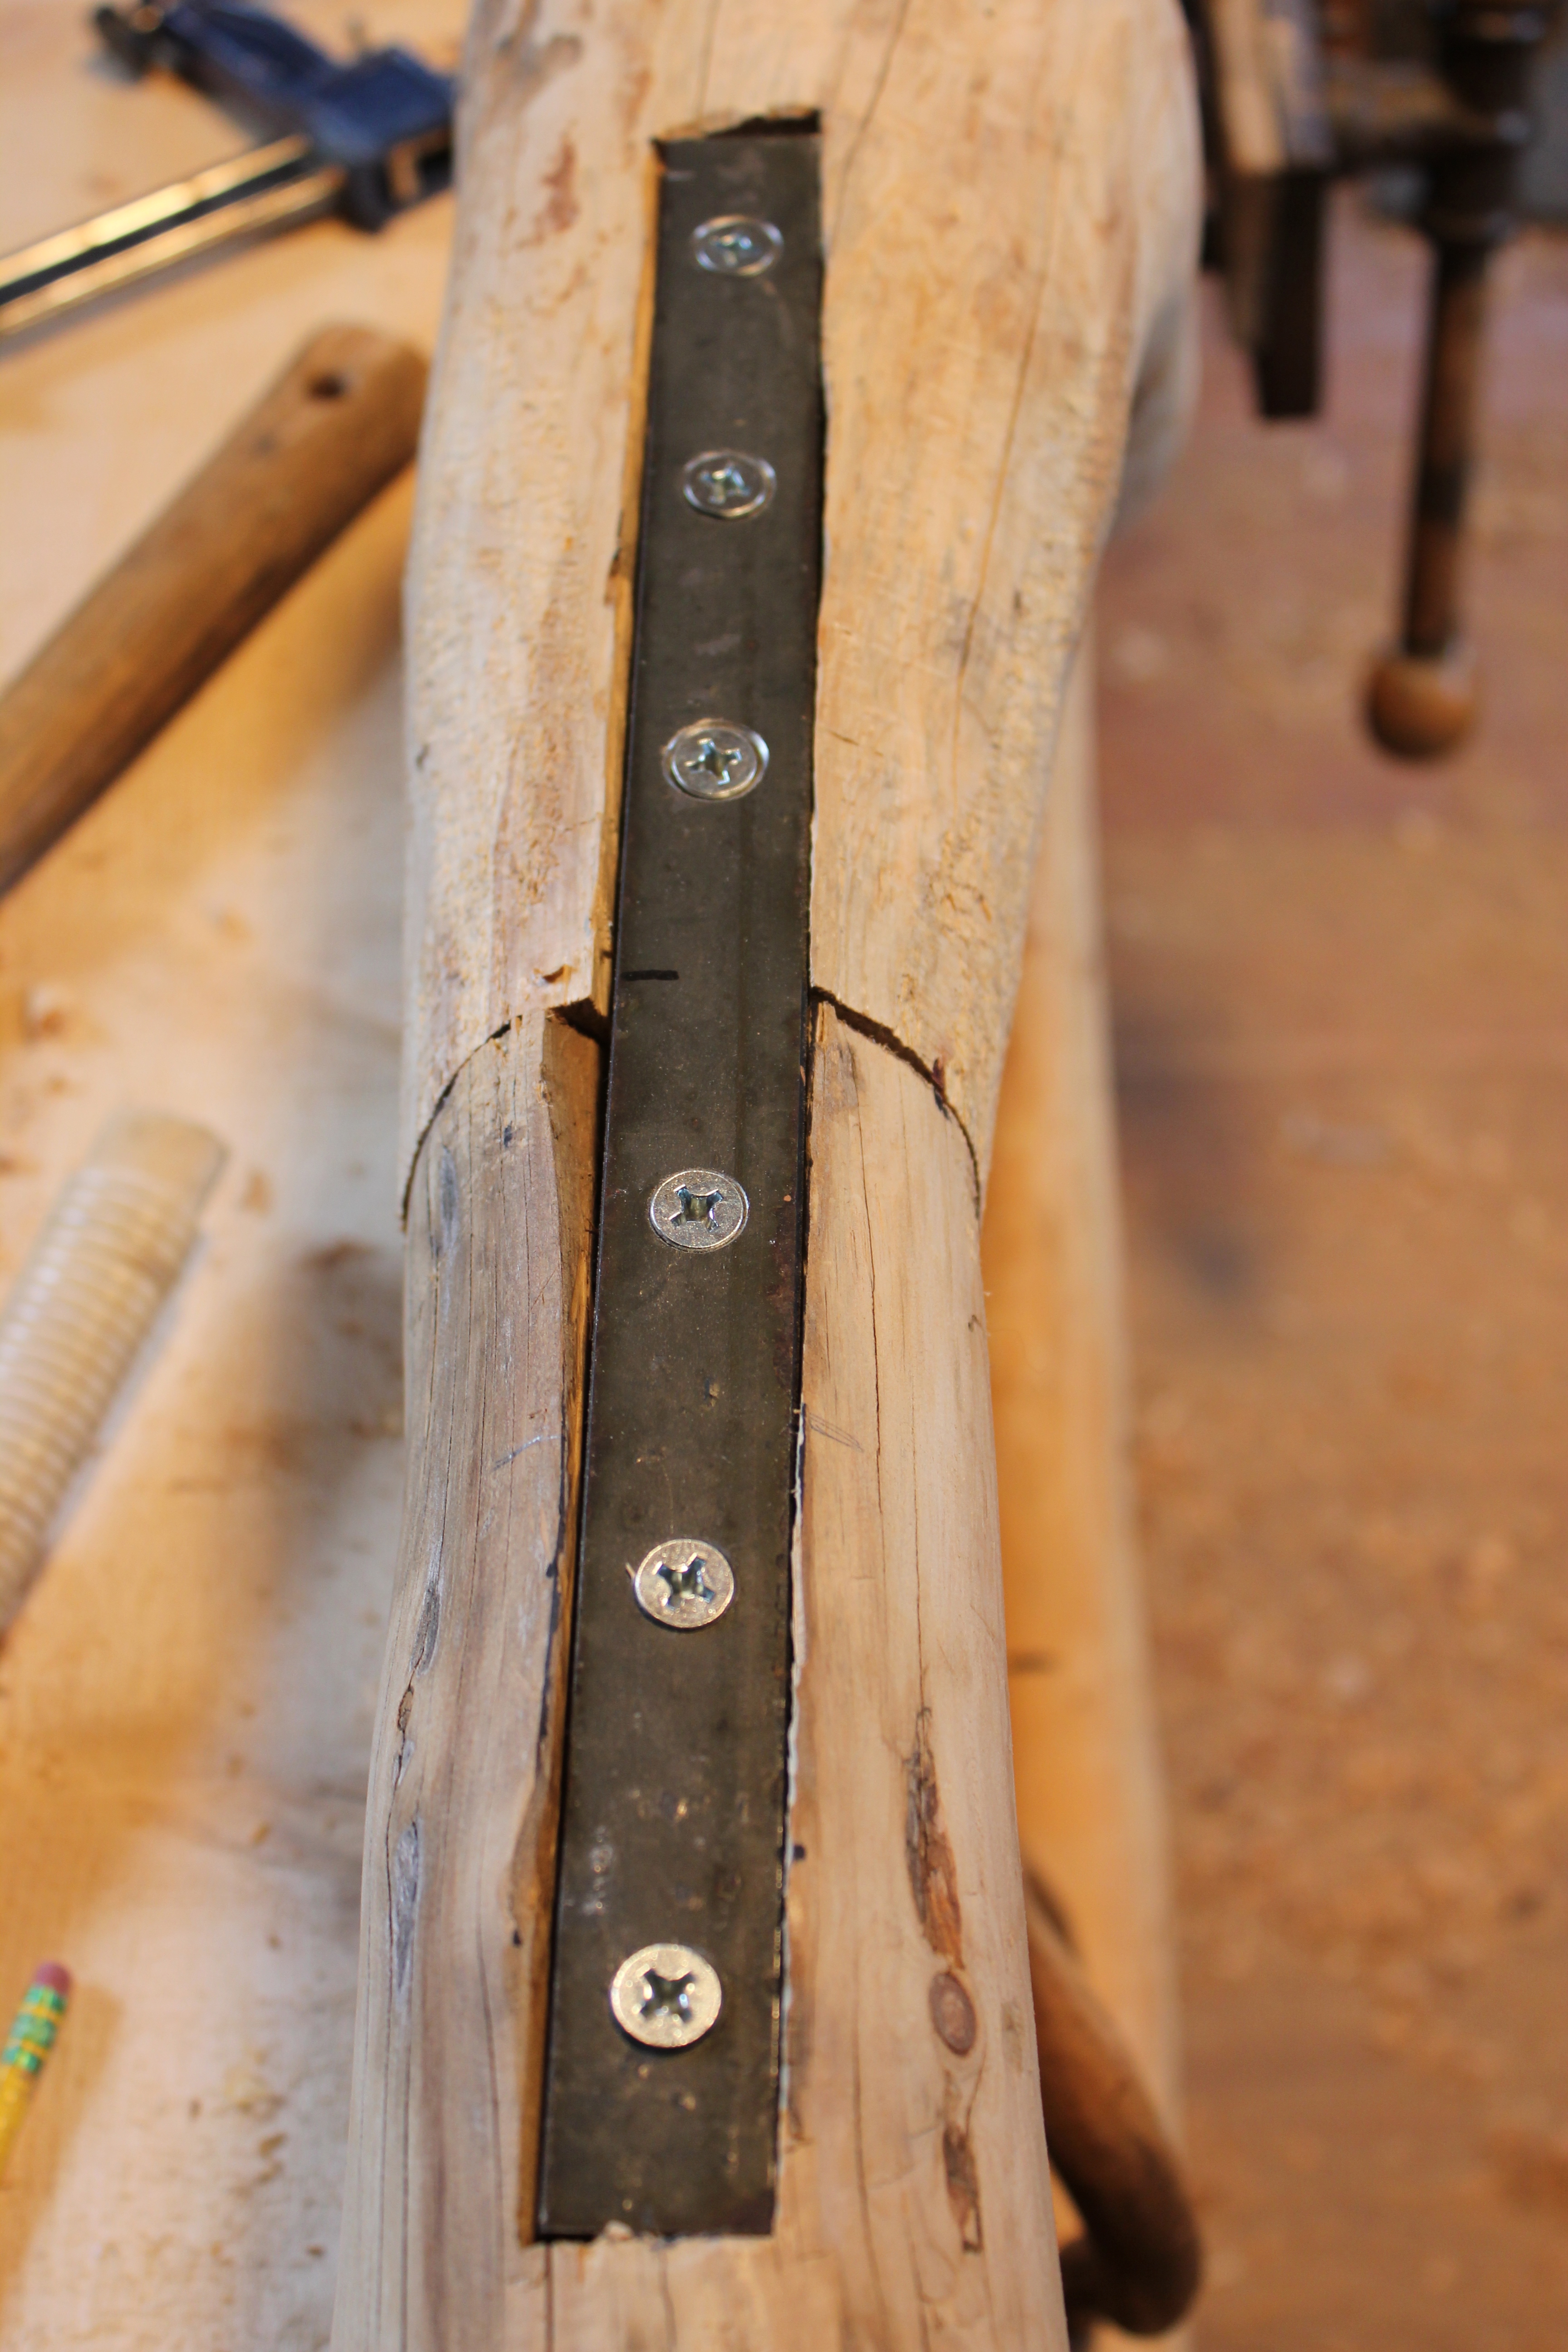
The flat iron bar is inlaid into the underside, to be concealed, and secured with long, countersunk wood screws. The end to end butt joint of the swan necks is also reinforced by a one inch diameter hardwood dowel, centered and penetrating more than 3″ into the end grain of each piece.
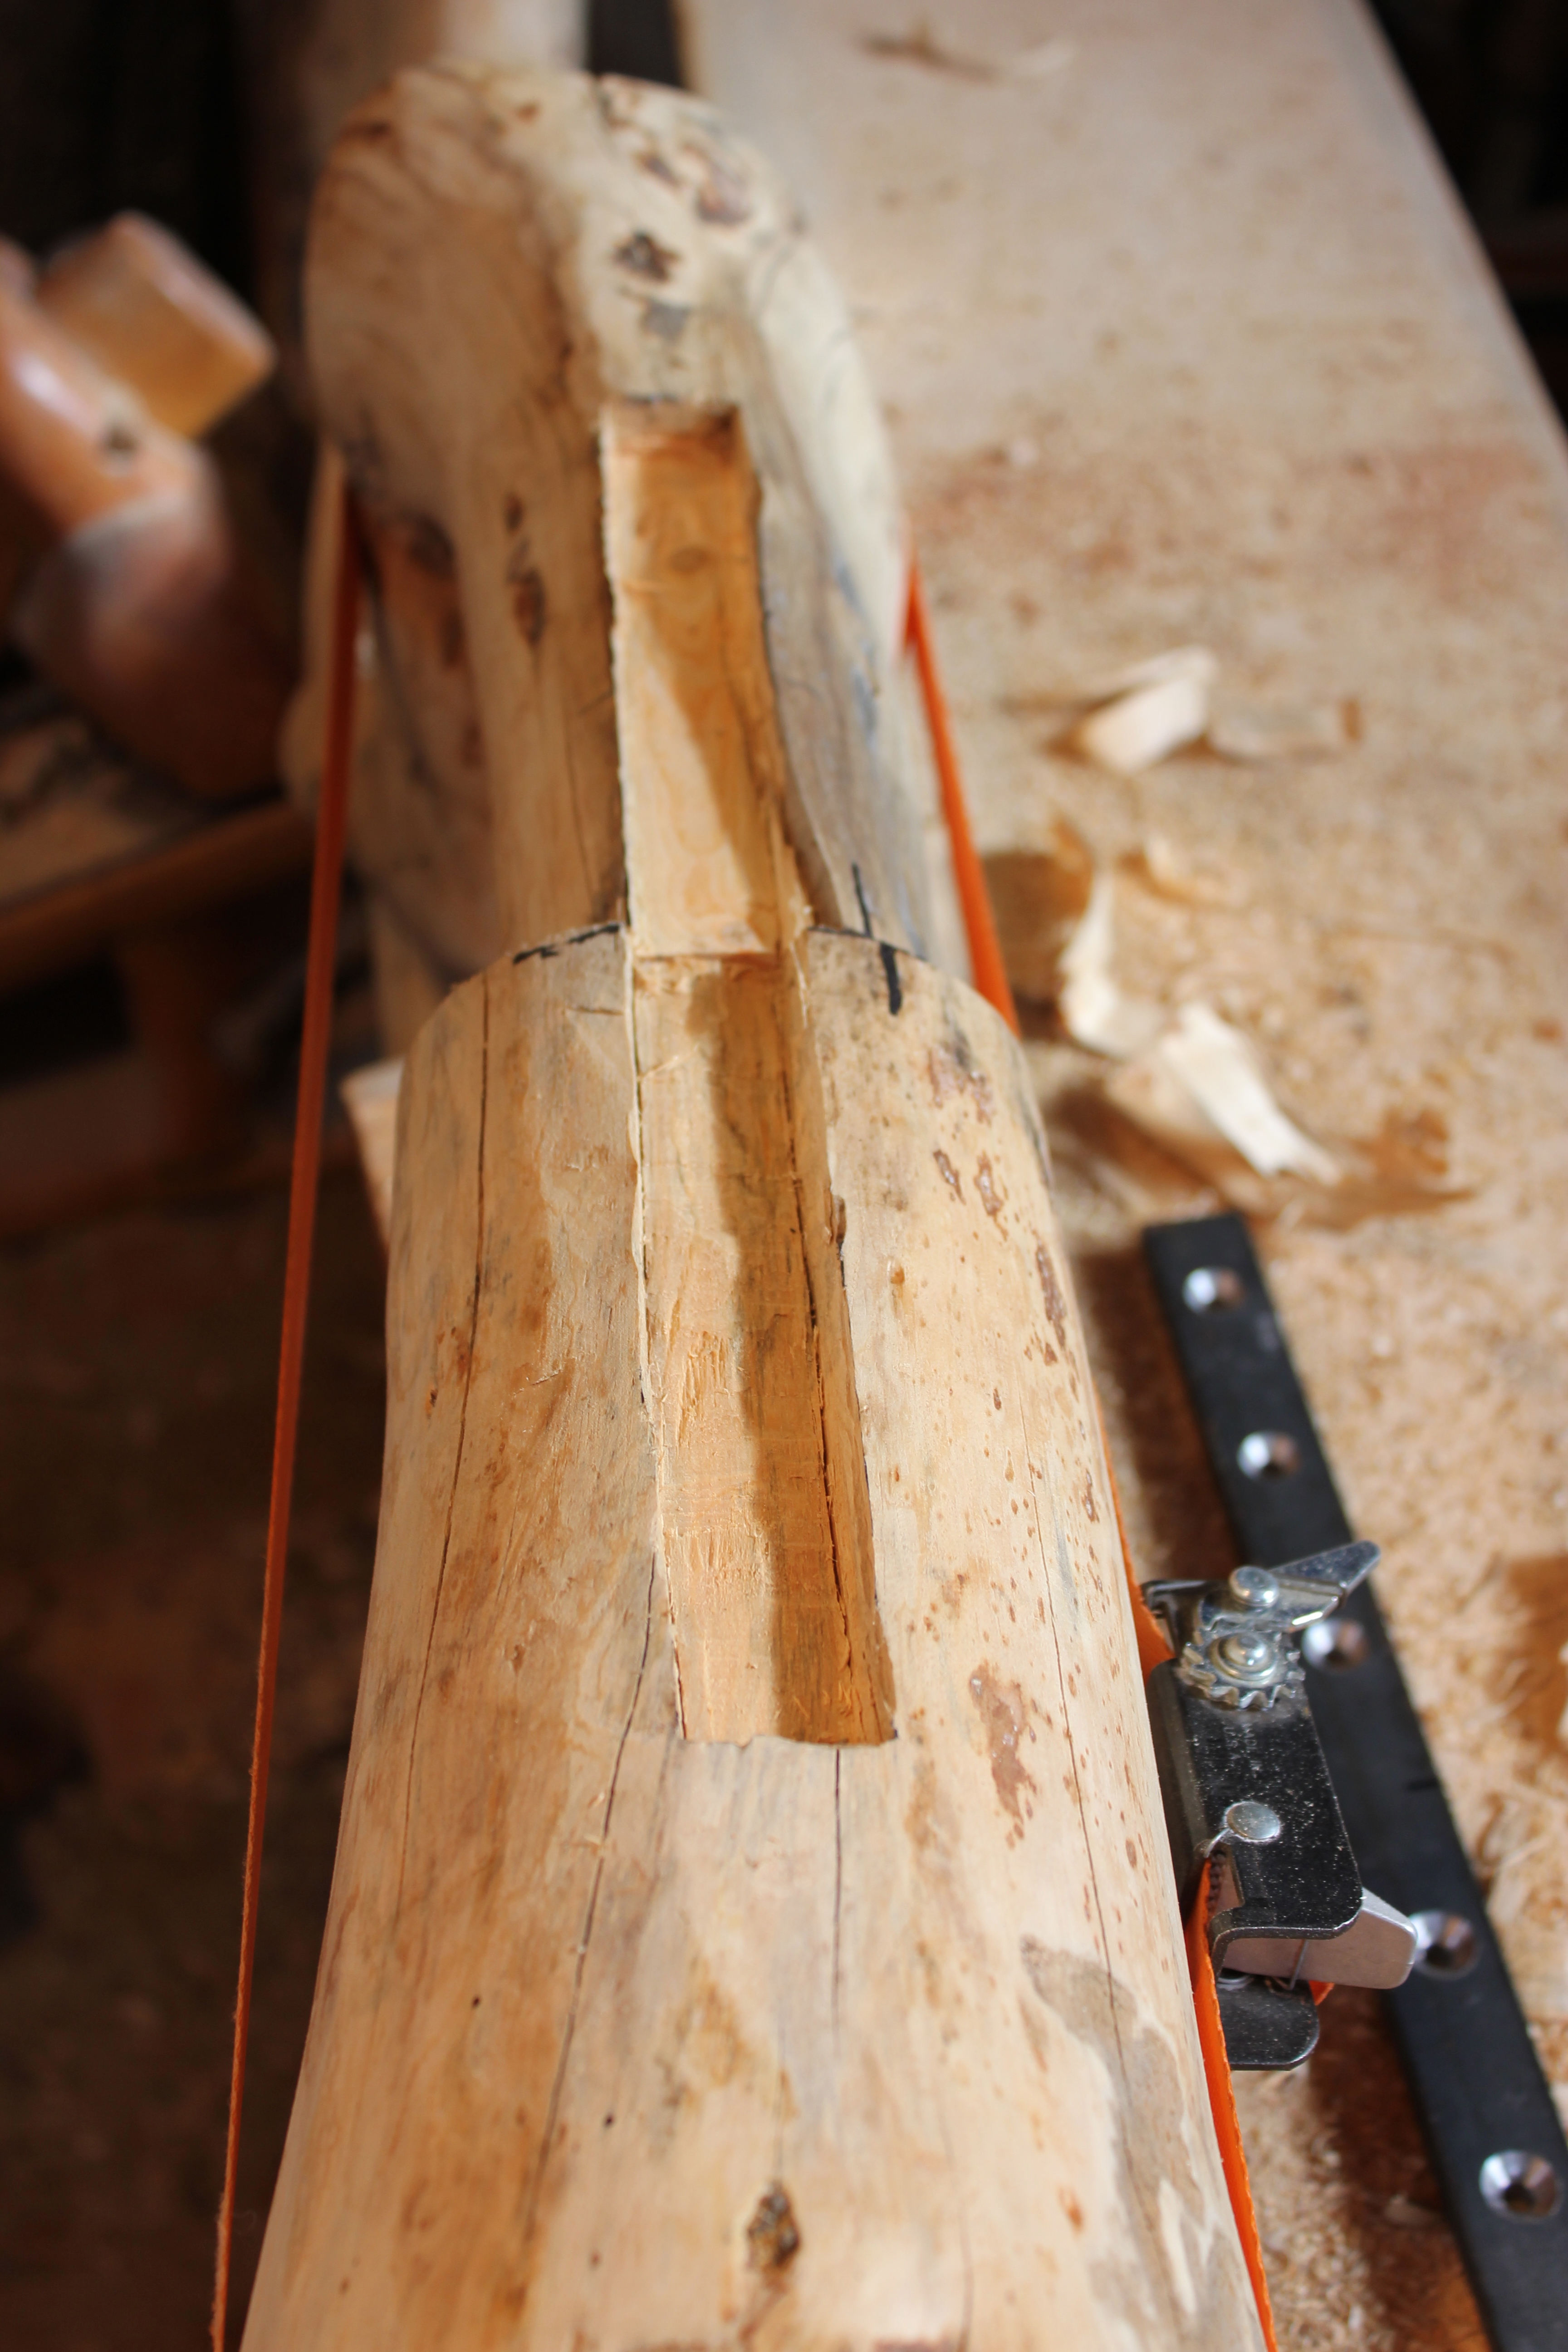
These round tenons are made by hand with a draw knife and sizing jig to fit a drilled mortise. In this piece I’ve also used free form tenon and mortise joints.
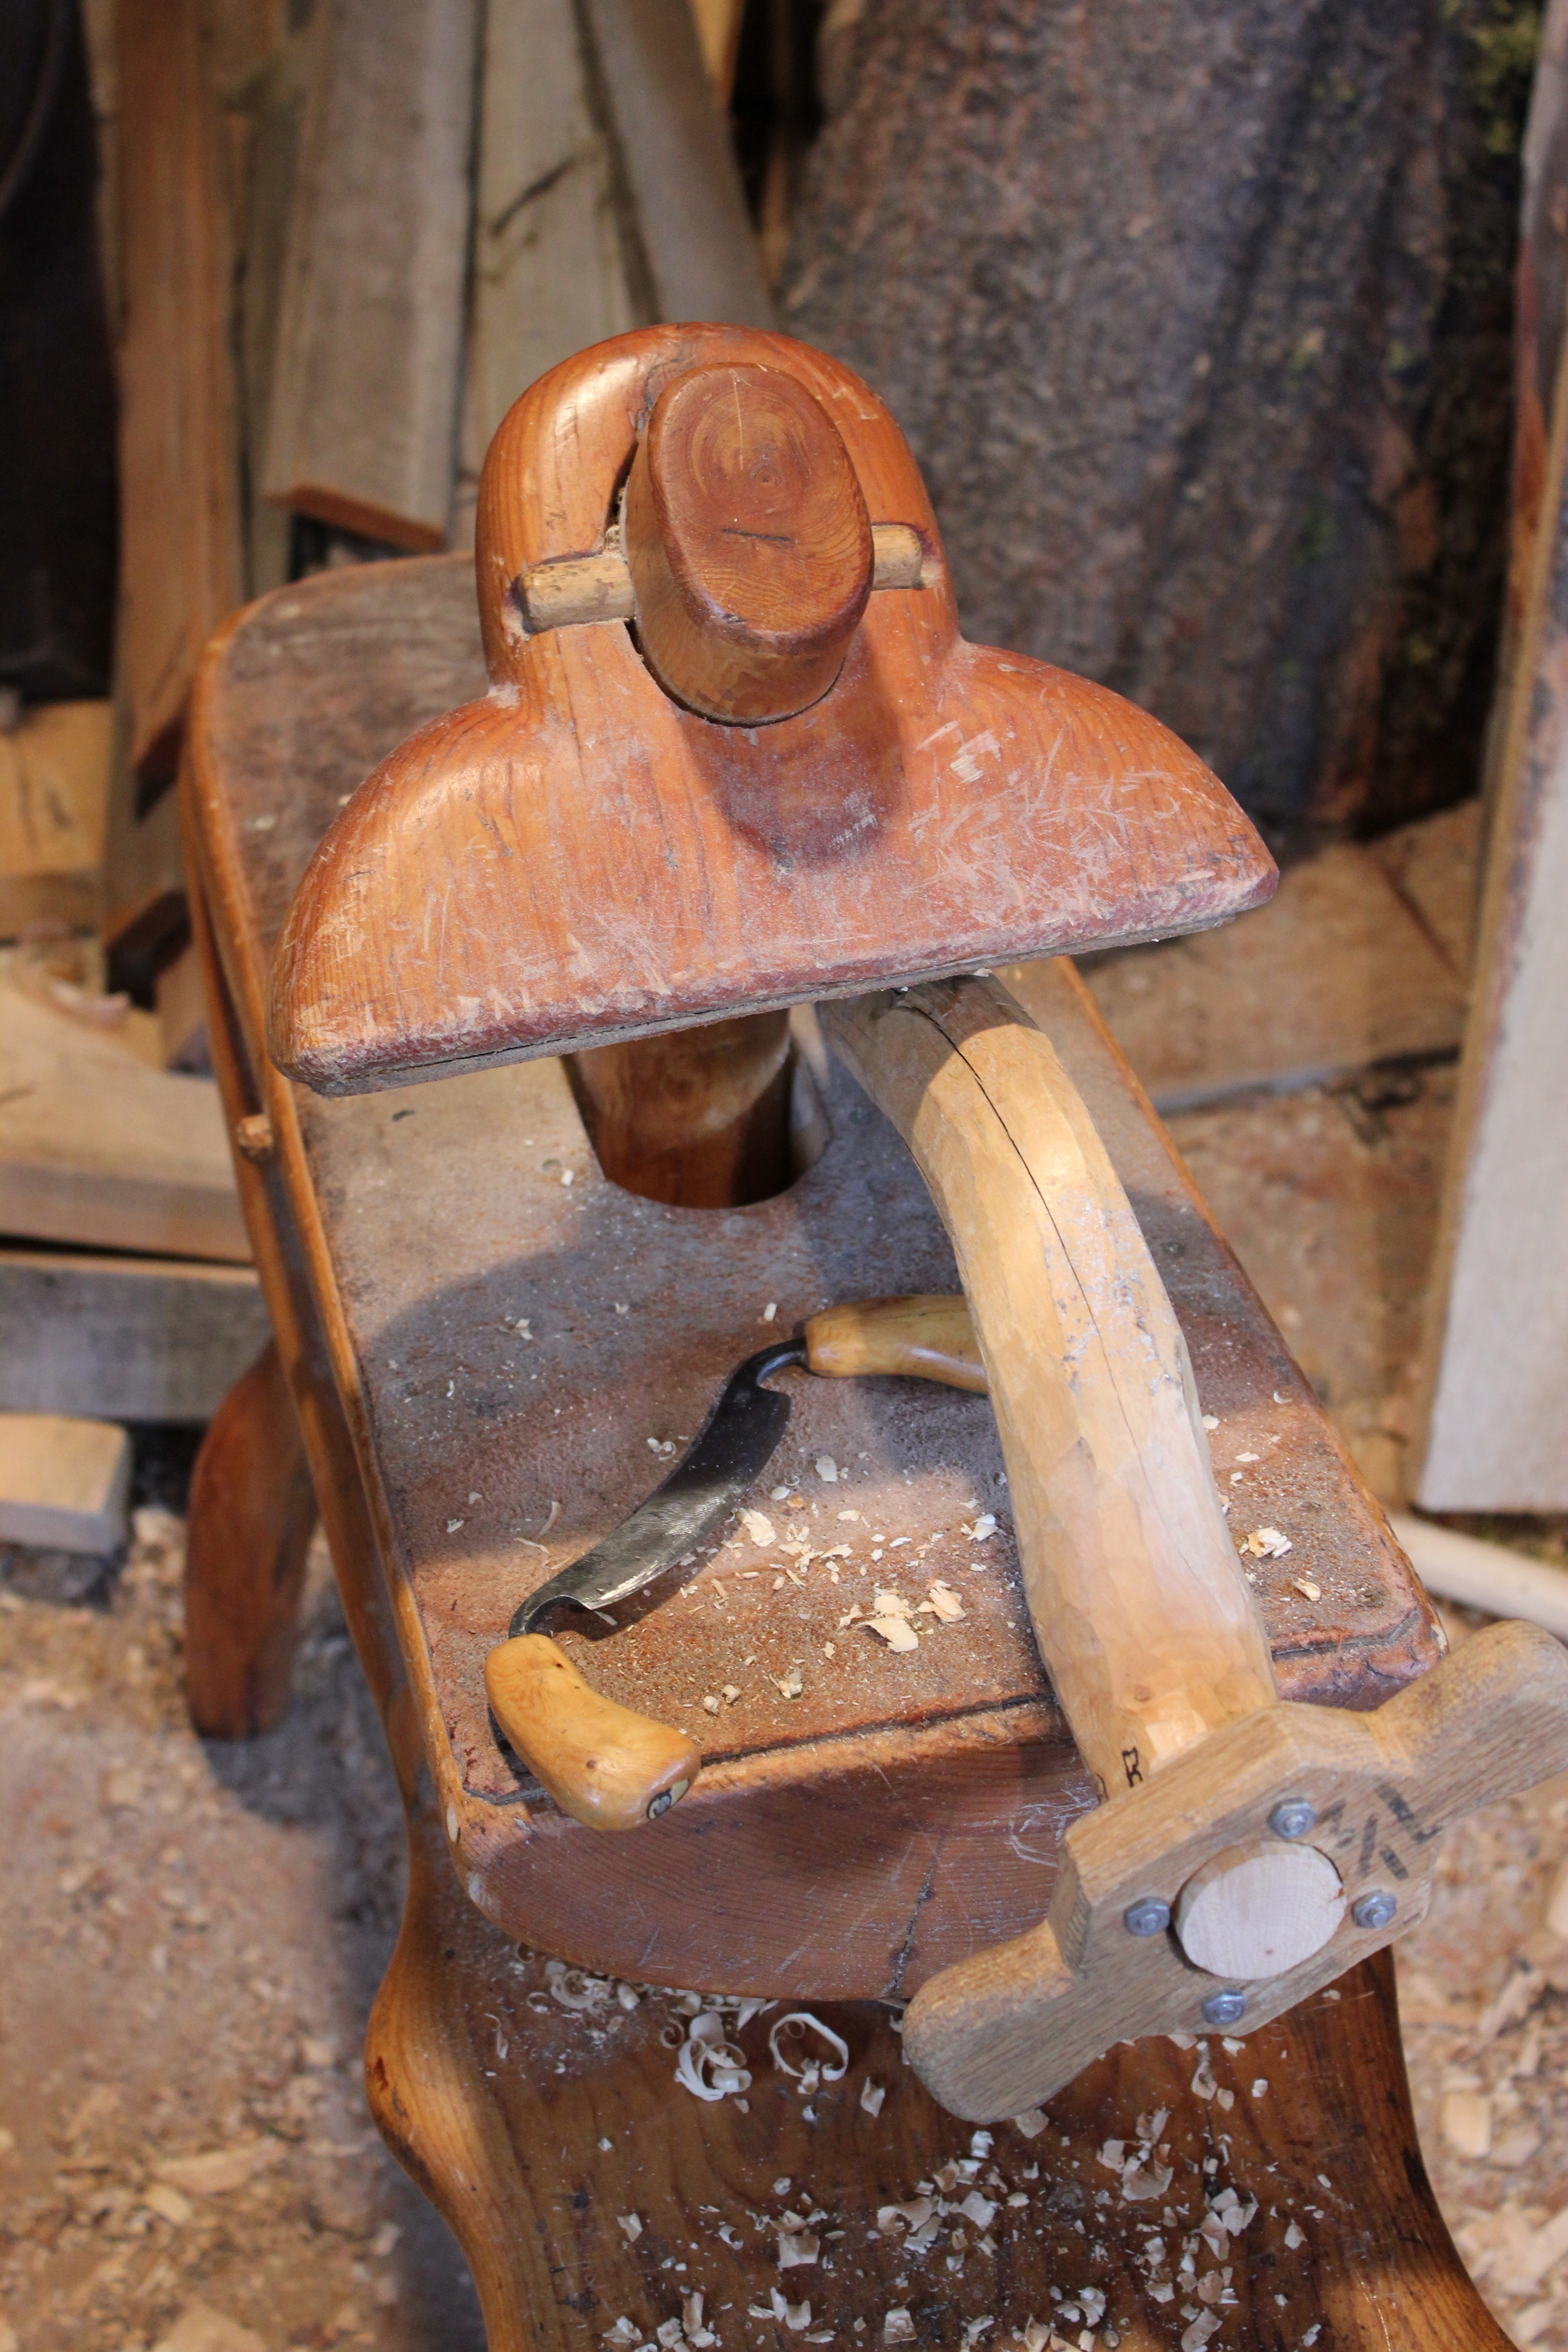
Here’s a piece clamped in the shaving horse, with the sizing jig and hand-forged drawknife in use.
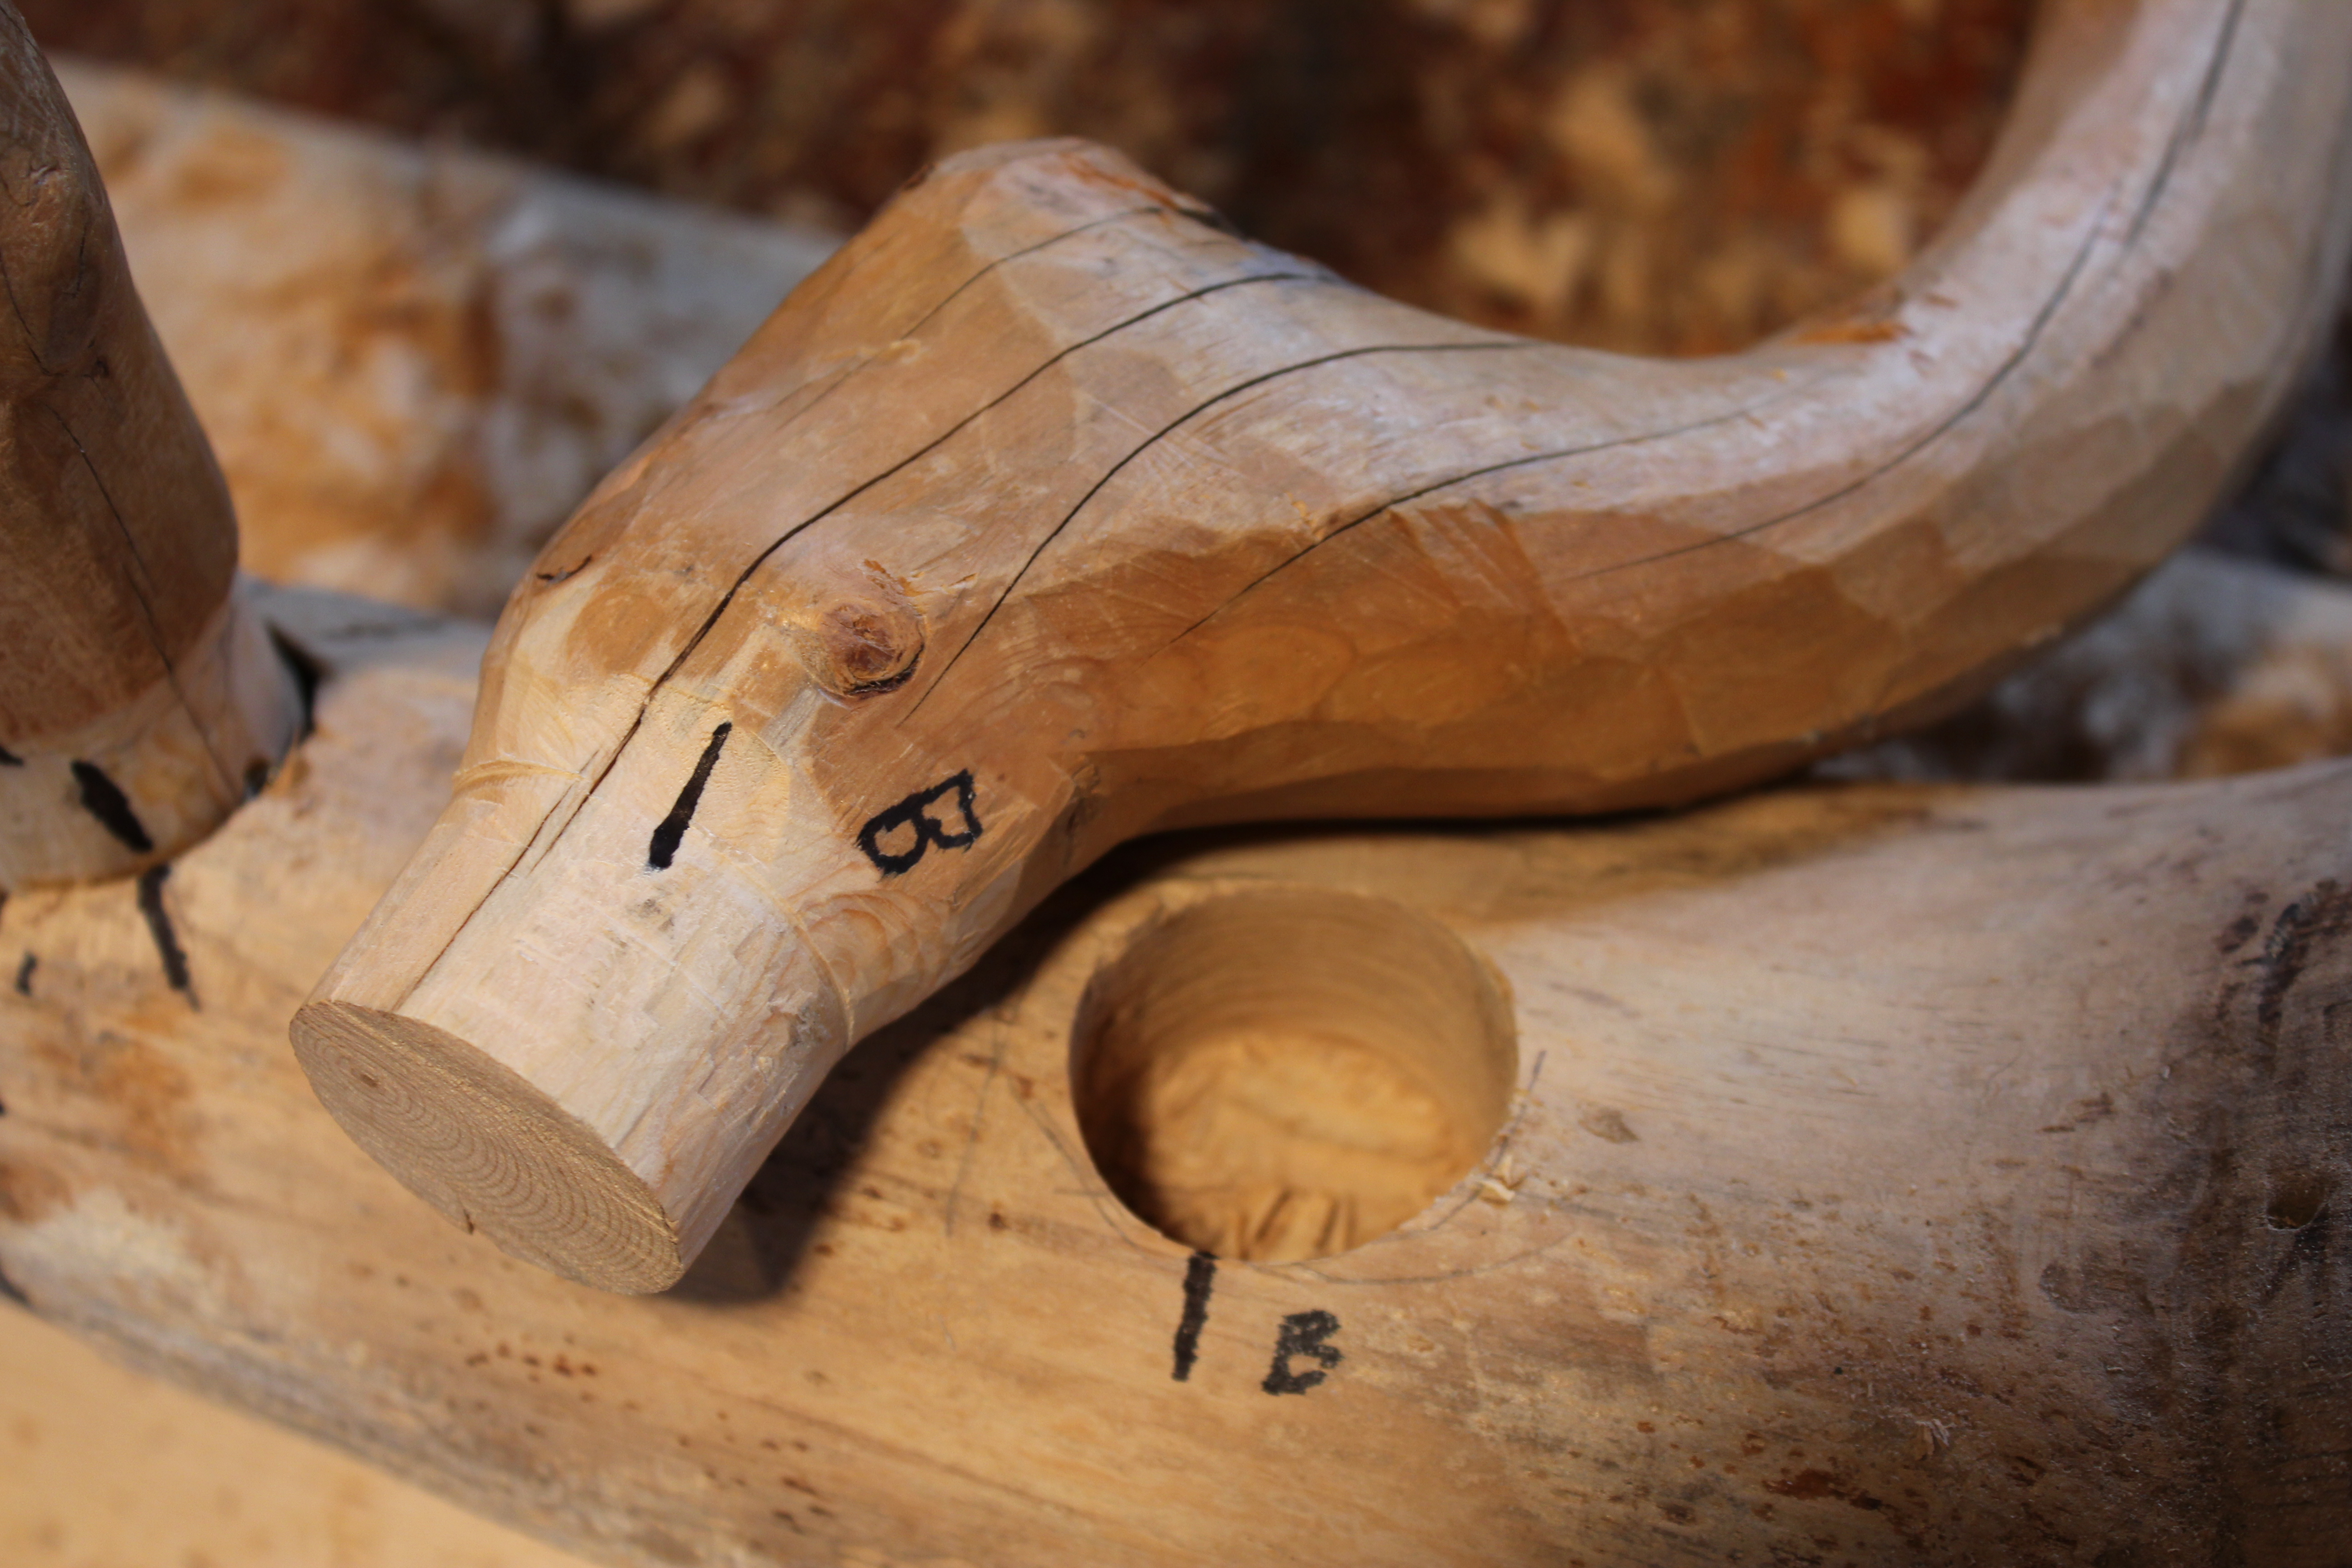
The swan neck is clamped in place and both the placement of the mortise and the shoulder of the tenon are marked.

I’m using a long straight edge just to get an approximate location and length of the paired swan necks.

This round mortise is on the underside. Also visible is the dowel that goes up into the end of the arch on top. I always use numbers, letters, arrows, etc. for replacement after repeated fittings.
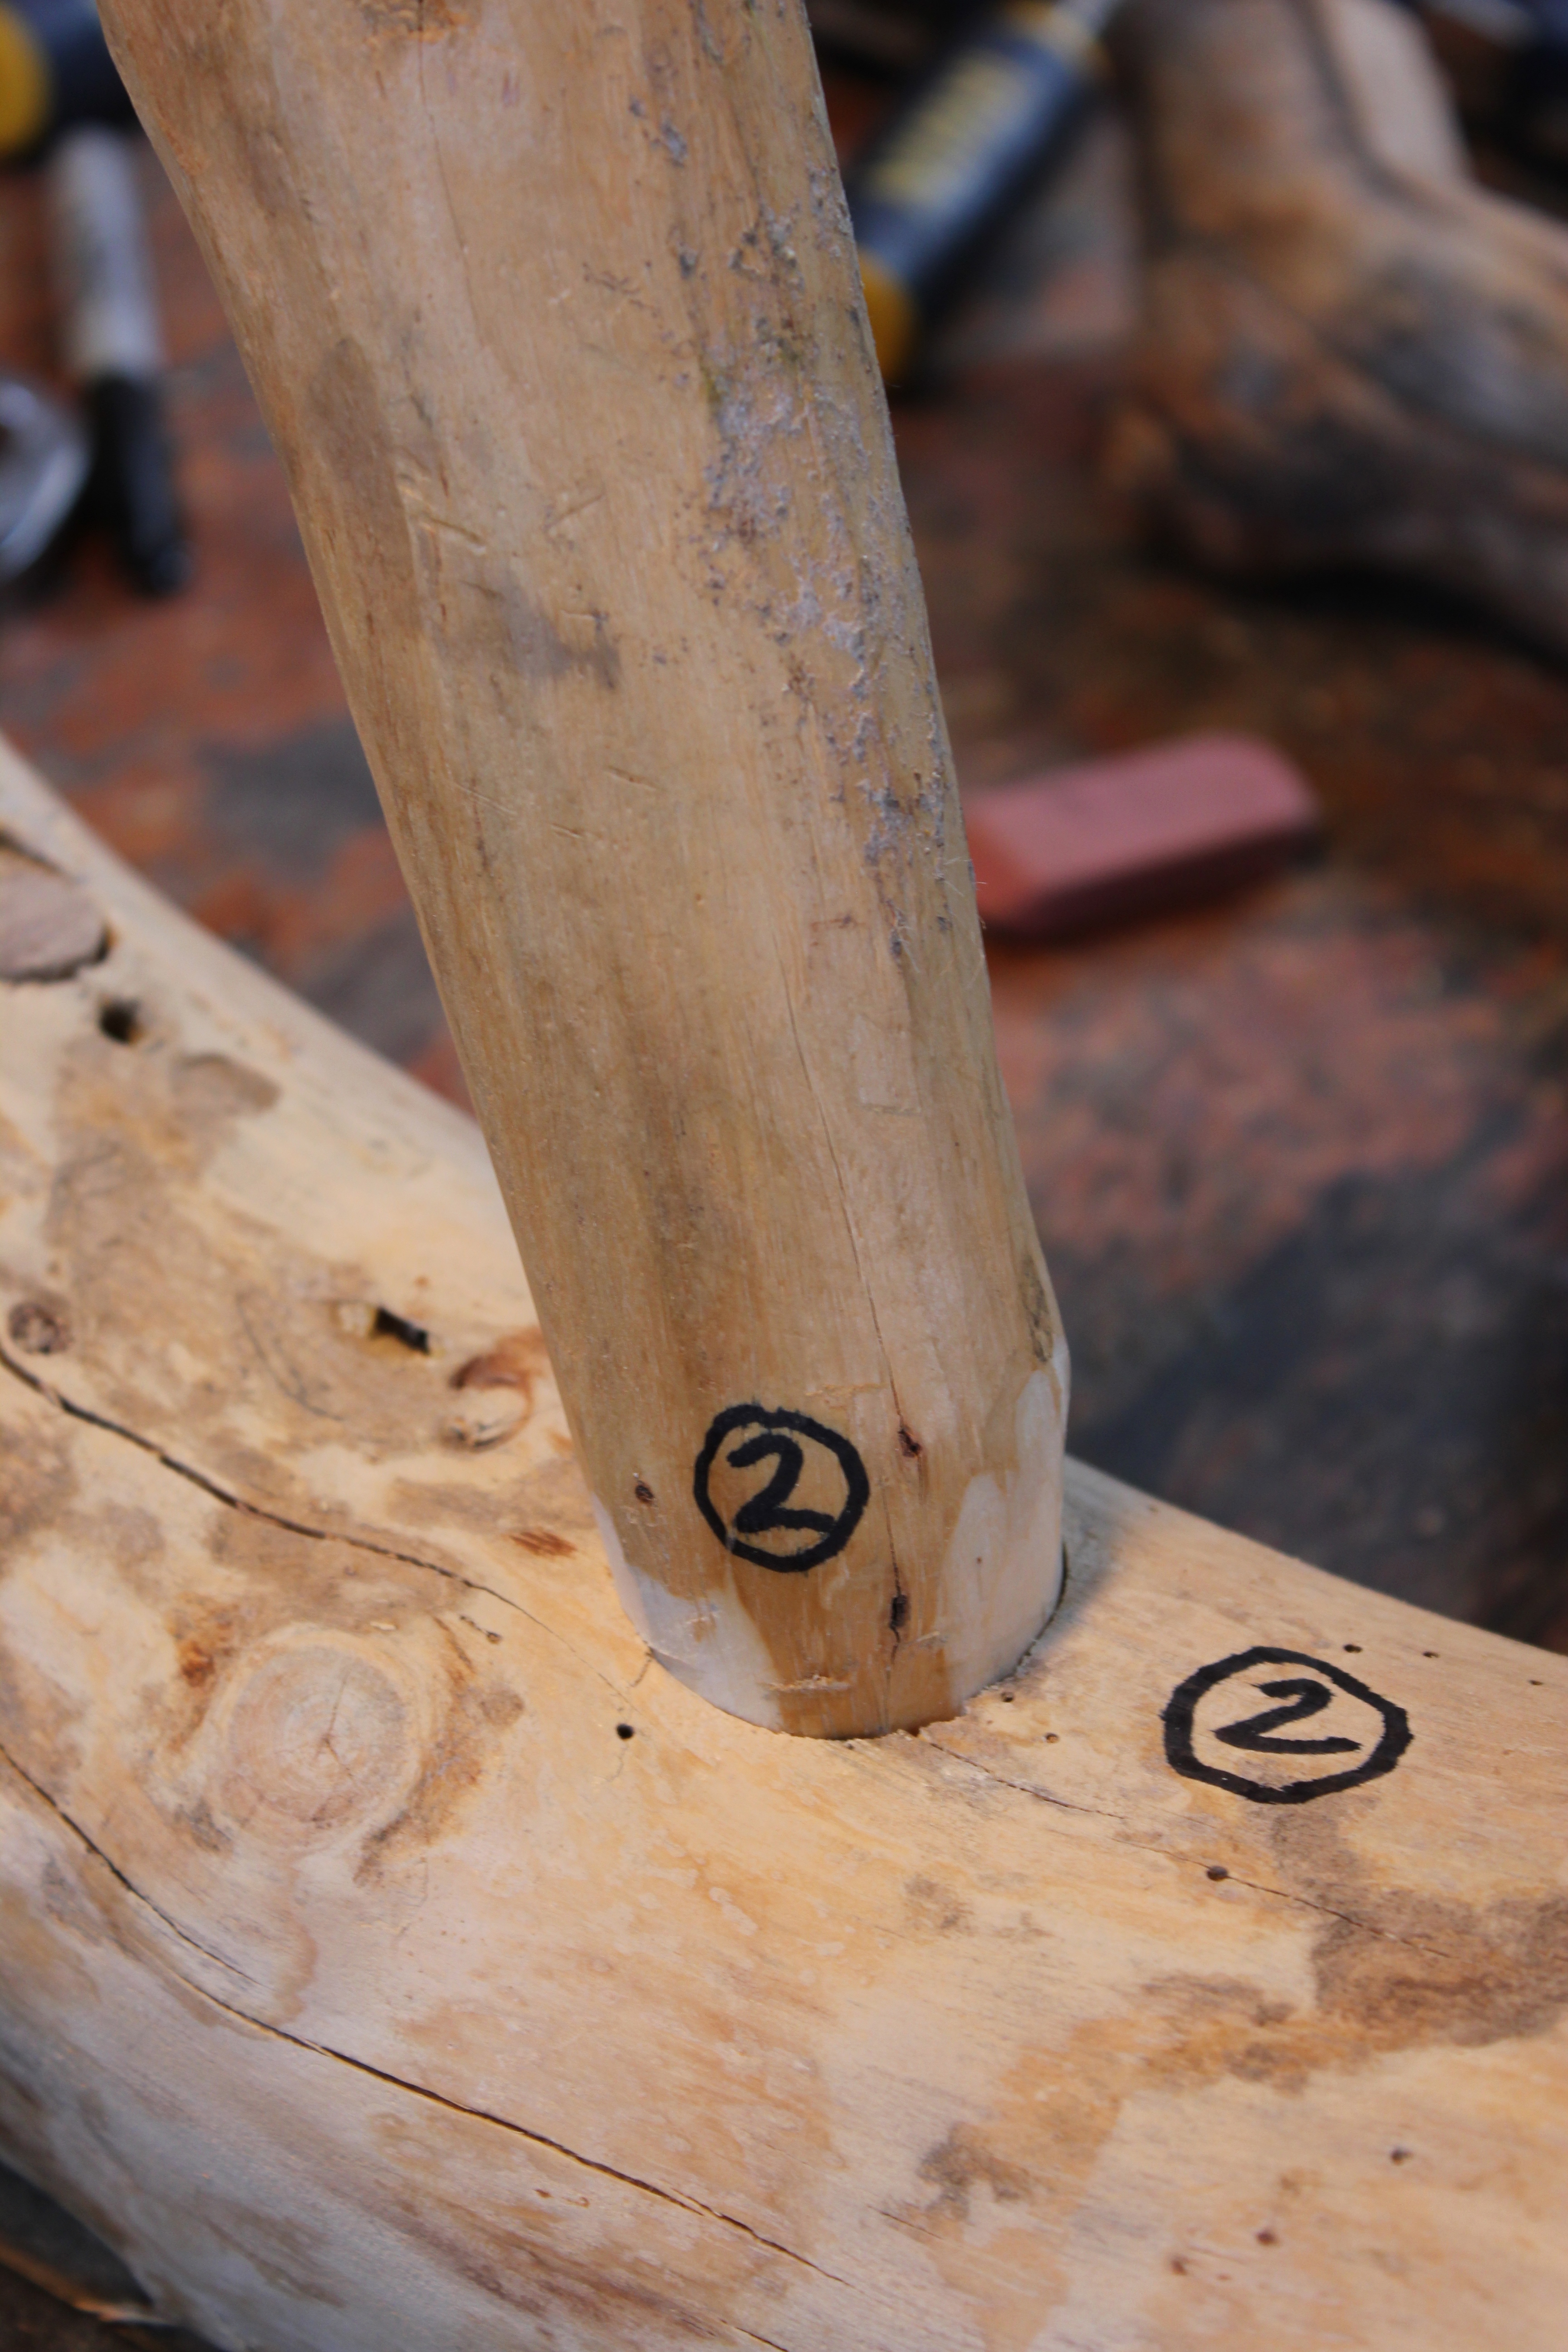
Here’s #2 mortise and tenon in place. The joint is drawn tight by a concealed wood screw entering from the other side.

The slab is placed here just to check the length of the four swan necks. It seems to work, so it’s time to put the slab in the shaving horse.